MeUp - Listing Marketplace Event WordPress Theme
- created: 09/26/2019
- latest update: 12/10/2019
- by: ovatheme
- themeforest.net/user/ovatheme/portfolio
- email: ovatheme@gmail.com
Overview
We would like to thank you for purchasing our theme! We are very pleased you have chosen our theme for your website, you will not be disappointed! Before you get started, please be sure to always check out these documentation files. We outline all kinds of good information, and provide you with all the details you need to use our theme.
Wordpress Information
WordPress Information
To install this theme you must have a working version of WordPress already installed.
To install this theme you must have a working version of WordPress already installed. If you need help installing WordPress, follow the instructions in WordPress Codex or you can watch the Instructional Video. Below are all the useful links for WordPress information.
• WordPress Codex – general info about WordPress and how to install on your server
• Instructional Video – How To install wordpress
• First Steps With WordPress – general information that covers a wide variety of topics
• FAQ New To WordPress – the most popular FAQ’s regarding WordPress
• WP101 Basix Training videos – some great videos from WPTuts on WordPress
Requirements For Our Theme
- To use theme, you must be running WordPress 5.x, PHP 7.x or higher, and mysql 5 or higher. Follow below checklist to ensure your host can work well with theme:
+ Your web host has the minimum requirements to run WordPress.
+ They are running the latest version of WordPress.
+ You can download the latest release of WordPress from official WordPress website.
+ You did create best secure passwords FTP and Database.
Some settings for Server/Hosting
max_execution_time = 180
max_input_time = 600
post_max_size = 128M
upload_max_filesize = 60M
Host supports: allow_url_fopen: true
Support
The our team are always happy to help you with any questions or recommendations you have about the our theme.
If you need any help or support please contact us through Forum: https://ovatheme.ticksy.com/
Find purchase code:
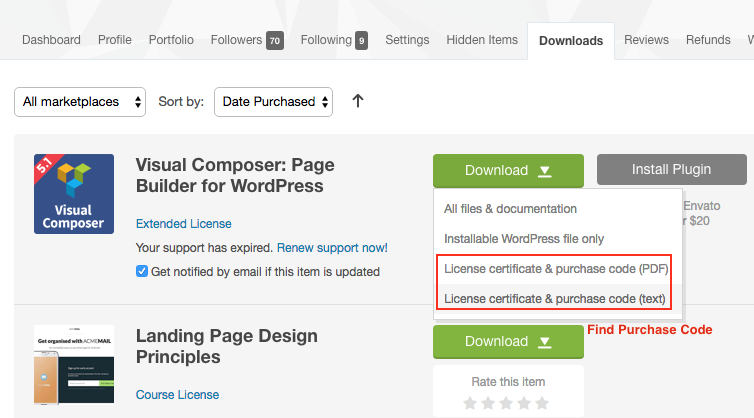
Then open file and find "Item Purchase Code" like
Item Purchase Code: cdf581e0-ed42-41a2-ab3f-26343434fb9c874
Install Theme
Step 1: Download Theme Package From Themeforest
Step 2: Install Theme / Plugins
Download Theme Package
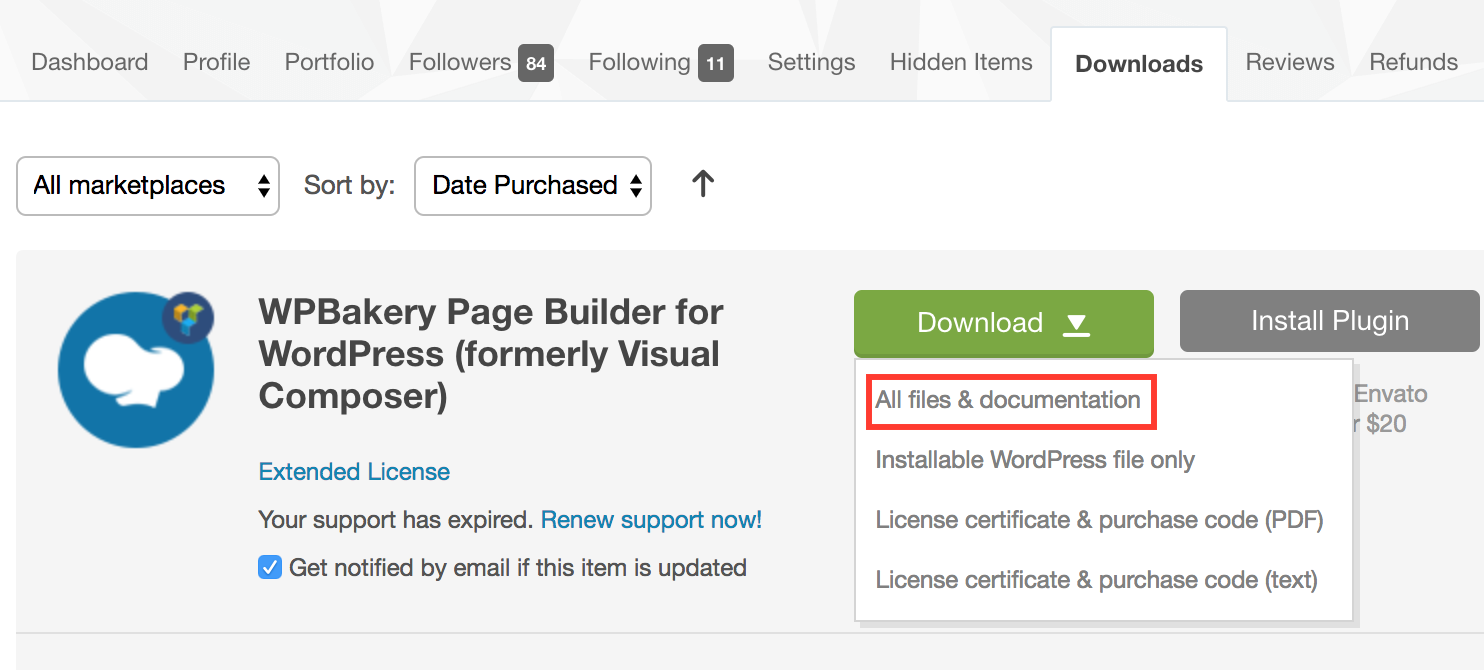
After purchasing our theme from Themeforest, you will need to download theme package for your use. To download the package, please login to your Themeforest account, navigate to “Downloads”, click the “Download” button in the left of the theme, choose “All files & documentation” to download our theme package to your computer. The theme package includes:
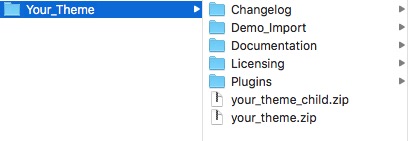
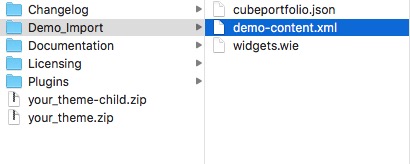
You have to UNZIP PACKAGE, you will see all folders, files in package:
Theme File: Includes your_theme.zip file that consists of everything you need to install the theme.
Child Theme File: Includes your_theme-child.zip file
Demo Import Folder: Includes .xml, .wie, .json file for import content, cubeportoflio, widget
APP Folter: Include .apk file and code for developer. Use React-Native for make APP
Plugins Folder: Include all local plugins use in theme
Changelog file: Include readme.txt. Read to know changes in all version.
Documentation Folder: Includes Documentation file that helps you get to know about theme and guides you to build your site with our theme.
Licensing Folder: Includes the licensing files of Themeforest purchase.
Install Theme / Plugins
This is example for install your theme, mean your_theme.zip is meup.zip, your_theme-child.zip is meup-child.zip
Step 1 : From Admin Menu click Appearence >> Themes >> Add New
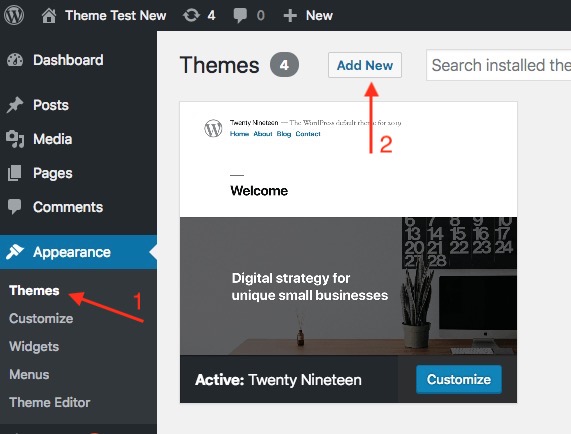
Step 2: Install Parent Theme your_theme.zip
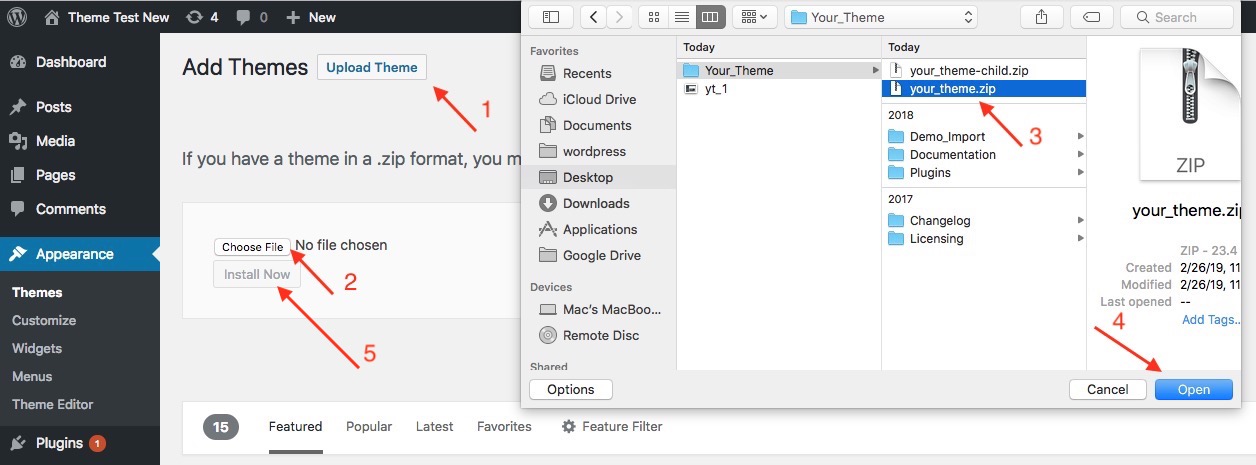
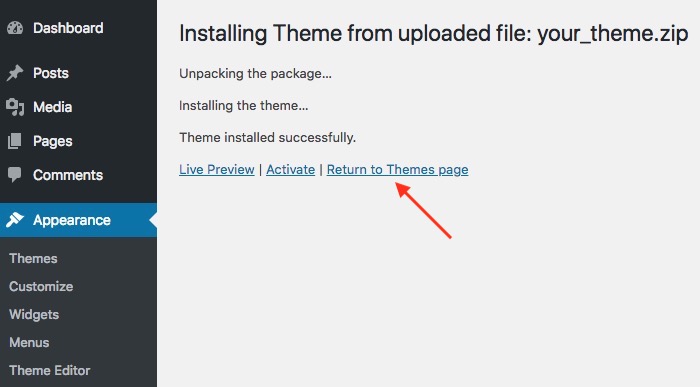
Then upload Parent theme, Return To Themes Page to install Child Theme
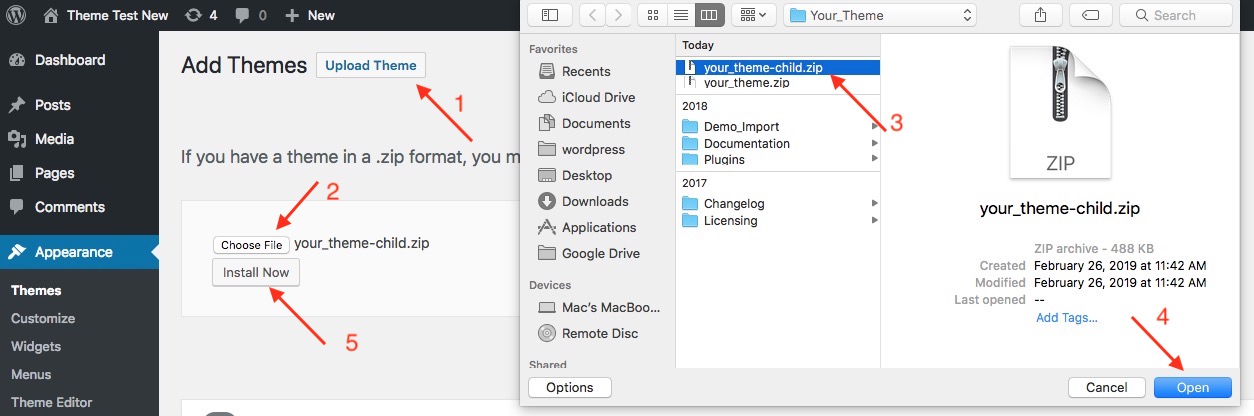
Step 3: Install Child Theme your_theme-child.zip like install Parent theme
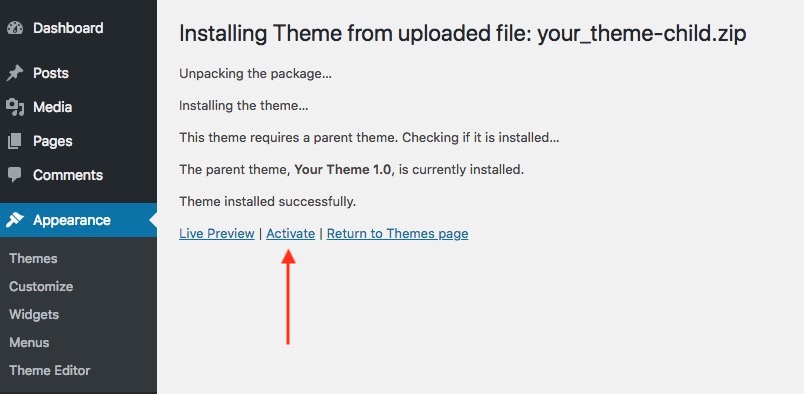
Step 4: Active Child Theme
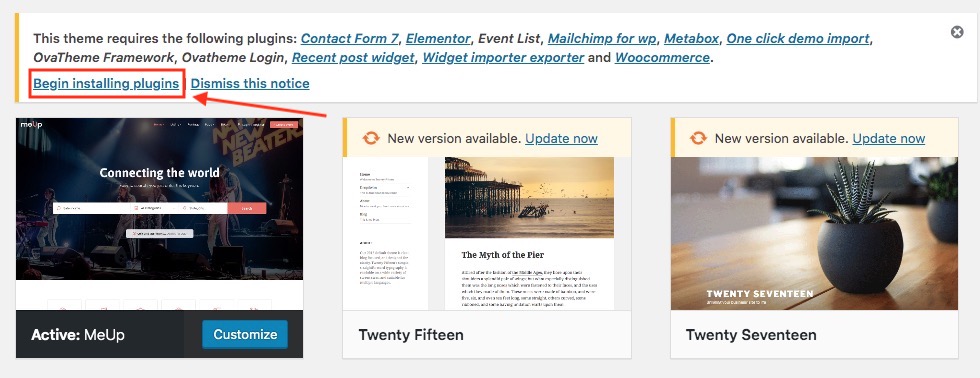
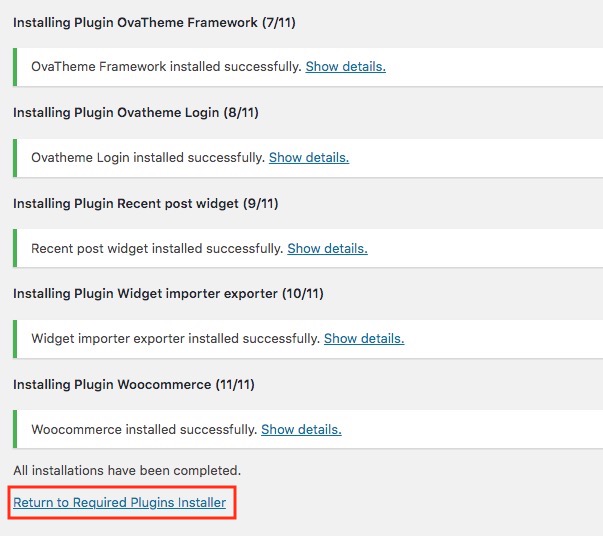
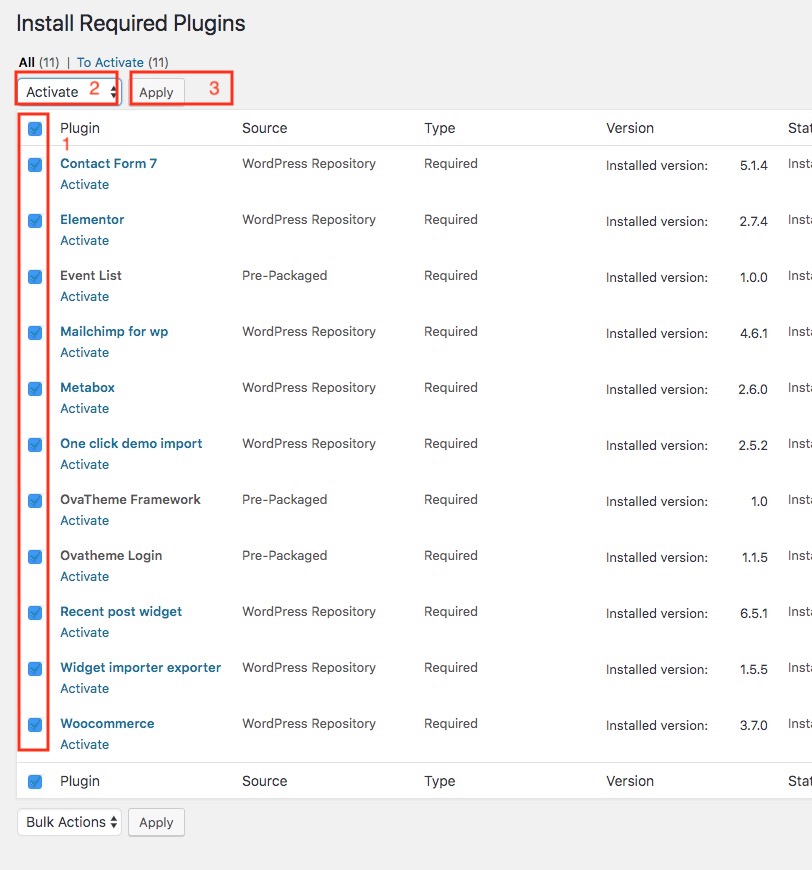
Step 5: Install and Active Plugins

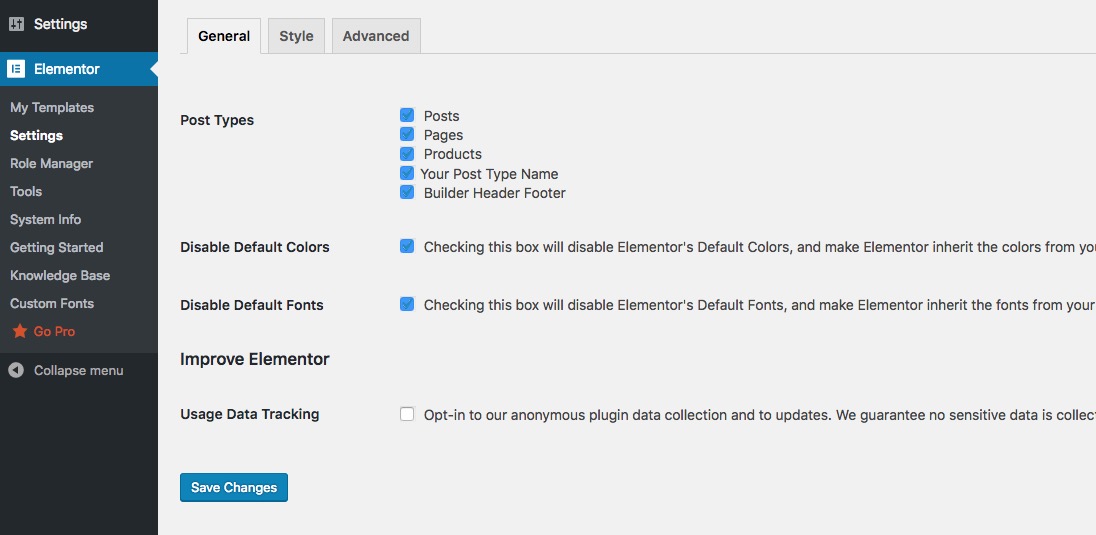
Step 6: Config Elementor: Go to Elementor >> Settings >> General
Step 7: Save Event Settings: Events. >> Settings
- Choose some global page
- Enable Package
- Choose Payment Gateway
Import Demo Data
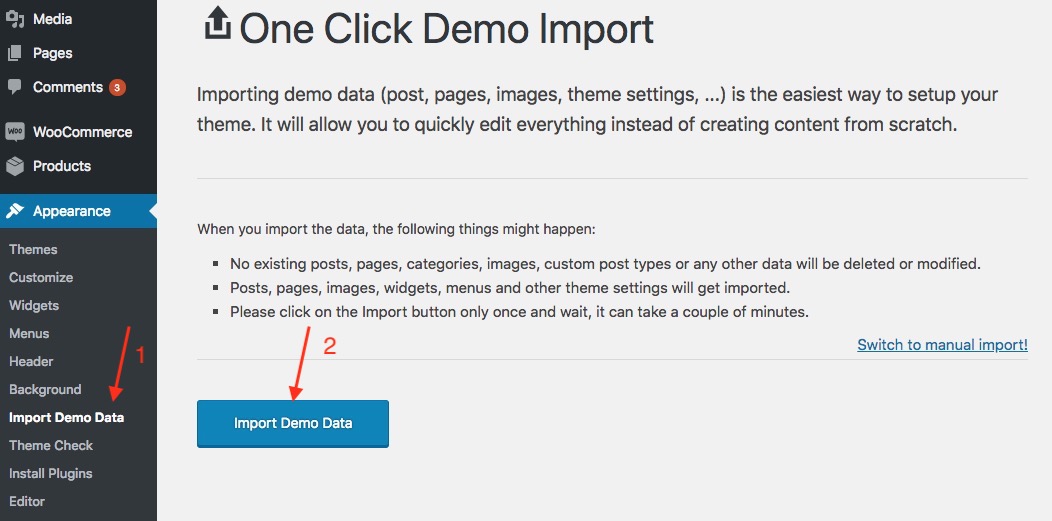
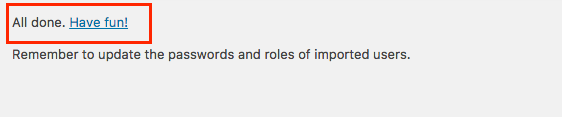
1: Auto Import Demo Data
- Go to Appearance >> Import Demo Data >> Wait some minutes and go to frontend to enjoy your results "
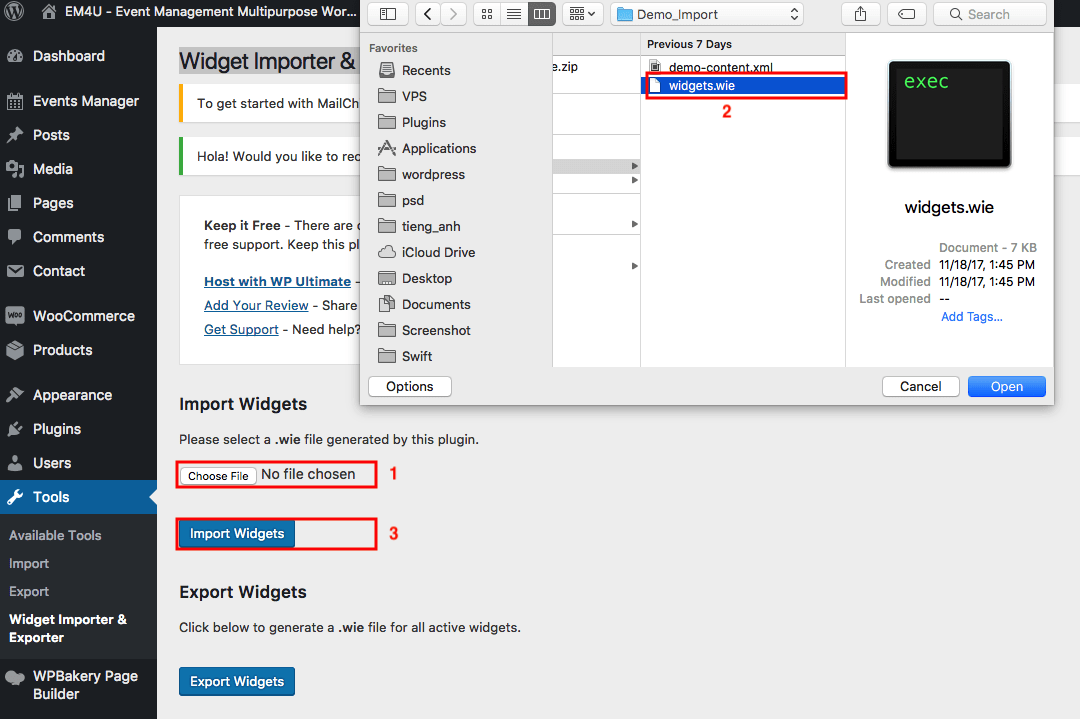
2: Manual Import Demo Data
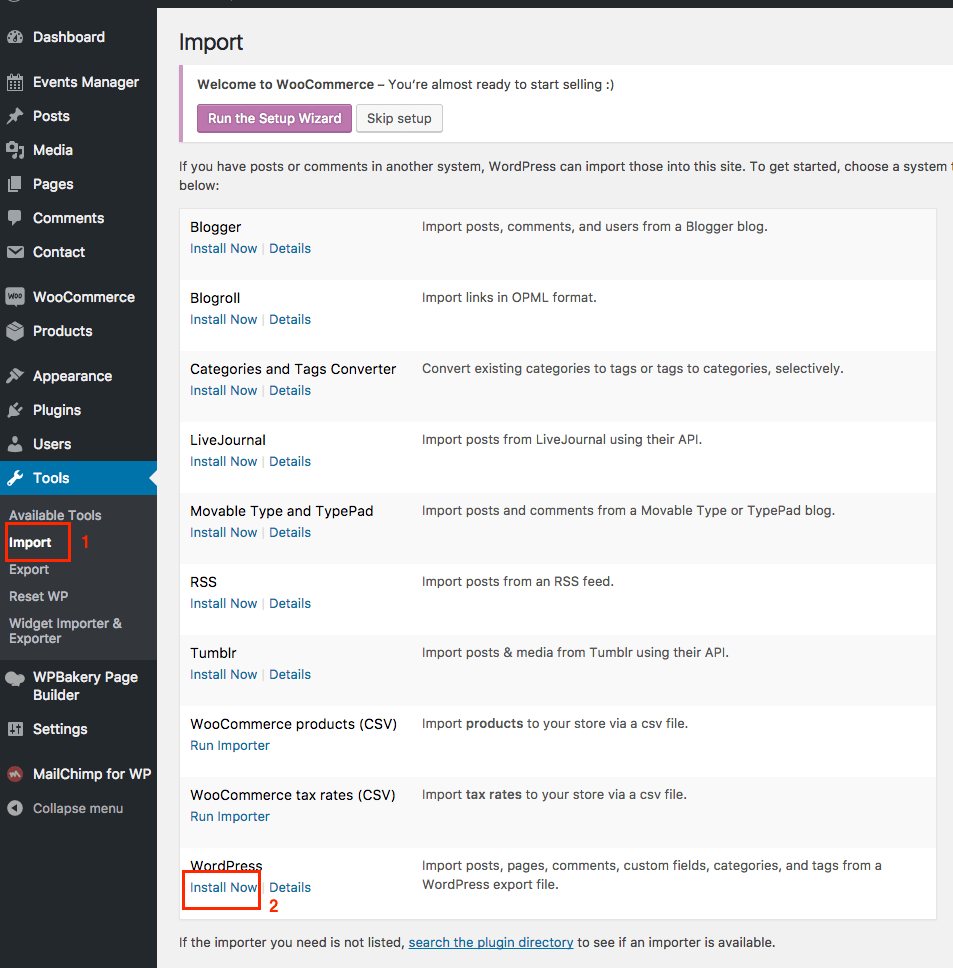
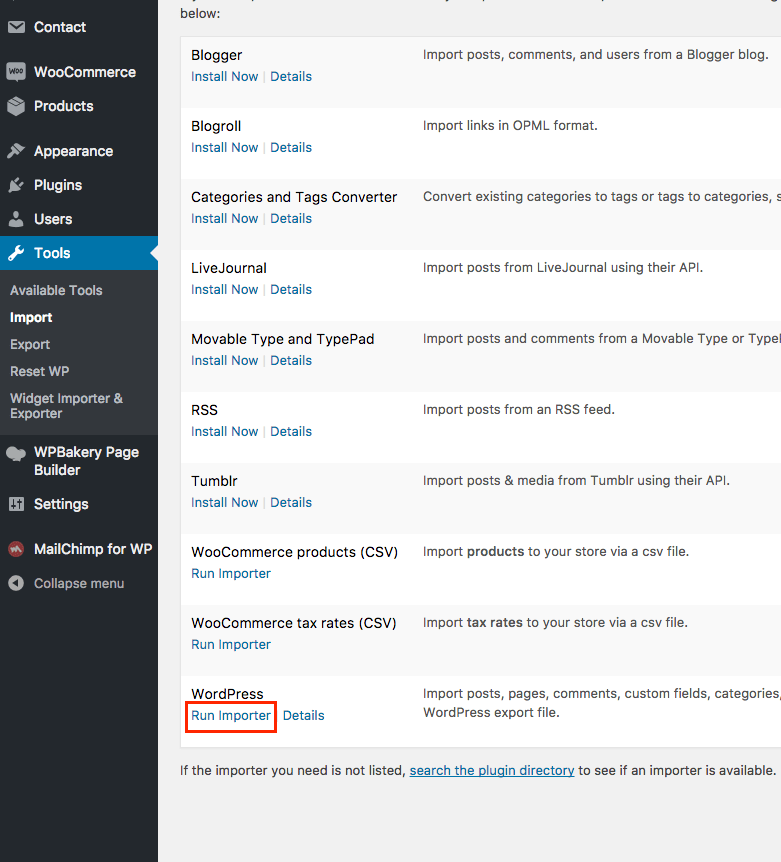
Step 1: From Admin Menu click Tool >> Import >> Install Now

Import widget data: Tool >> Widget Importer & Exporter
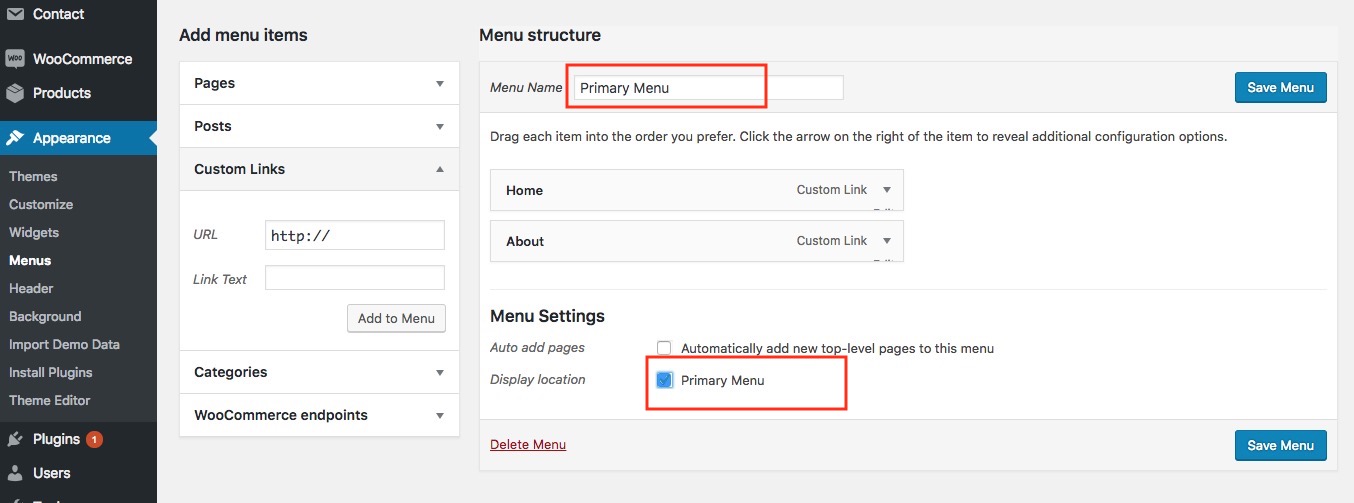
Step 2: Config Menu
From Admin Menu click Appearance >> Menus
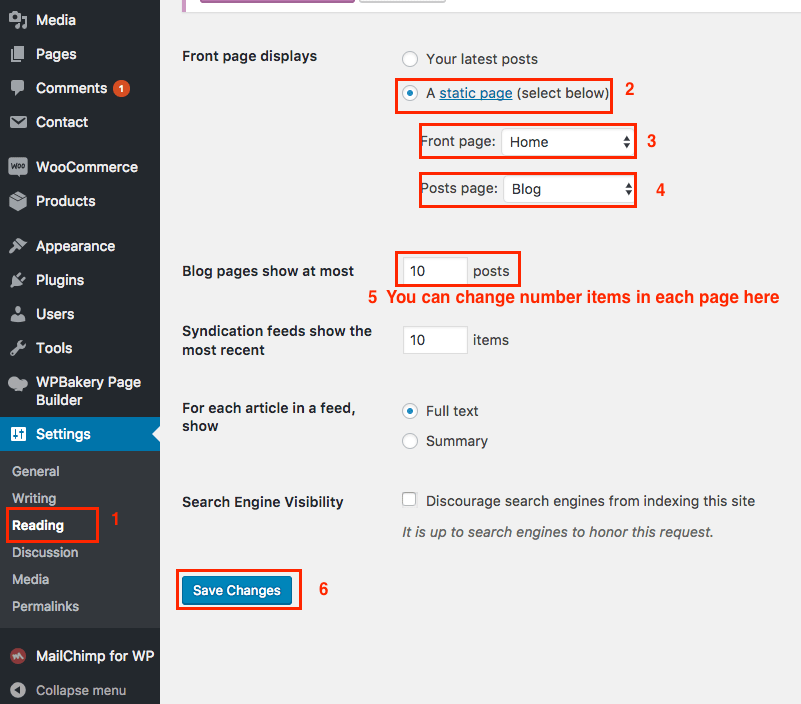
Step 3: Choose Home Page and Blog Page
From Admin Menu click Seetings >> Reading
Step 4: Go to frontend to enjoy your results !
Update Theme/Plugins
Use FTP client software (FileZilla, SmartFTP, CuteFTP, etc...) to upload theme or plugins to your server.
Step 1: Download again theme
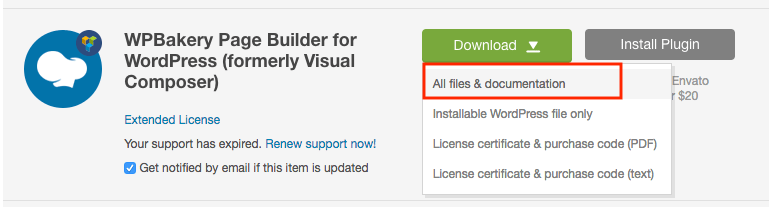
a, Re-download theme package from https://themeforest.net/downloads
b, Click "All files & documentation" link like bellow image:
c, Extract the package ( .ZIP file ), you will see folders and files like
d, Open file: Changelog/readme.txt to know plugins, file changed.
Step 2: Update theme
Unzip your_theme.zip then upload and override your_theme folder to wp-content/themes/ folder in your server
Step 3: Update Plugins
You will see latest plugins in Plugins Folder, unzip .ZIP file then upload and override to wp-content/plugins/ folder in your server
Customize Option Theme
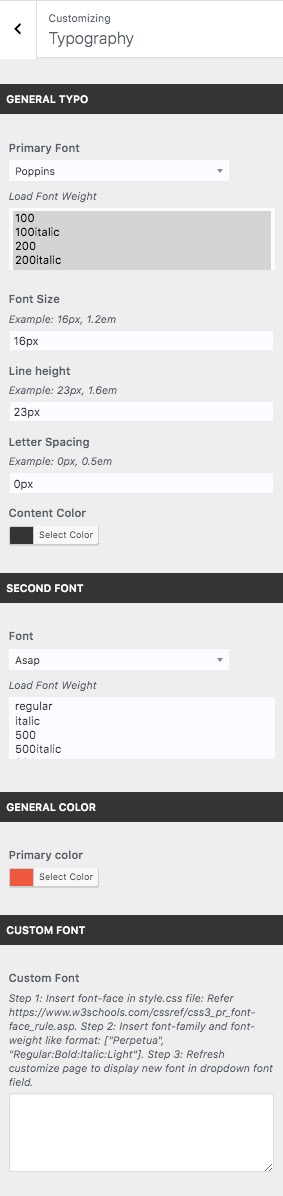
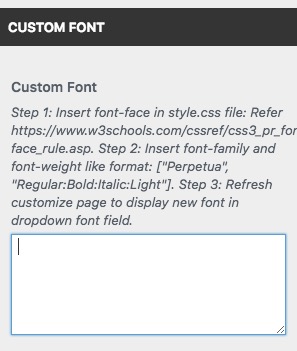
Typography
Appearance >> Customize >> Typography
You can choose Google Font or Add your font by using Cutom Font Field.
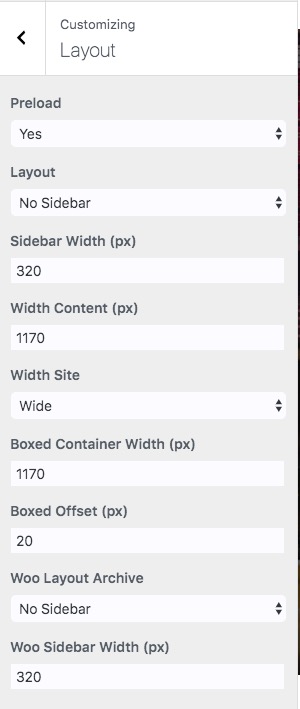
Layout Global
Appearance >> Customize >> Layout
Header Global
Appearance >> Customize >> Header
You can choose Header Version for Global Page. This is overwritten when when you choose other Header Version in individual Post/Page/Custom Post/

You can customize per Header Version in "Build Header Footer" Menu. You can check here: Header Elementor
Footer Global
Appearance >> Customize >> Footer
You can choose Footer Version for Global Page. This is overwritten when when you choose other Footer Version in individual Post/Page/Custom Post/

You can customize per Footer Version in "Build Header Footer" Menu. You can check here: Footer Elementor
Blog Archive
Appearance >> Customize >> Blog >> Archive

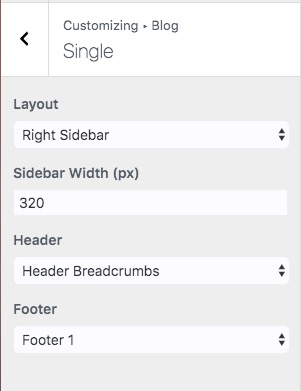
Blog Detail
Appearance >> Customize >> Blog >> Single
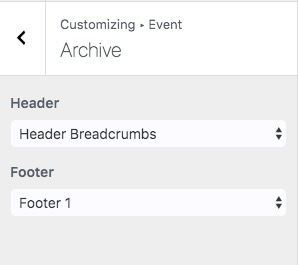
Event Archive
Appearance >> Customize >> Event >> Archive
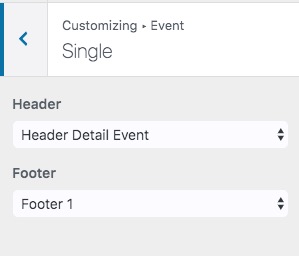
Event Detail
Appearance >> Customize >> Event >> Single
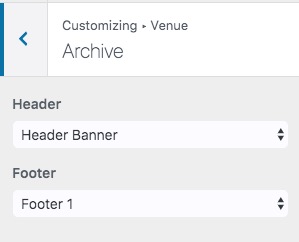
Venue Archive
Appearance >> Customize >> Venue >> Archive
Venue Detail
Appearance >> Customize >> Venue >> Detail

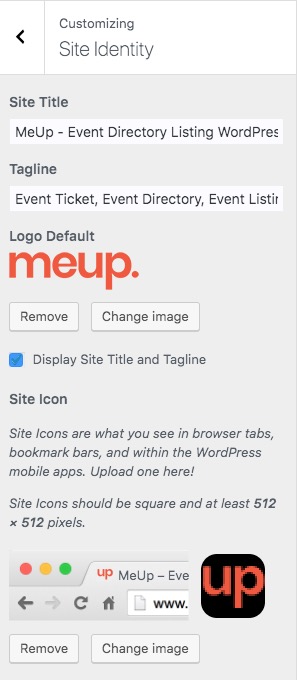
Site Identity
Appearance >> Customize >> Site Identity
Add/Update Header
This is example for Add/Update Header
Update Header
+ in Page/Post/Custom Post Type: Open a page and choose header to edit
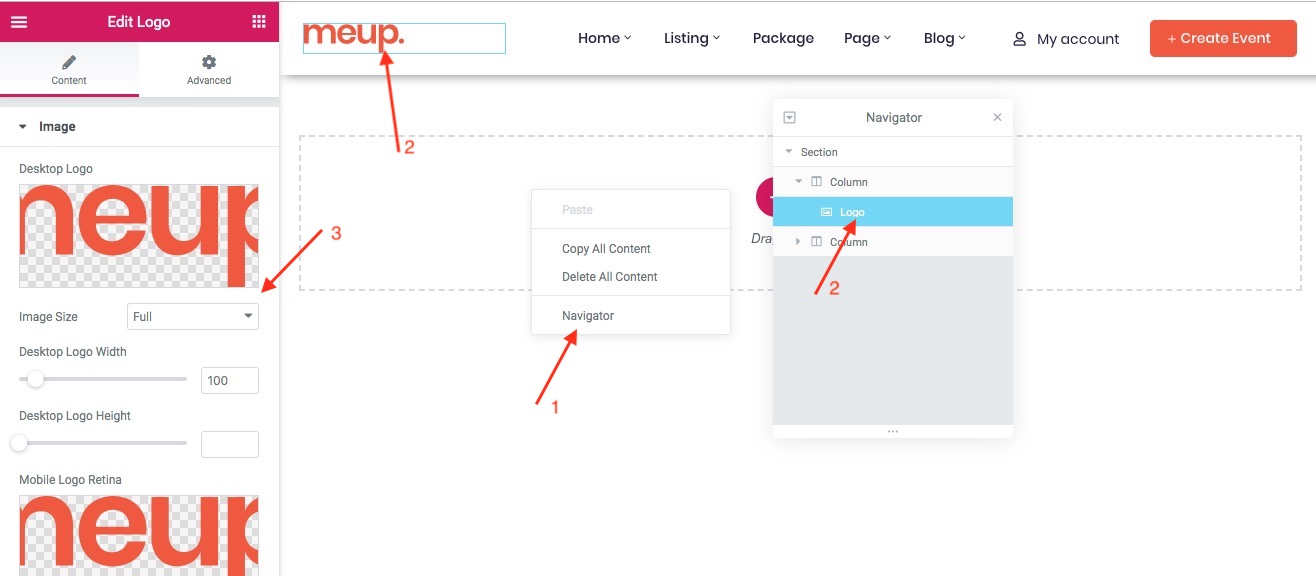
+ Edit Header
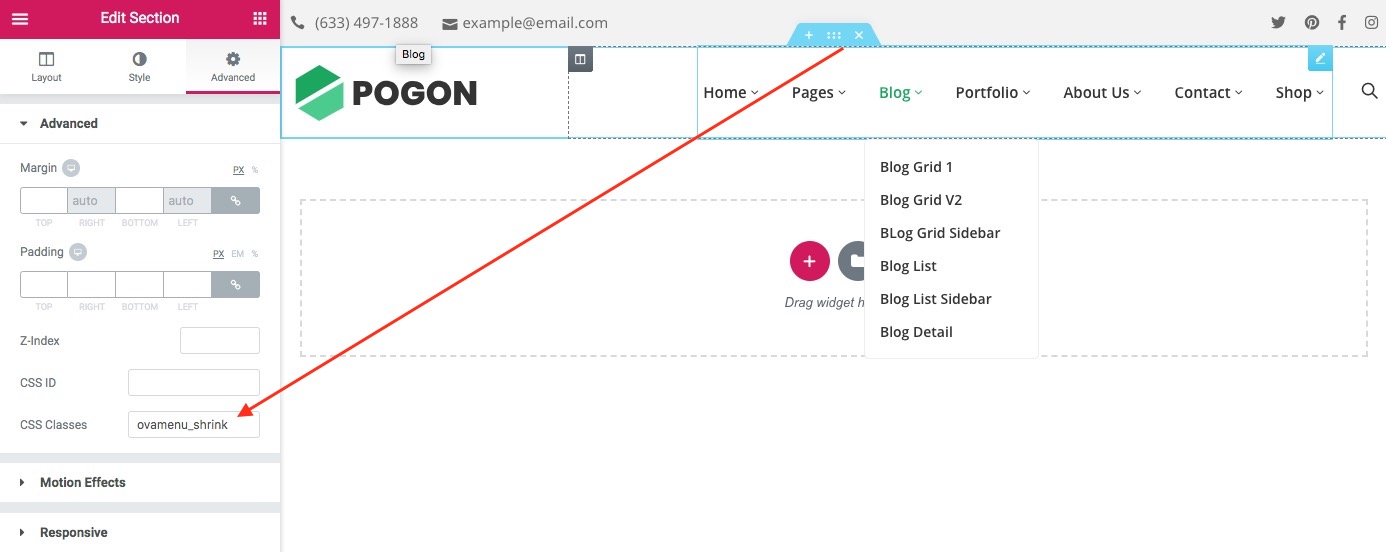
How to know Header display in Desktop , Ipad, Mobile ?
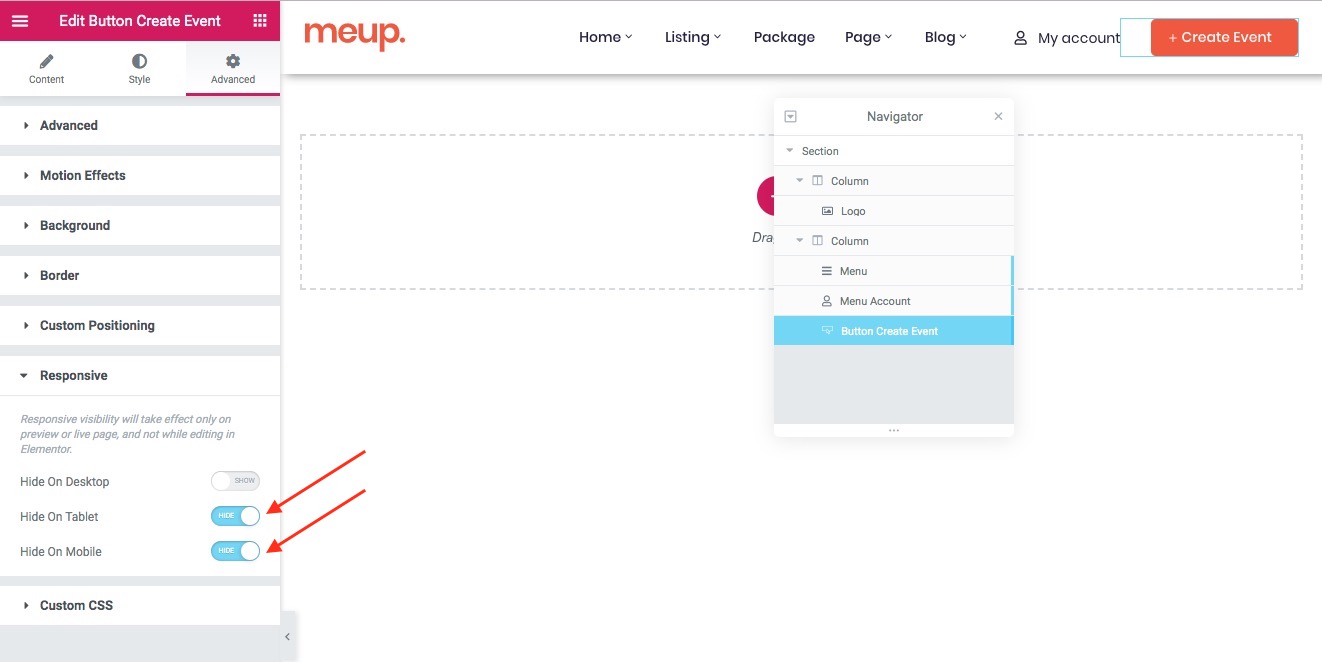
How to make Fixed Header When Scroll Page ?
Add class: ovamenu_shrink (for desktop), ovamenu_shrink_mobile (for Ipad, Mobile)
For Menu Background when scroll page, add class: bg_dark, bg_white
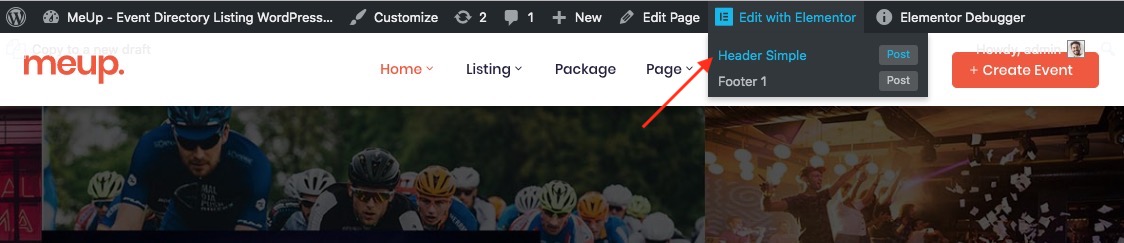
Add New Header
+ From Left Panel click Builder Header Footer >> Add New Elementor

+ Click Edit with Elementor button to add Logo, Menu, Text, Phone..... to your header. You can drag any elemntor to header.
Choose Header Version for Post/Page
+ Choose Header Version for a Page in General Settings

Elementor Setup
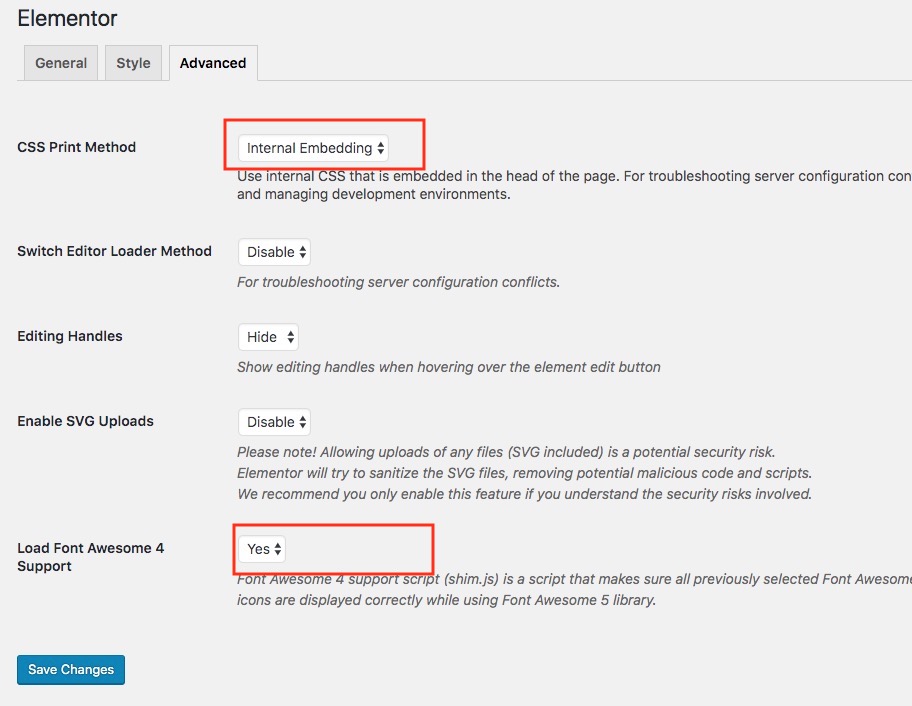
- Config Elementor: Go to Elementor >> Settings >> General
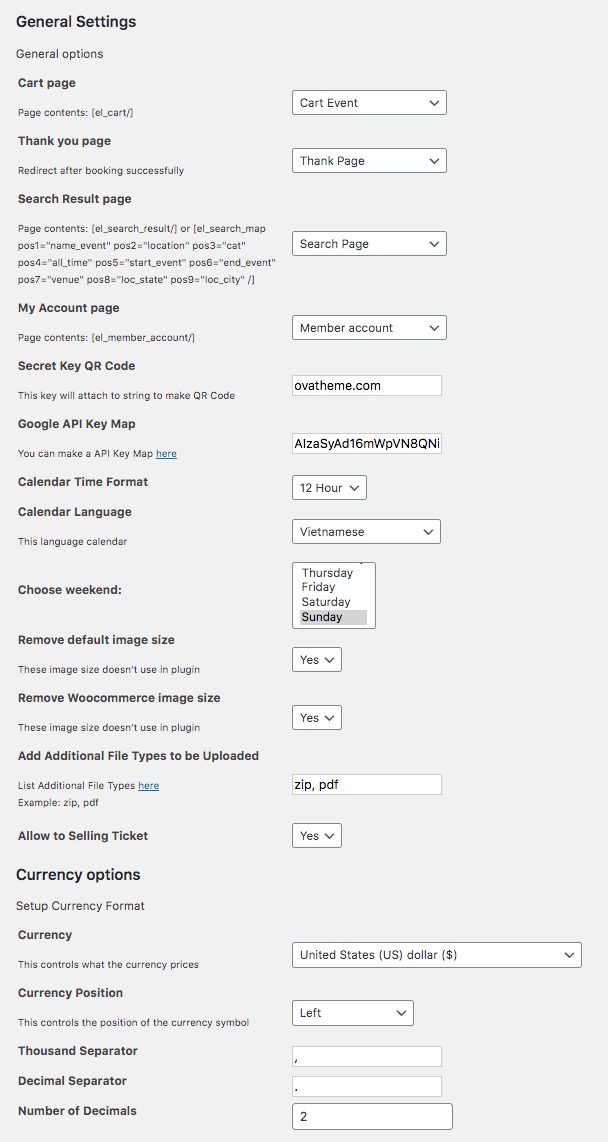
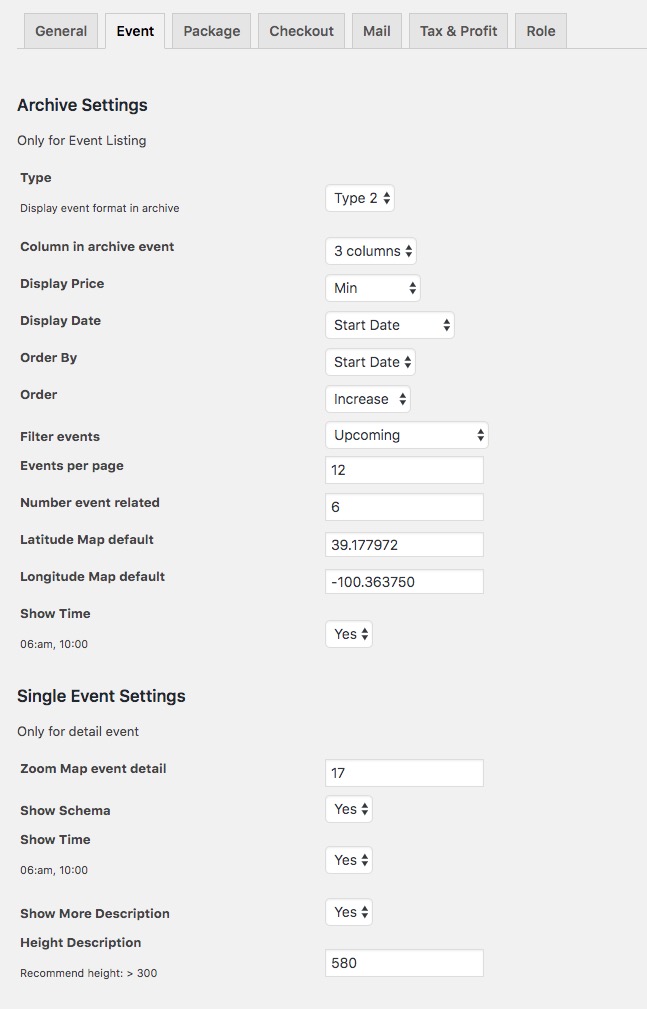
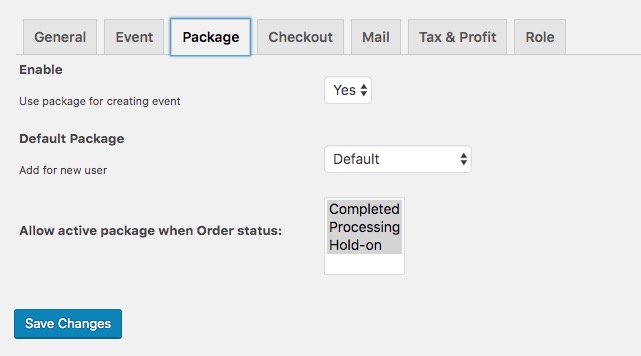
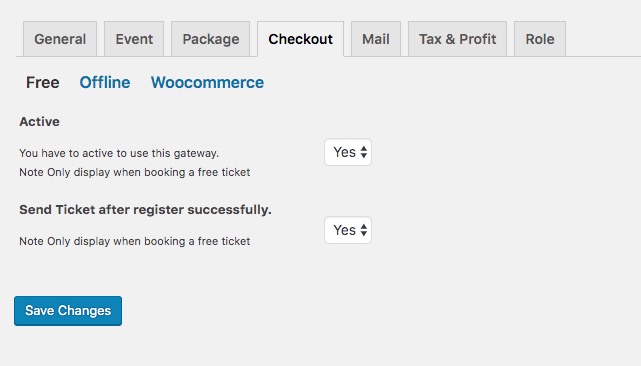
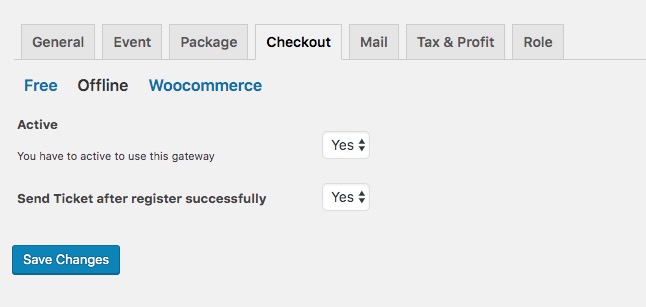
EventList Setting
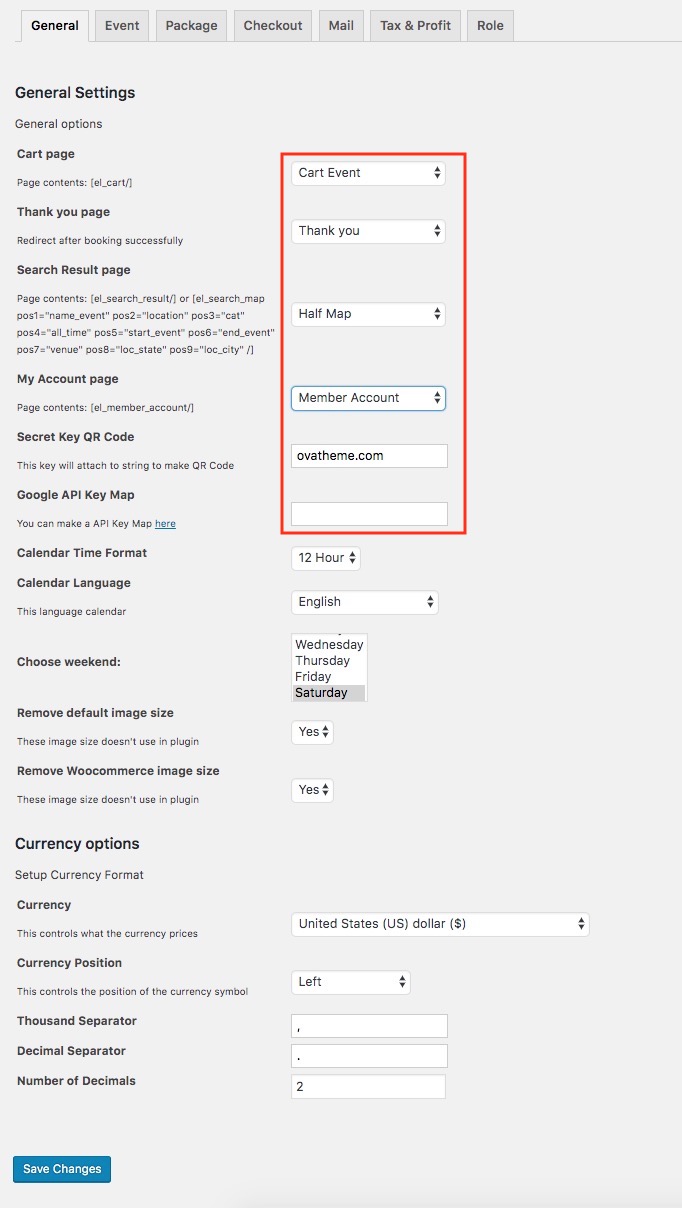
Go to Events >> Settings
1: General
+ Choose "Cart page" has shortcode: [el_cart/].
+ Choose "Search Result Page": After click Search Button, you can choose to display result in Search Result Global Page or Map Page
+ Choose "My account page" has shortcode: [el_member_account/]. The vendor will manage event in this page.
2: Event
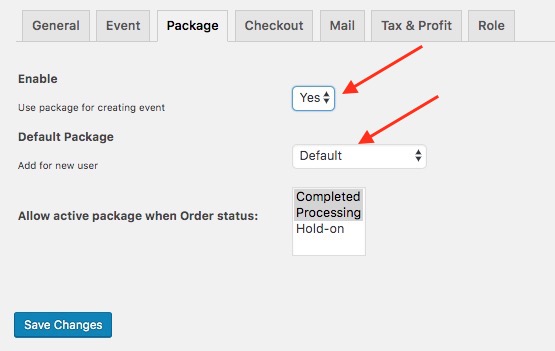
3: Package
+ You have to enable to use Package (subscribe) for vendor. We are using Woocomemrce for paymenting package so, you can active Package when Order status in woocommerce like dropdown.
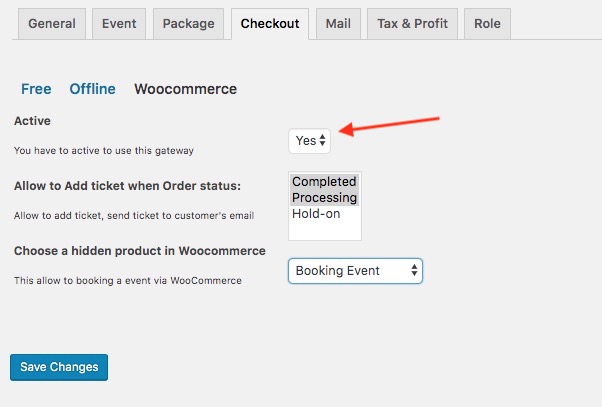
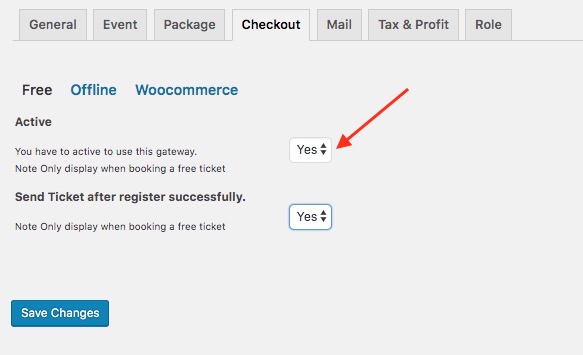
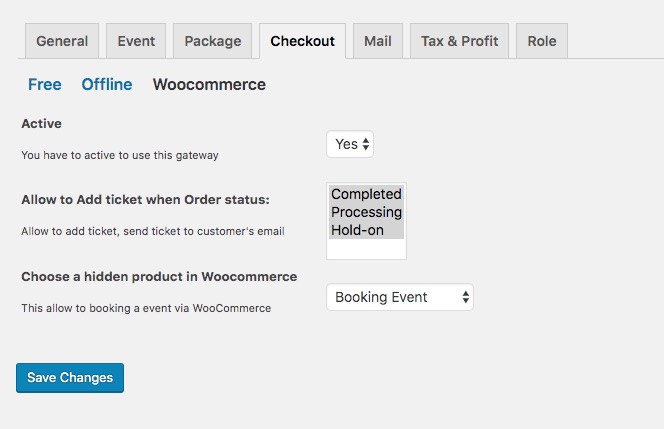
4: Checkout
+ Free payment: This only display when event is free ( Total money in Cart equal 0 )
+ Offline payment: You still can booking event and send money directly to admin's bank acocunt.
+ Woocommerce payment: Use booking system of woocommerce for paymenting ticket. You can install multi payment gateways that the woocommerce supports.
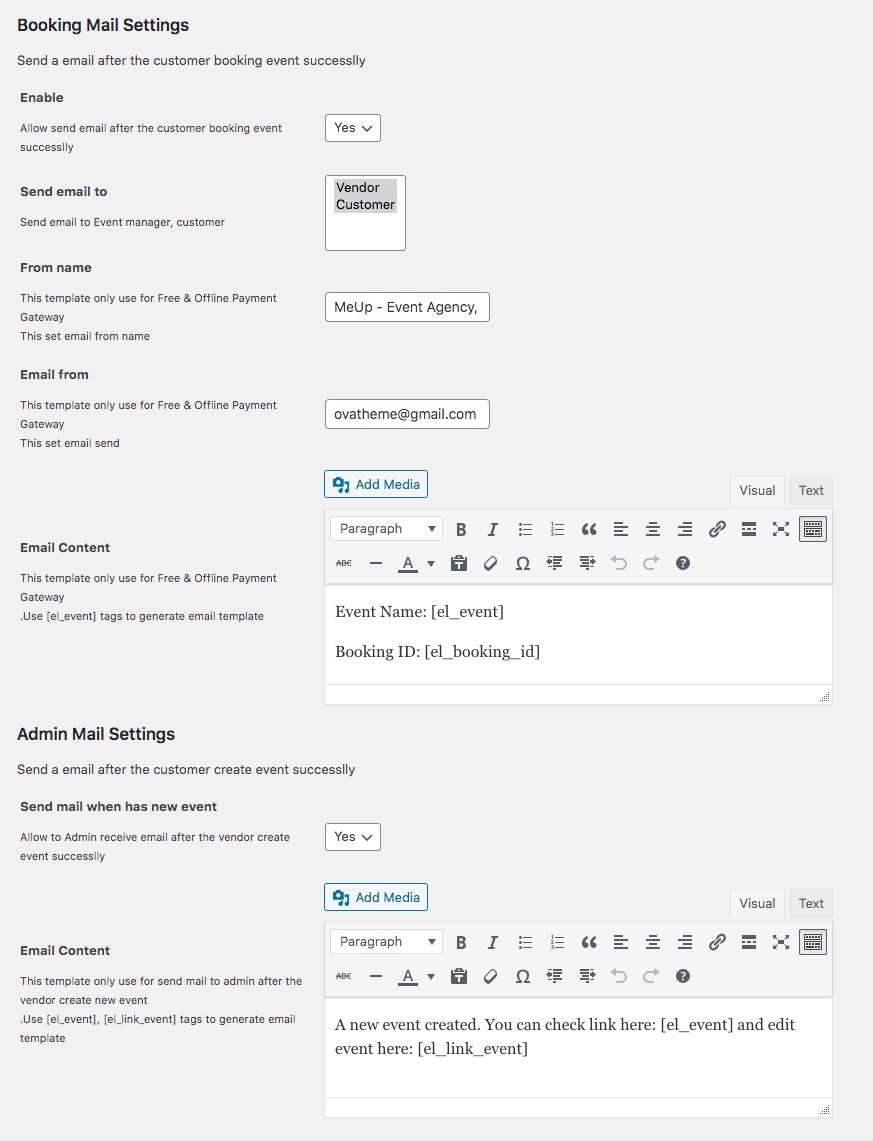
5: Mail
Booking Mail Setting: This template mail only used when guest use payment method: Free and Offline. If gust use Woocommerce, the template mail will use in woocommerse system.
Admin Mail Setting: Send mail to Admin when new event made
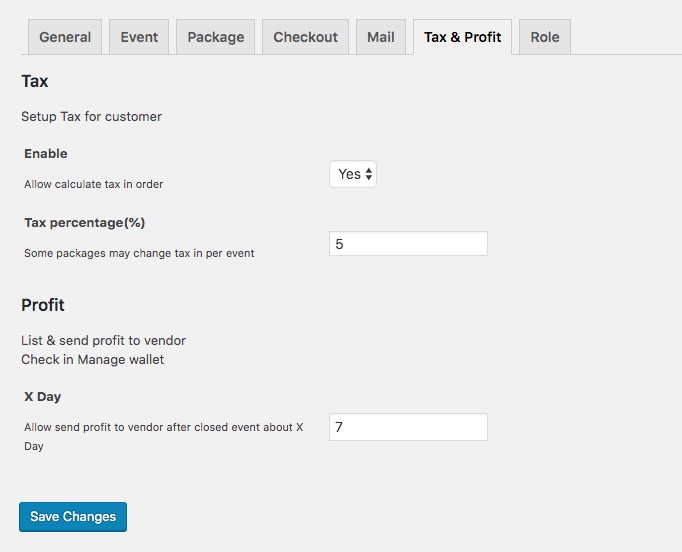
6: Tax & Profit
+ You can fixed tax for per booking ticket. Note the vendor can setup tax if package is enable
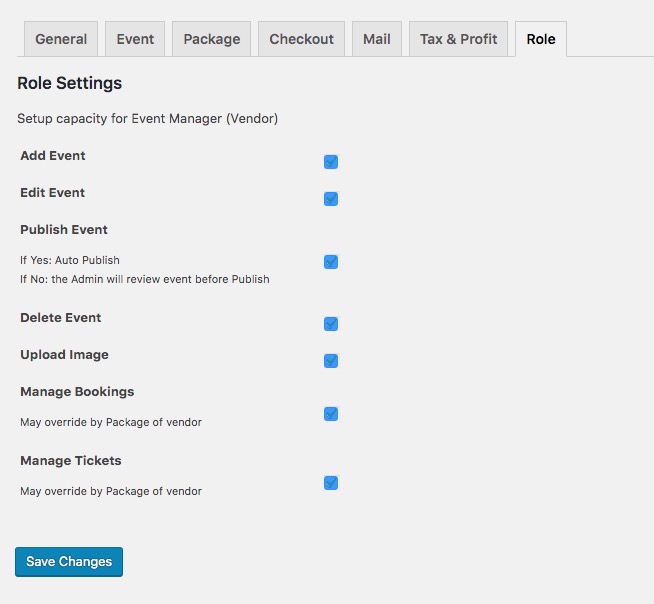
7: Role
- You can set permission for vendor
Make Event
You can make event in backend or frontend: All fields in backend and frontned is the same.
- This is instruct make event at frontend:
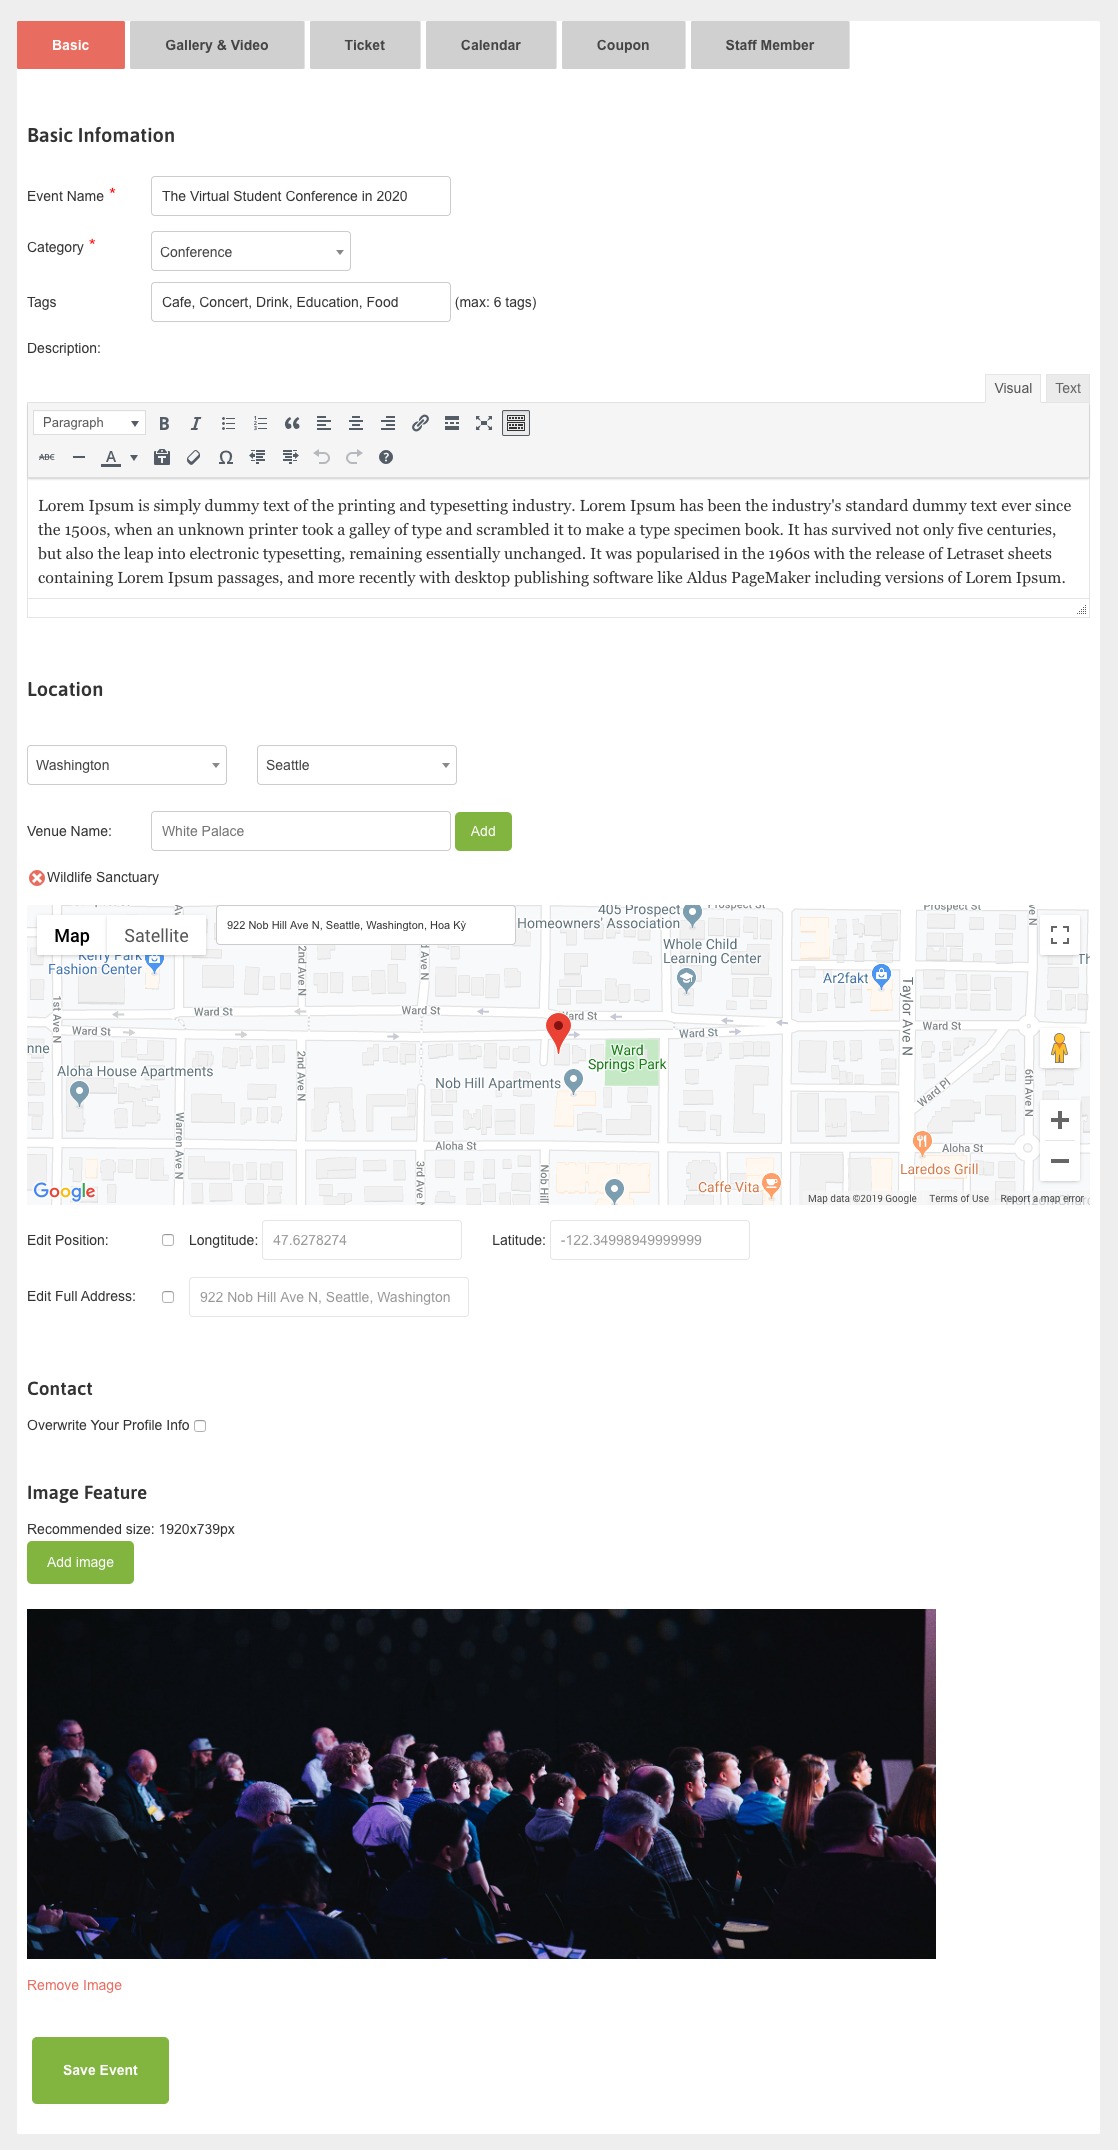
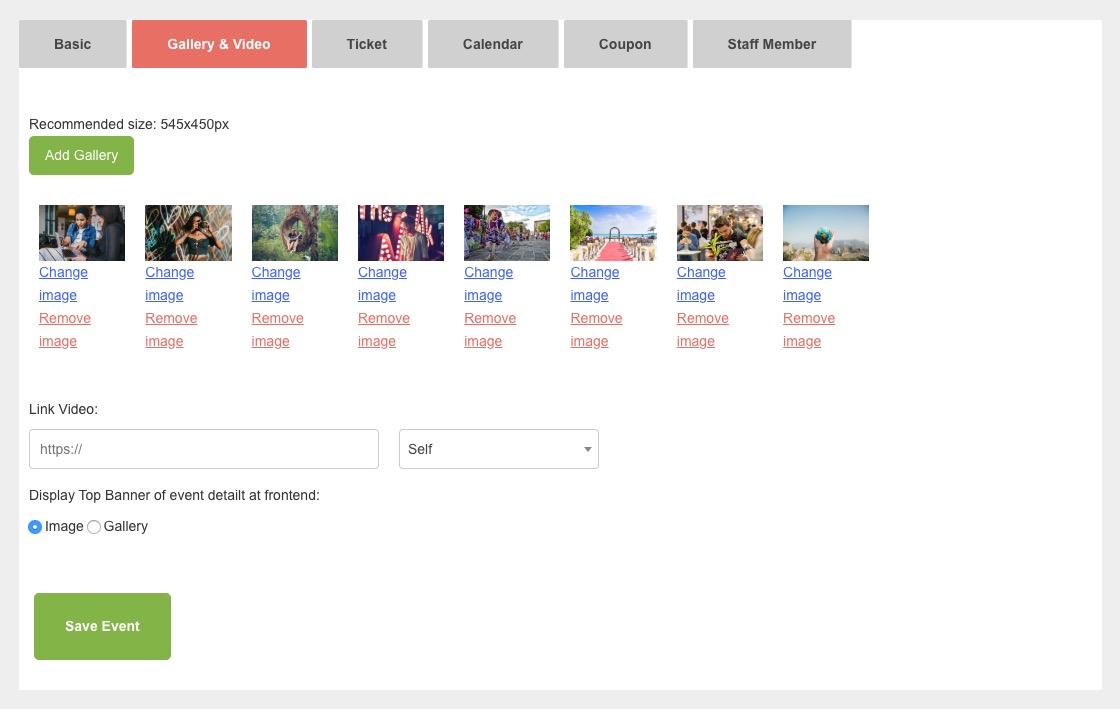
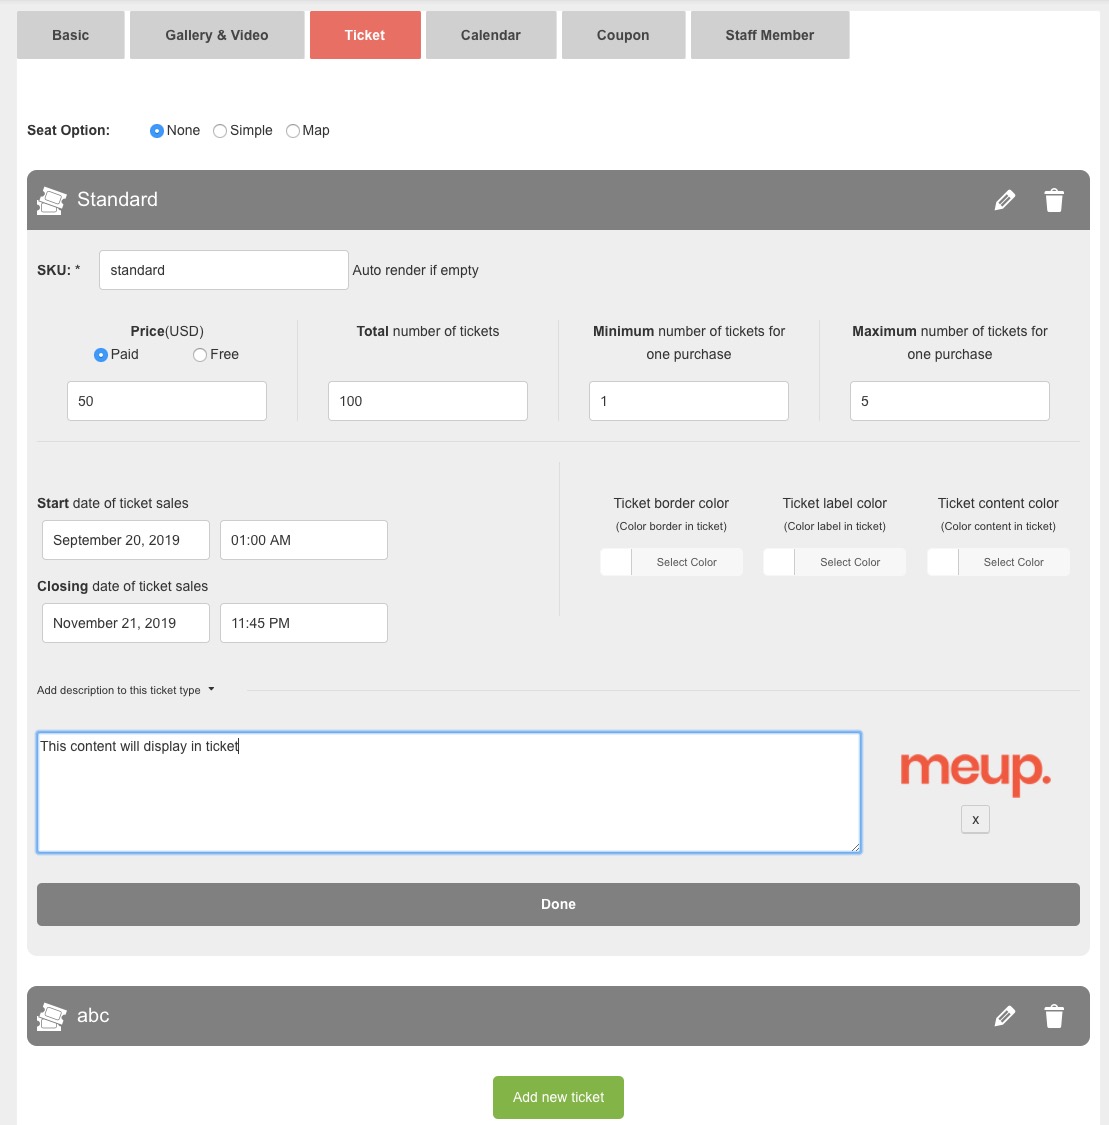
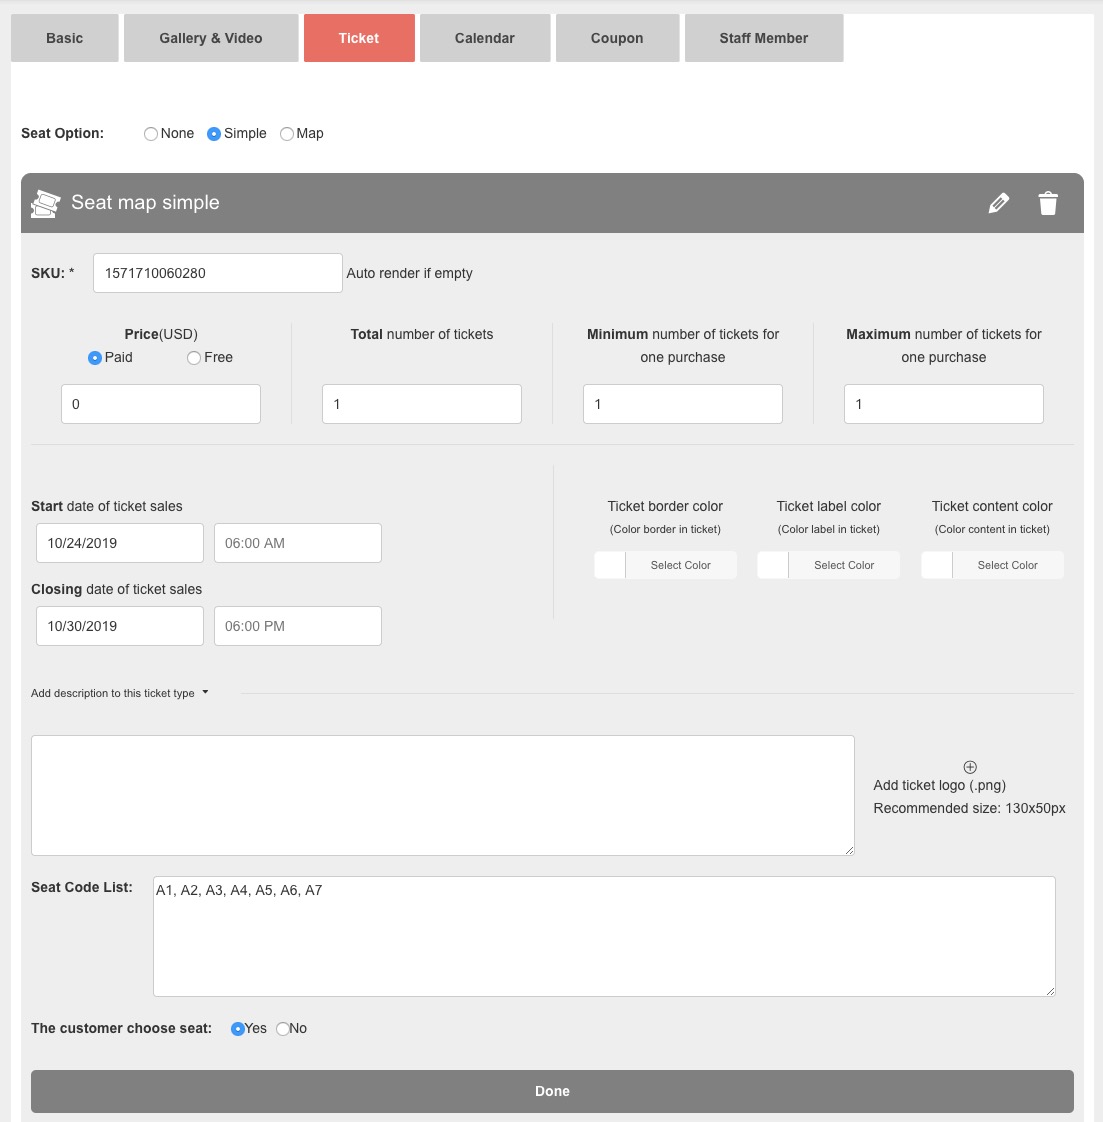
Go to My Account >> Create Listing >> Insert Infomation in some tabs:
- Basic Tab
- Gallery & Video
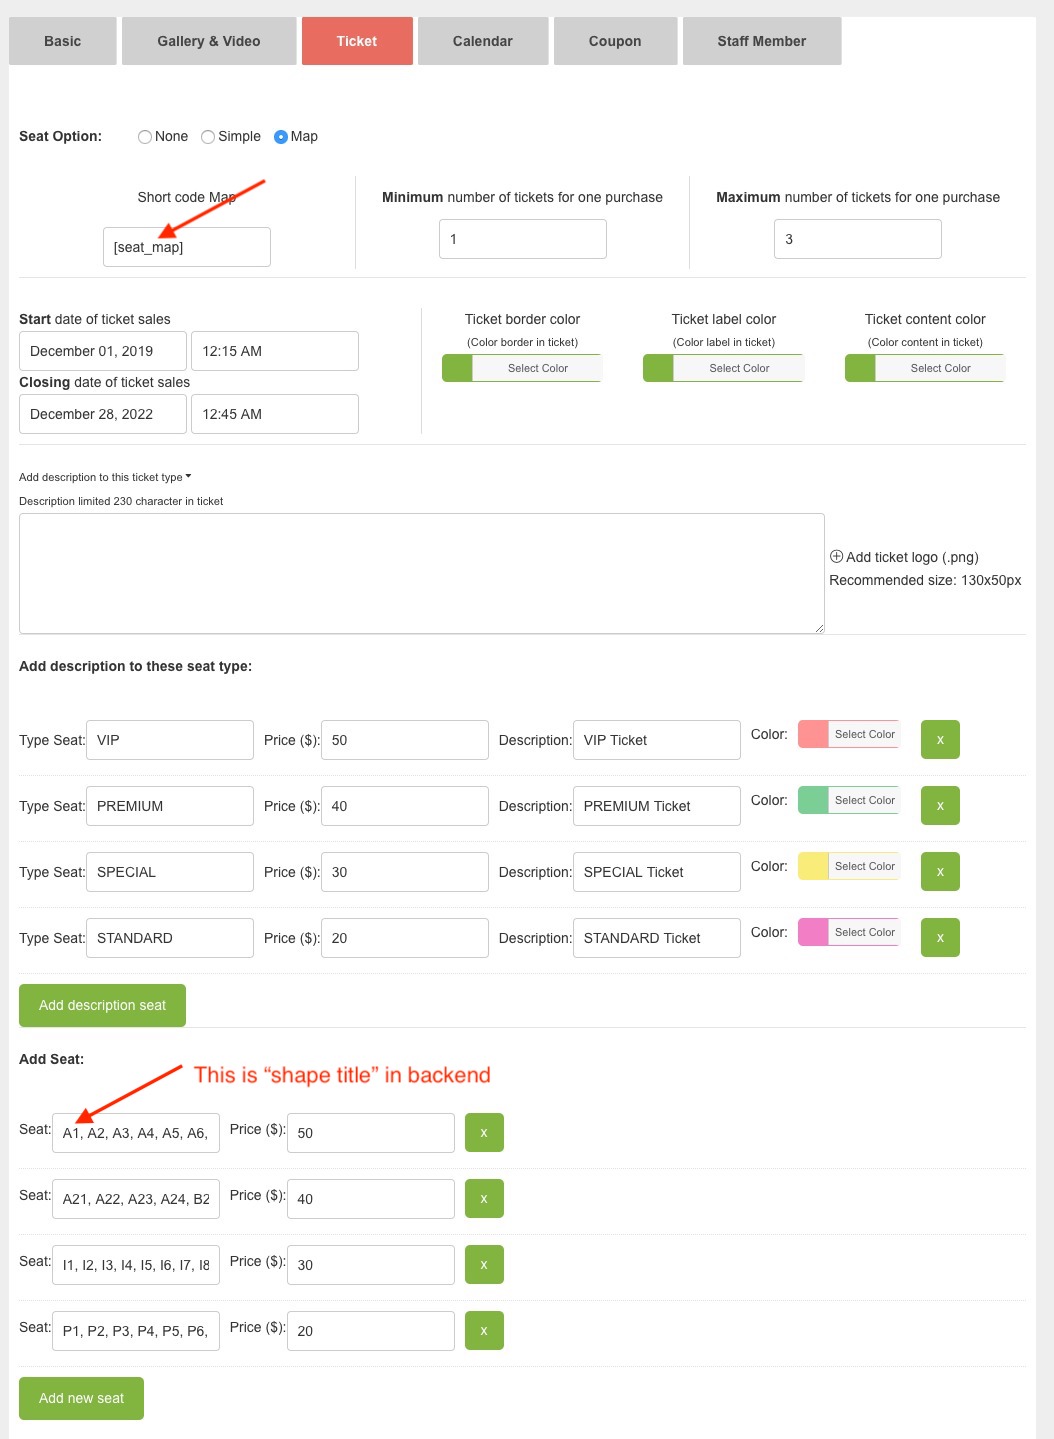
- Ticket: Support 3 type ticket
+ Seat None: Don't insert seat in ticket
+ Seat Simple: Insert seat in ticket simply
+ Map: Make seat via image, the customer can booking seat at map
Make Seat Map in backend:
You can read here for detail : https://codecanyon.net/item/image-map-pro-for-wordpress-interactive-image-map-builder/2826664
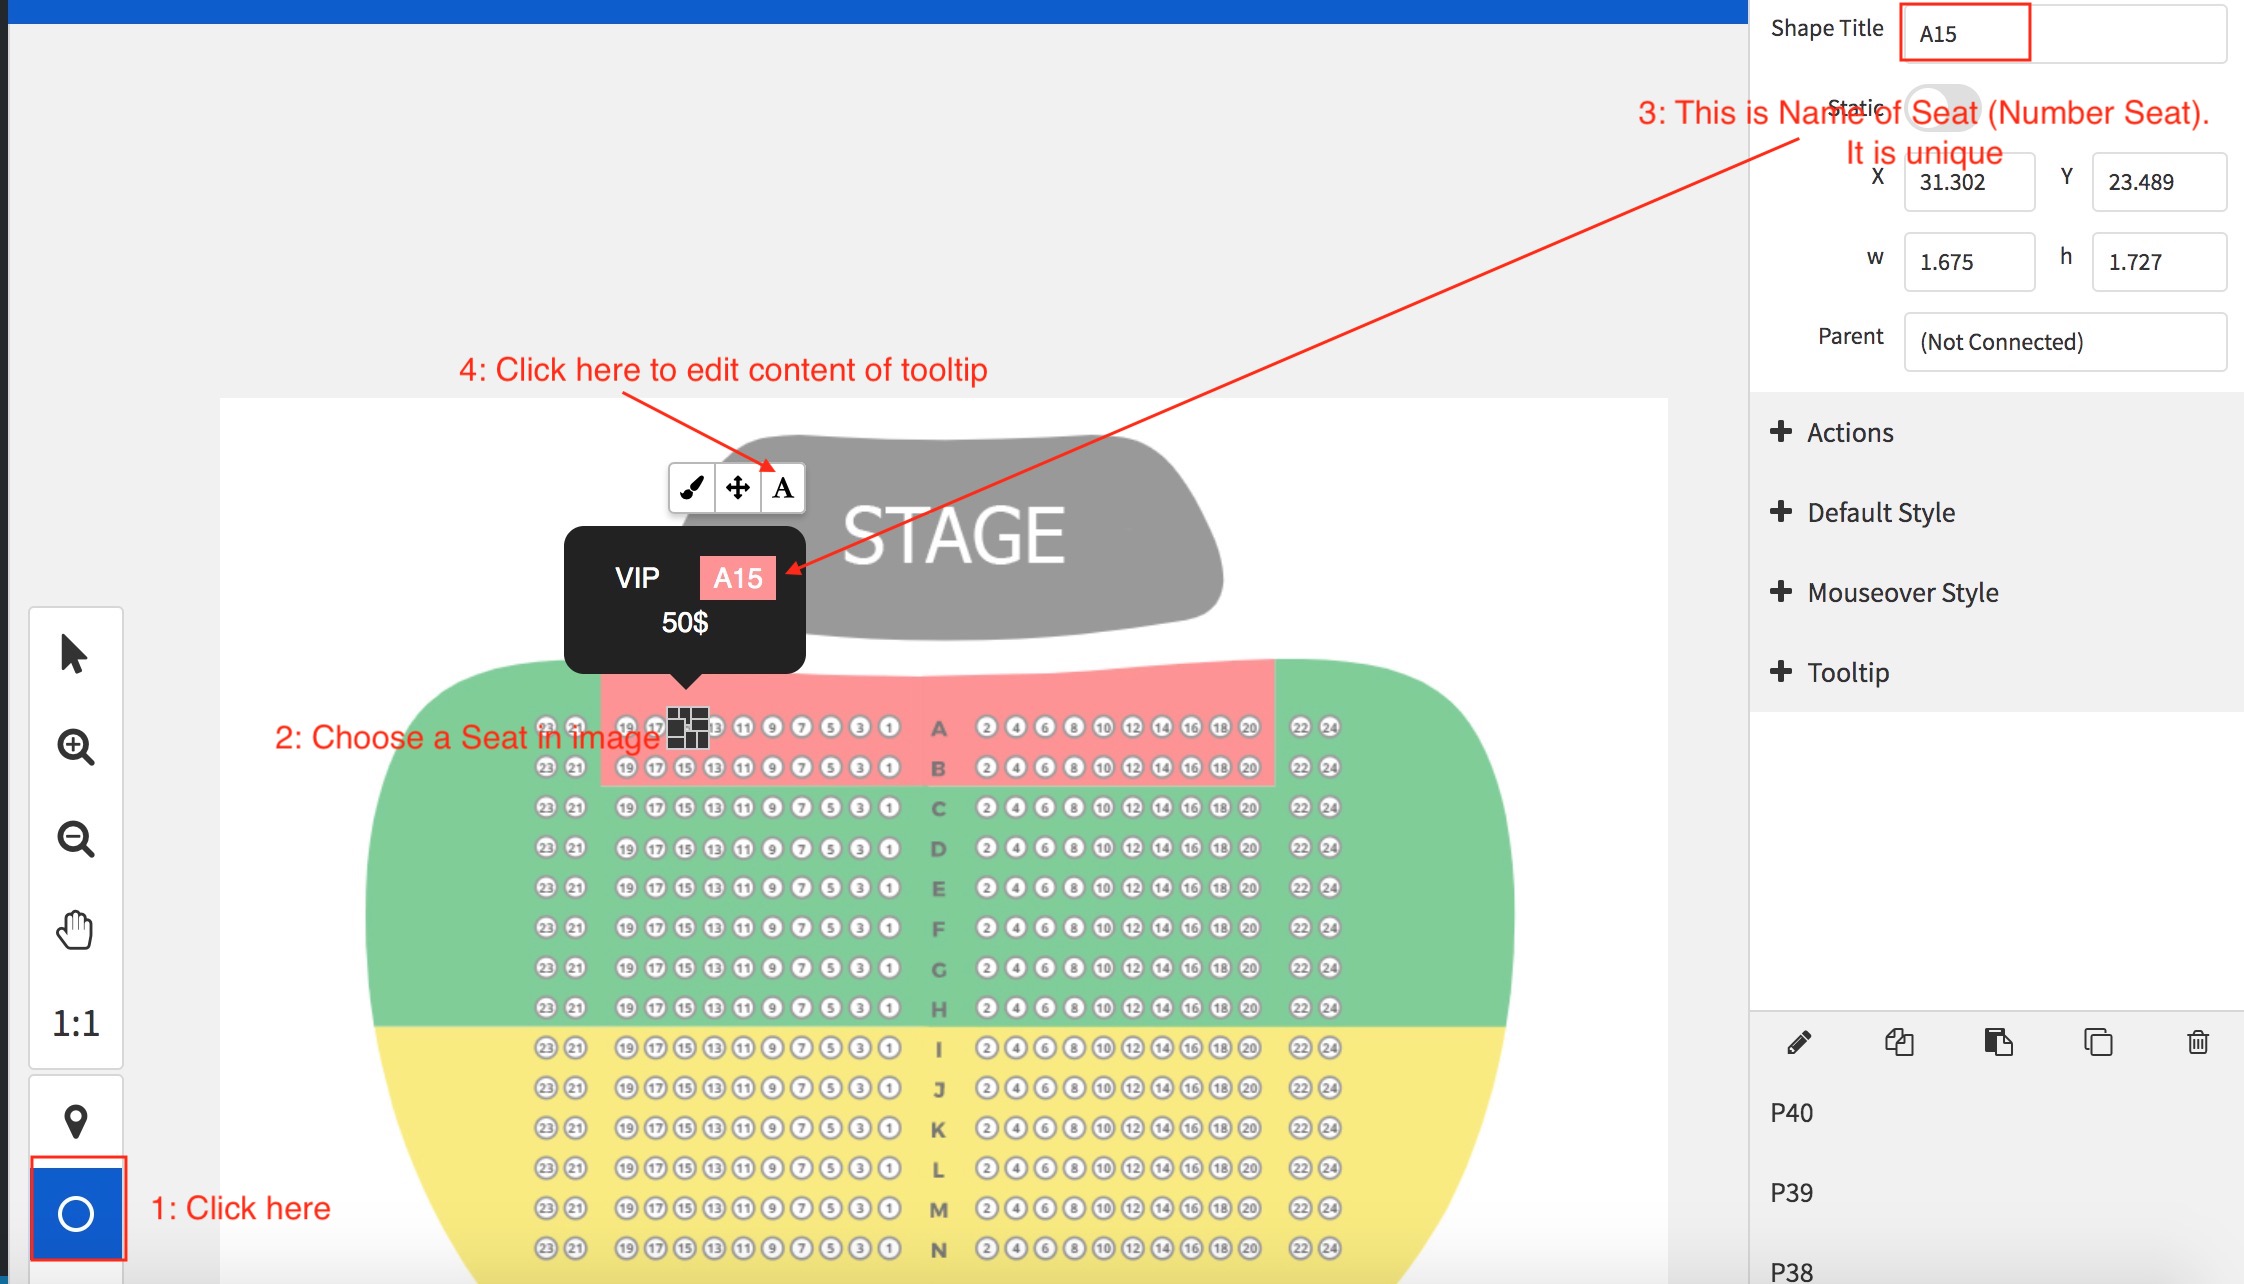
You can add Shortcode (will insert in ticket), title, price, Shape Title (important). Note Shape Title will used when make ticket
Make an Seat Map: Pleae read here
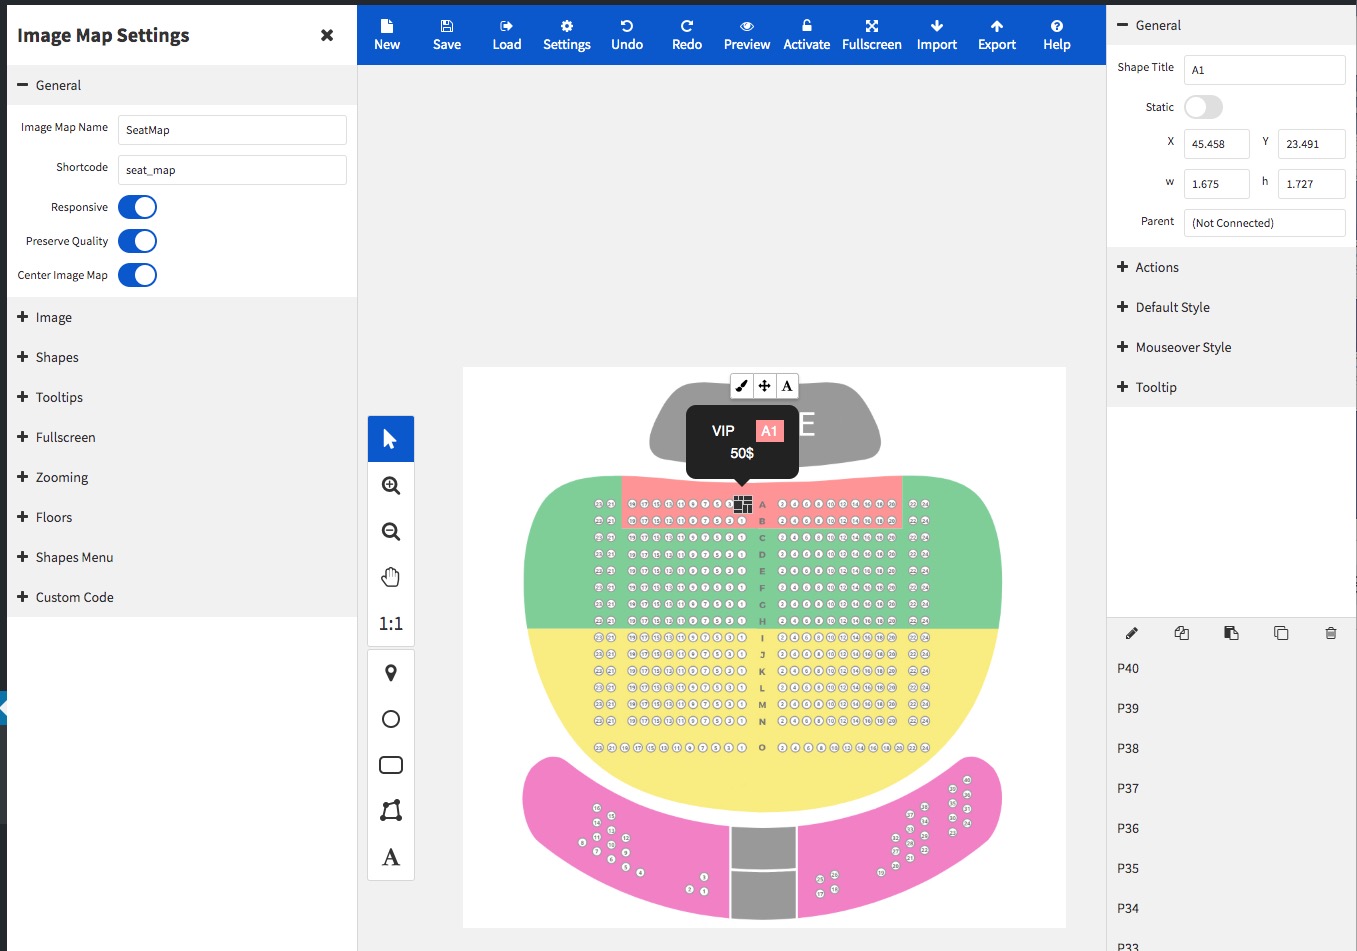
Make ticket display frontend: Go to Plugis >> Image Map Pro >> Add New
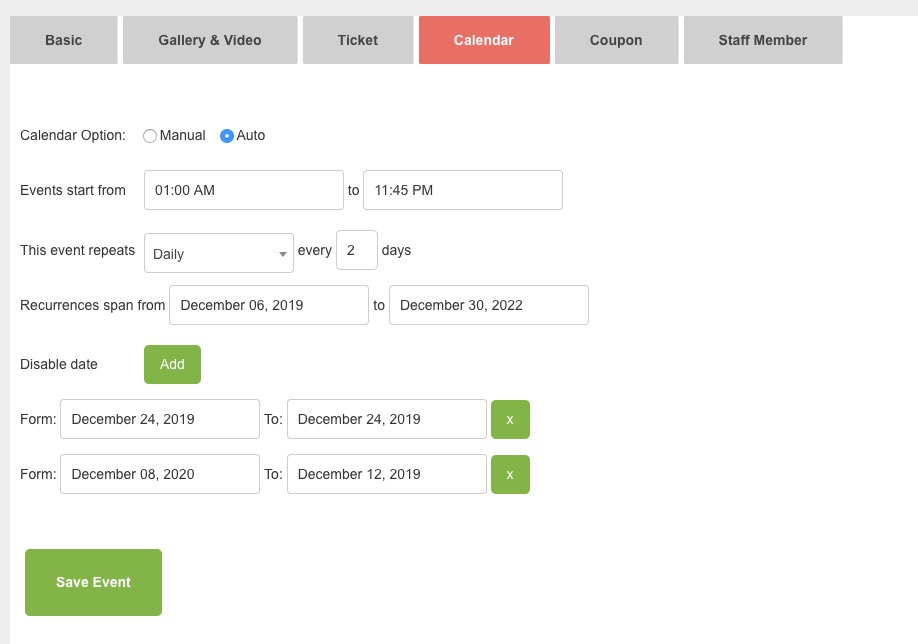
- Calendar: Support 2 type: Manual & Auto
+ Manual
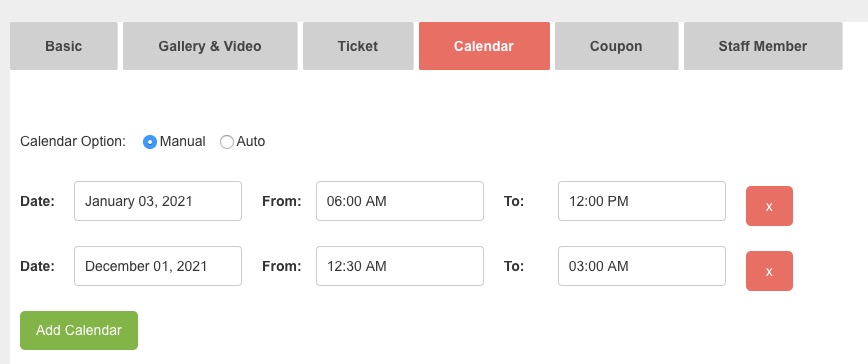
+ Auto
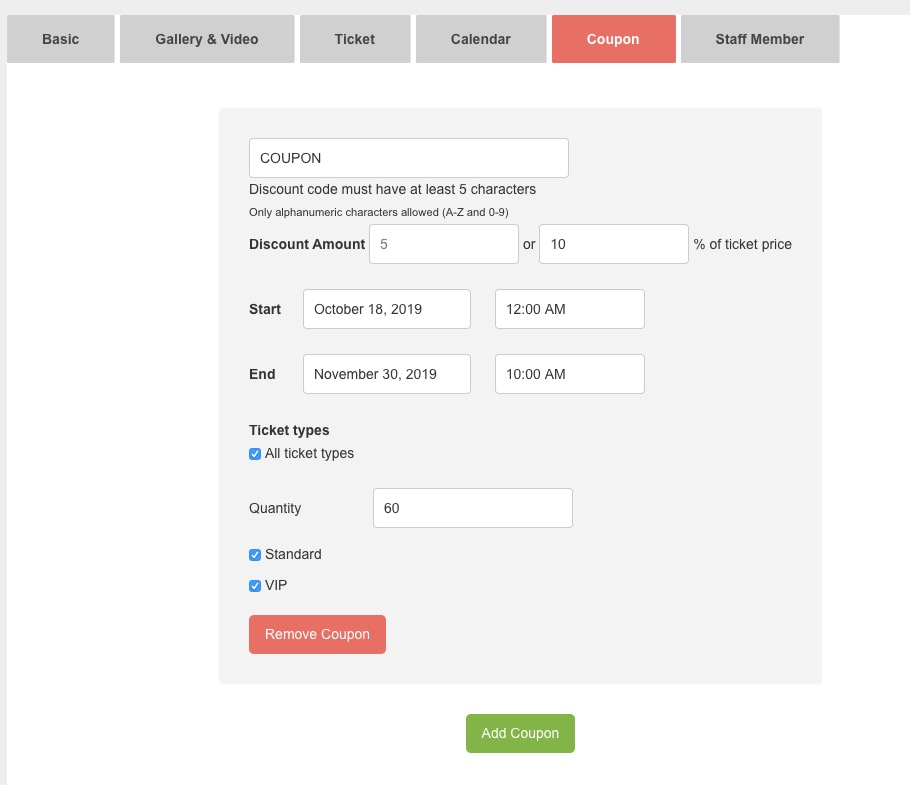
- Coupon
- Staff Member: You can add a username to scan QR Code ticket via APP Mobile.

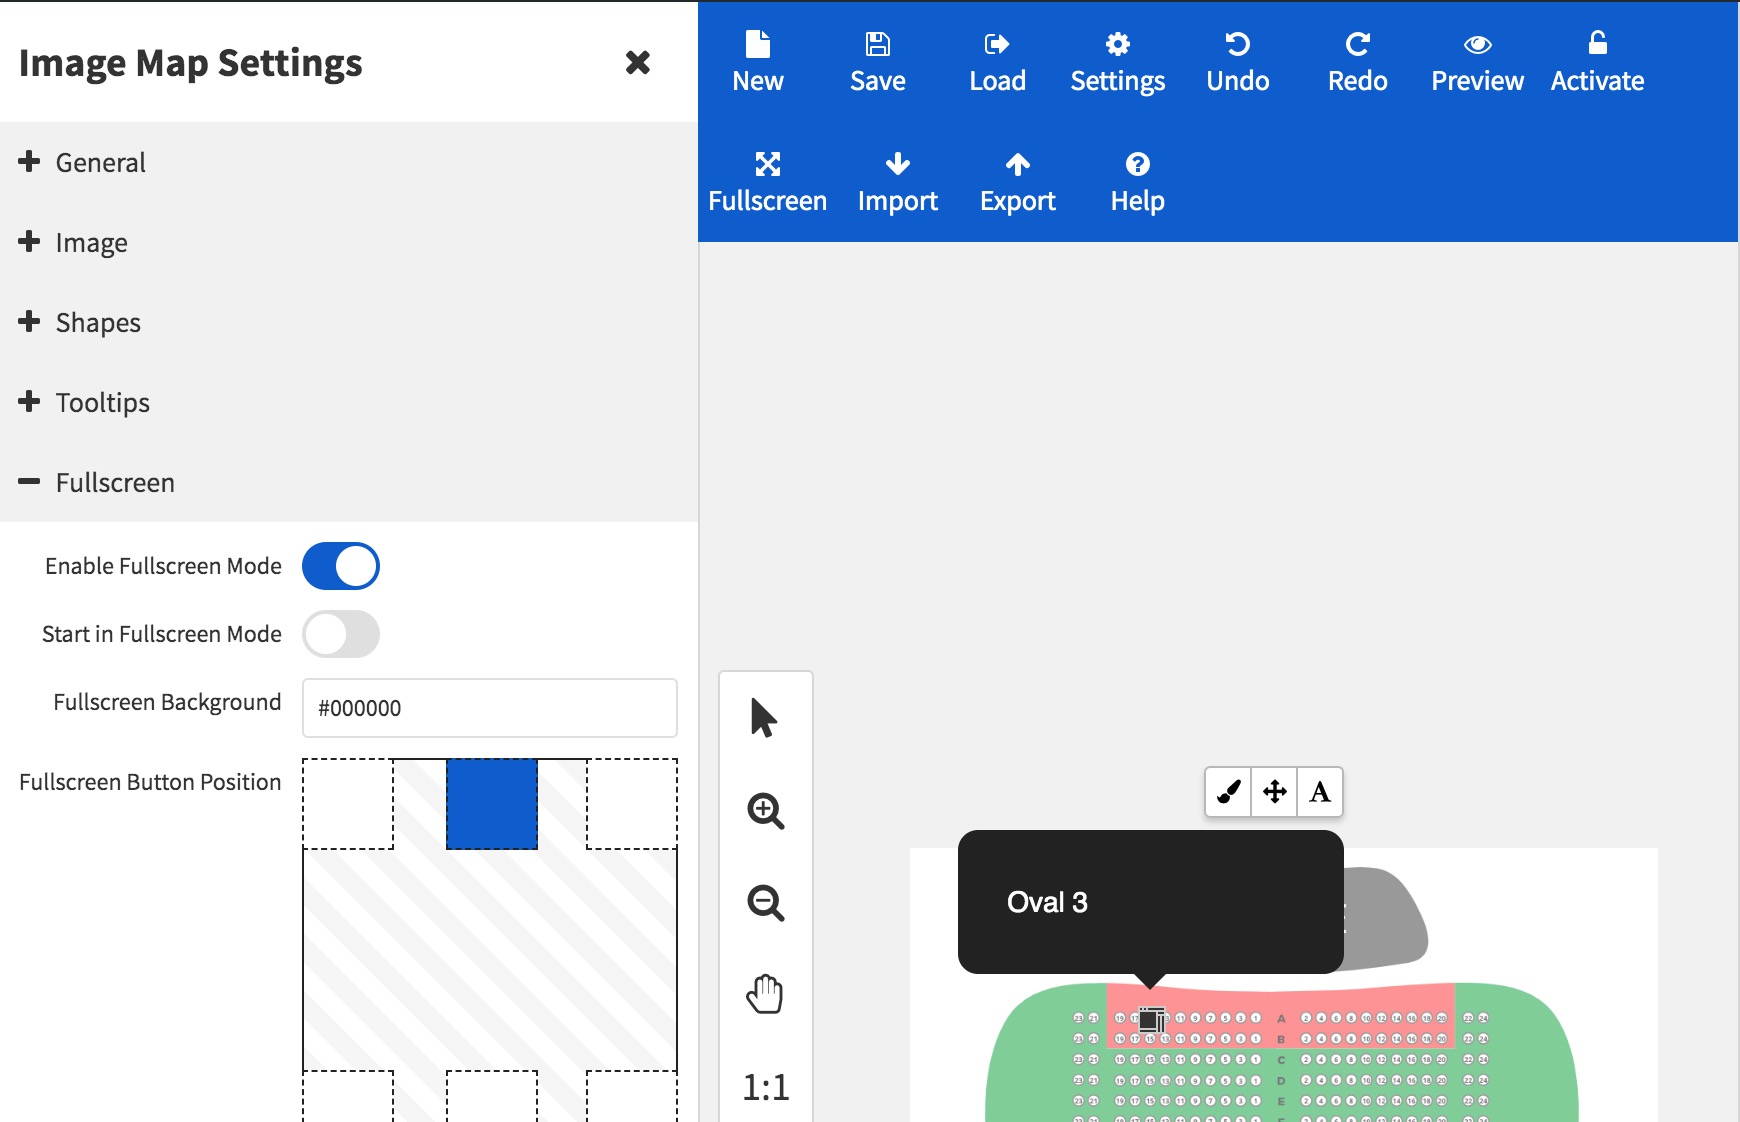
How to change Seat Map in Event
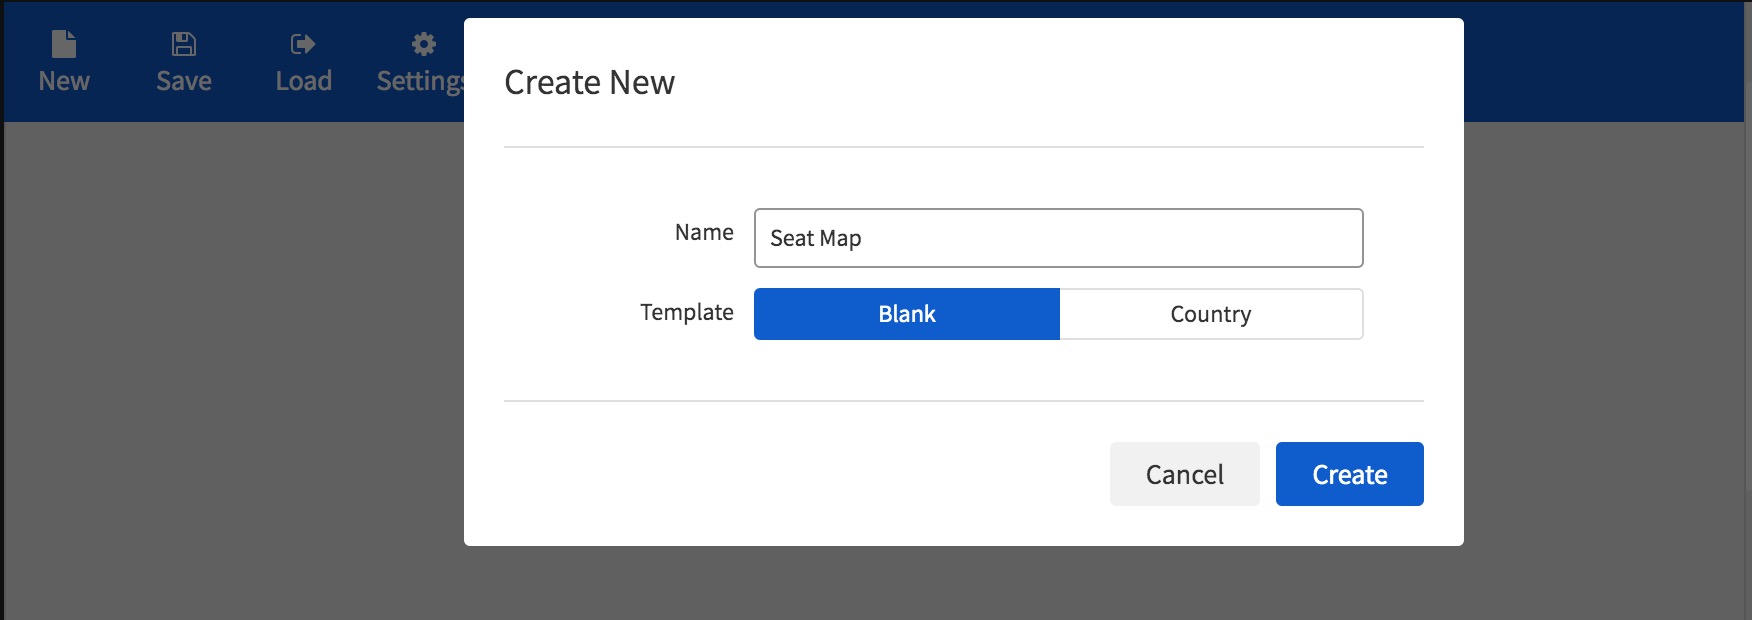
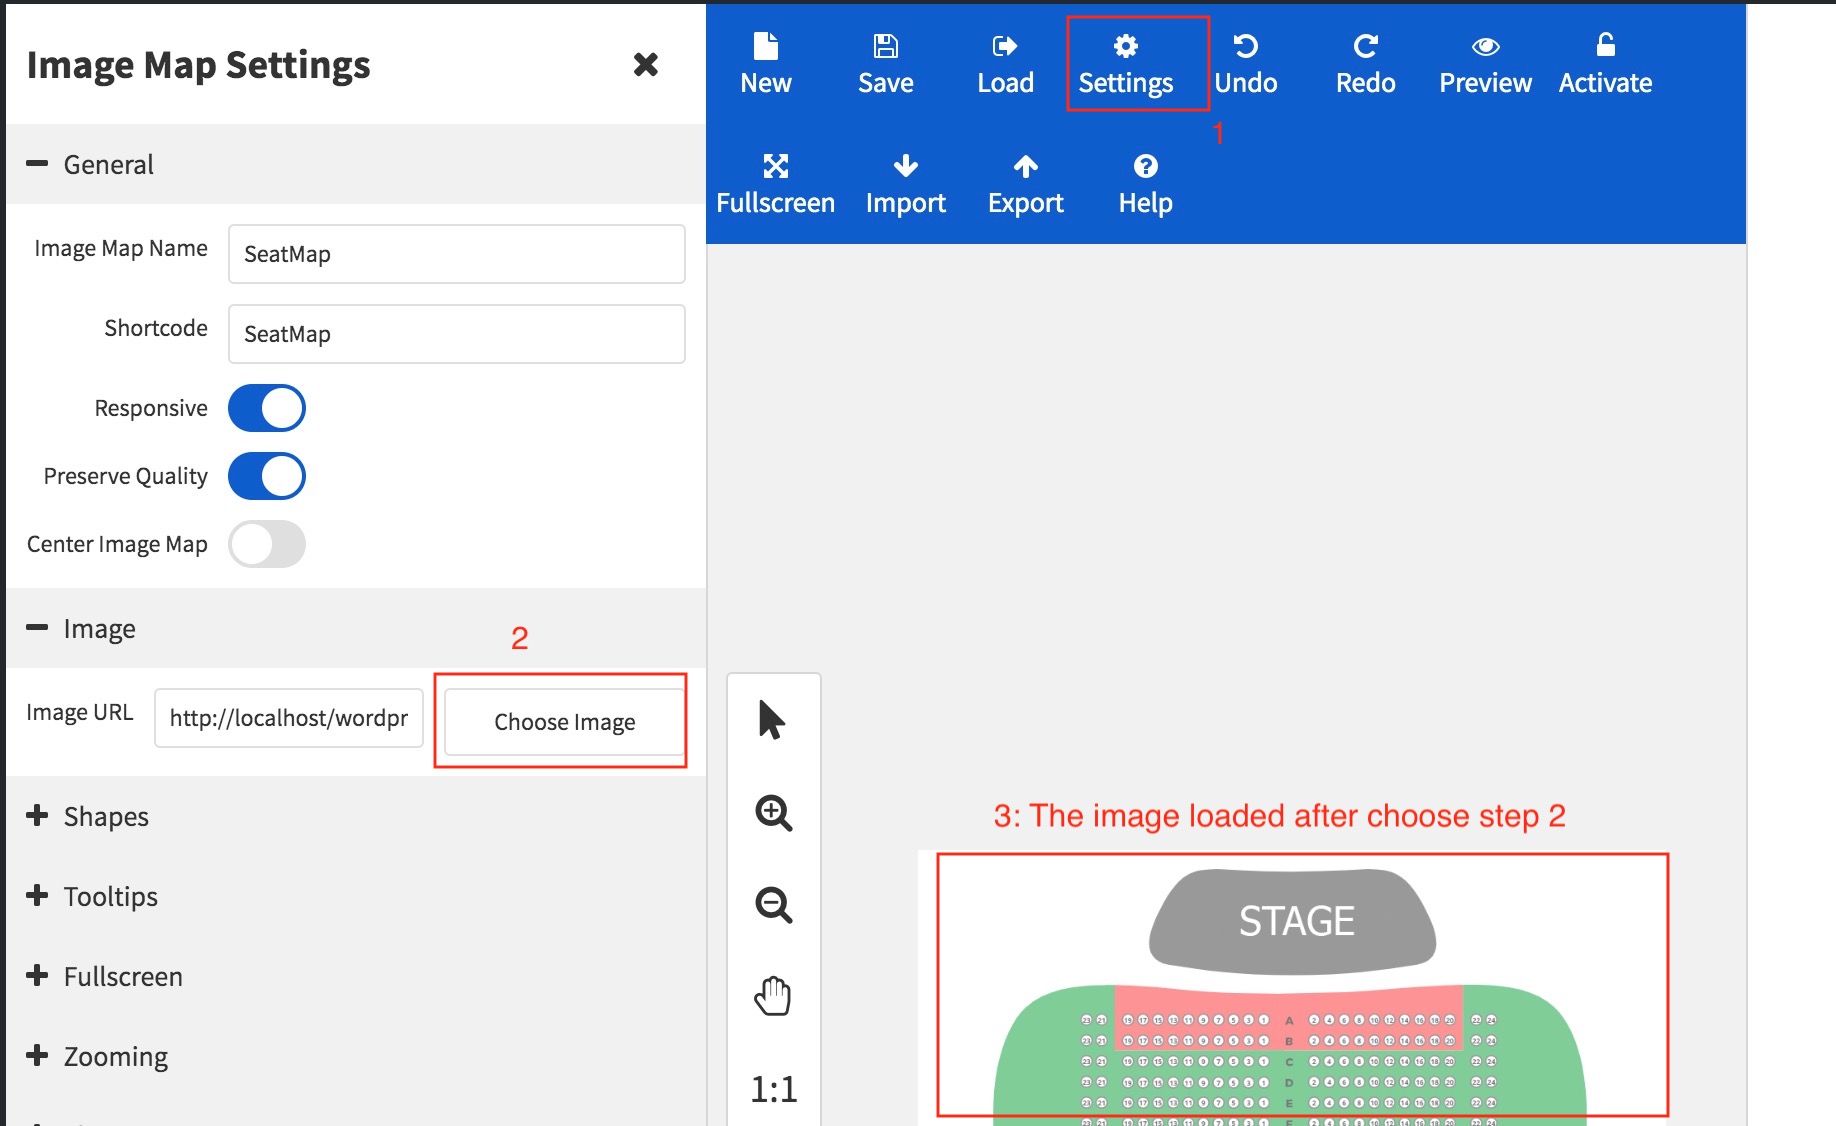
Go to Plugins >> Image Map Pro >> Click "New"
Click Settings >> Choose FullScreen
Click Settings >> Choose ToolTip
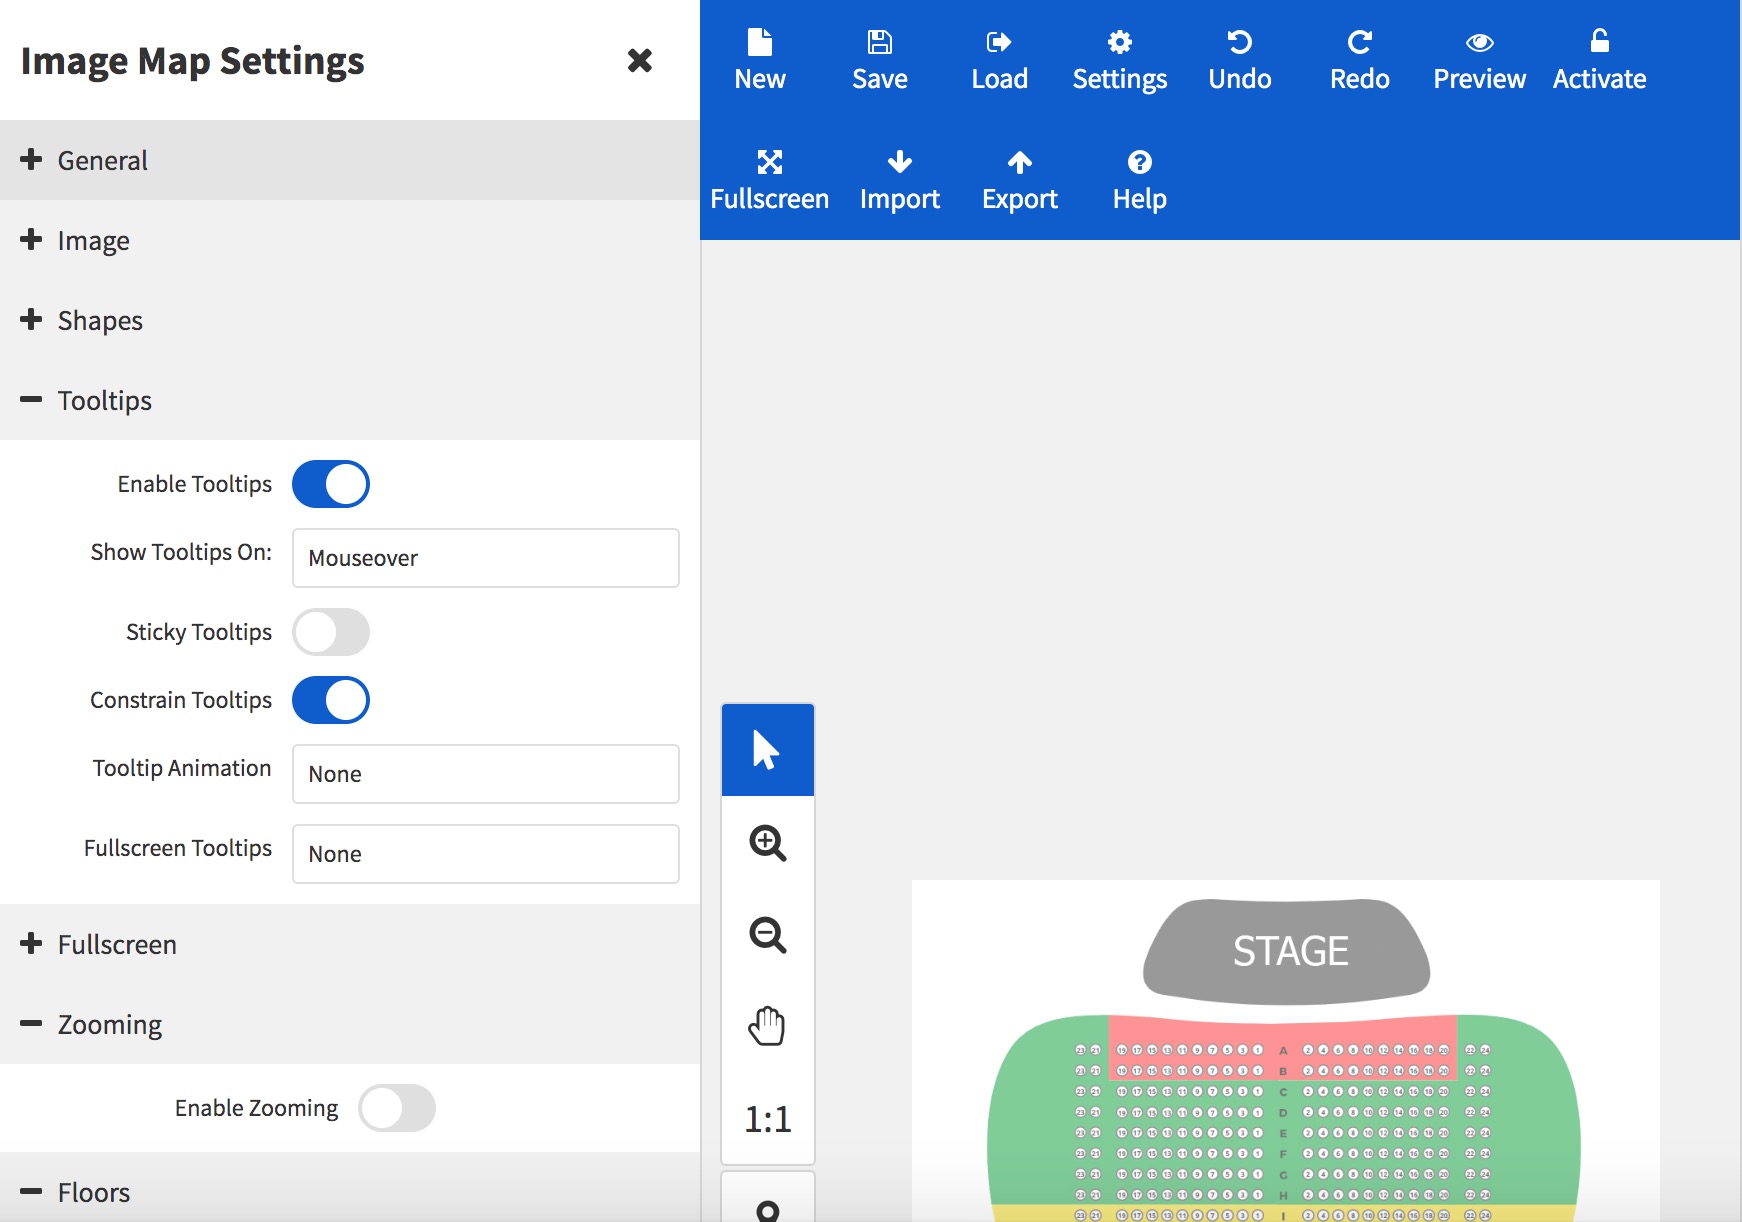
Click Settings >> Choose Image
From Tool Left Side click Elipse >> Choose an area (seat) in Image
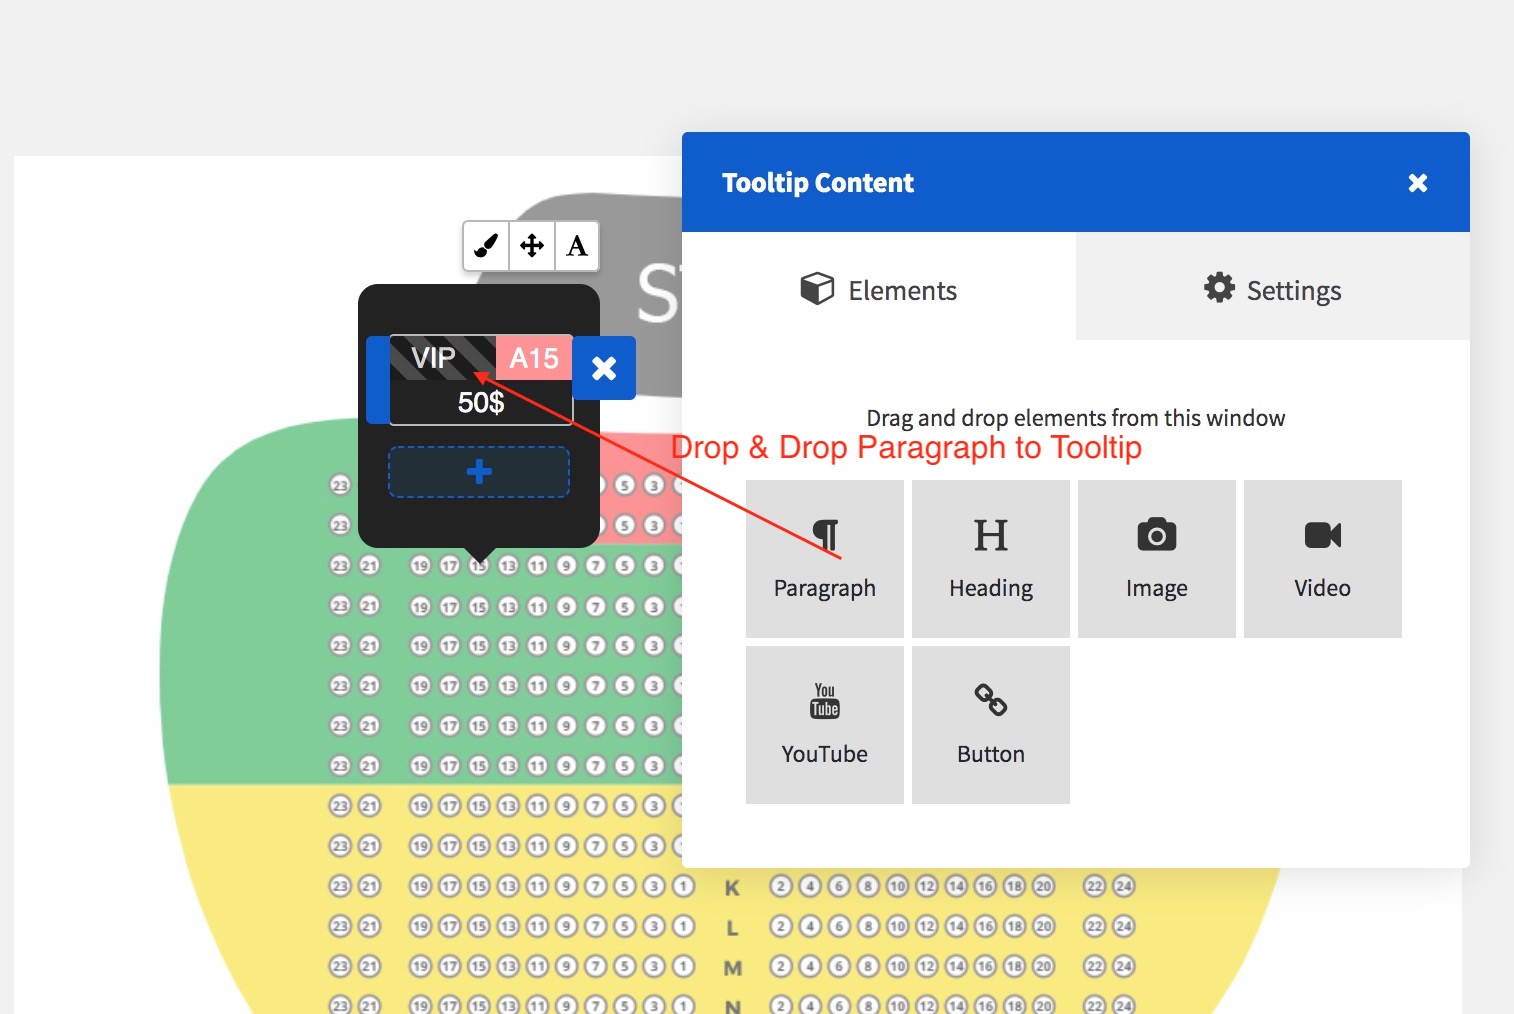
Edit Content Tooltip
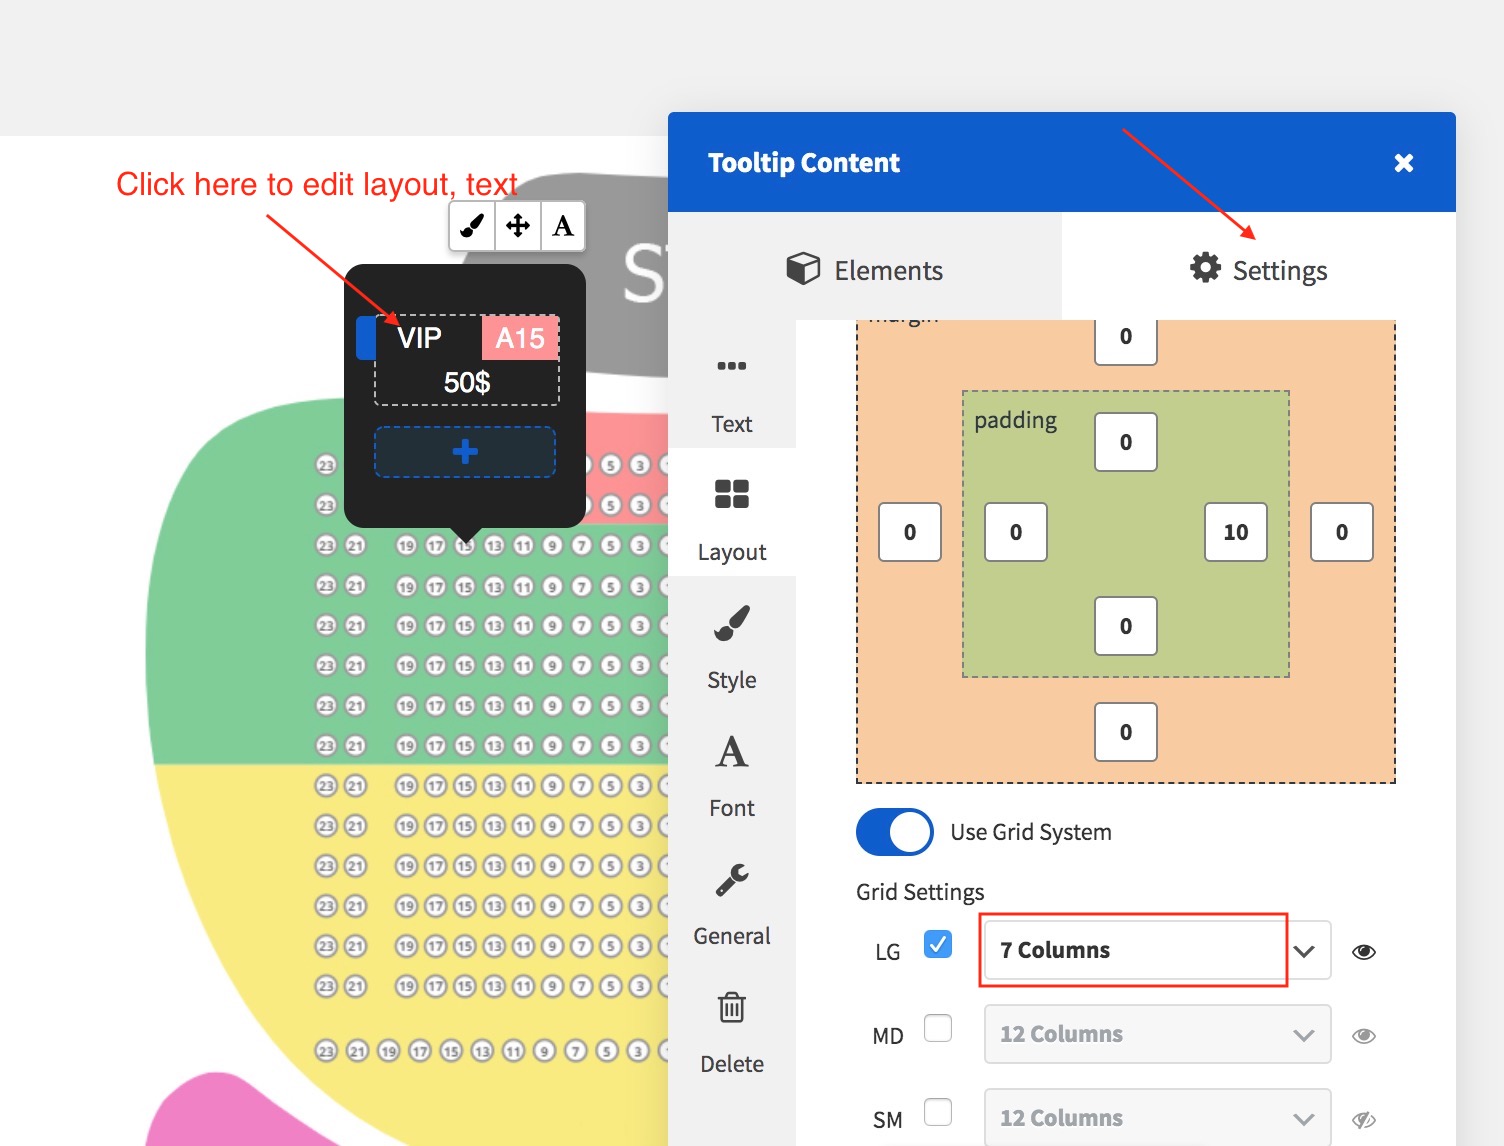
Change layout of section in Content Tooltip
Make ticket display frontend: Go to Plugis >> Image Map Pro >> Add New
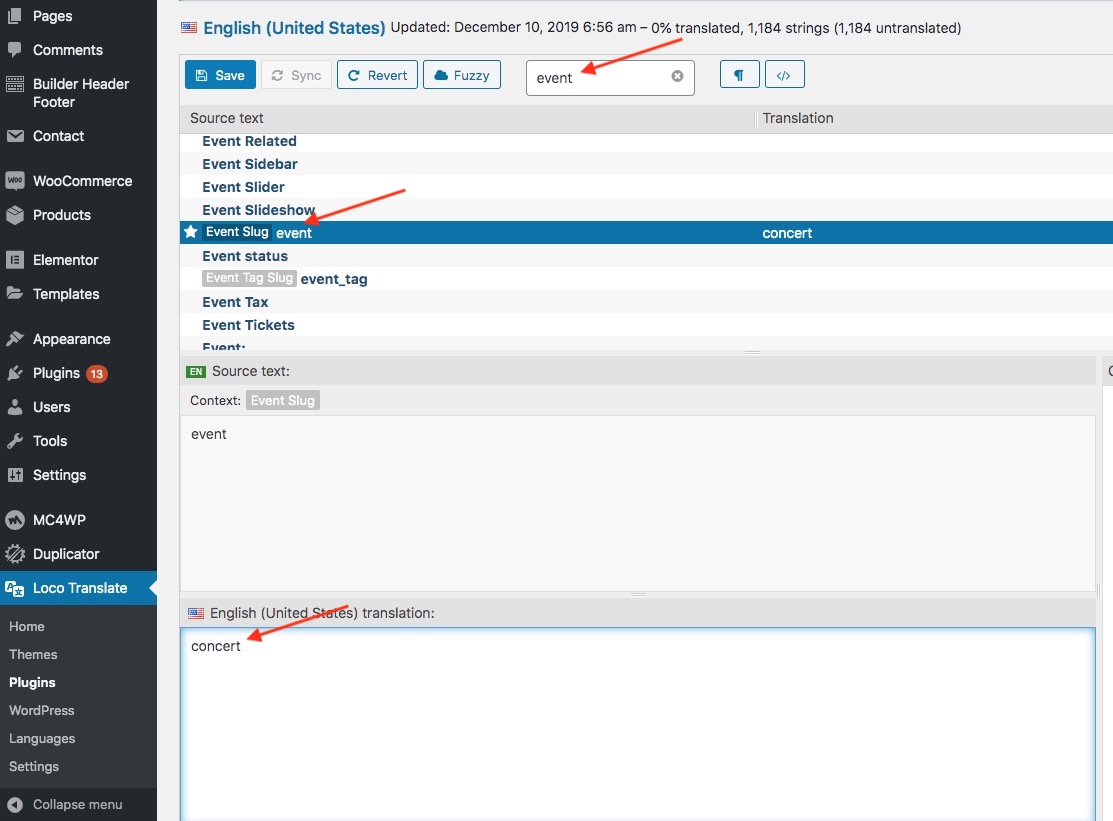
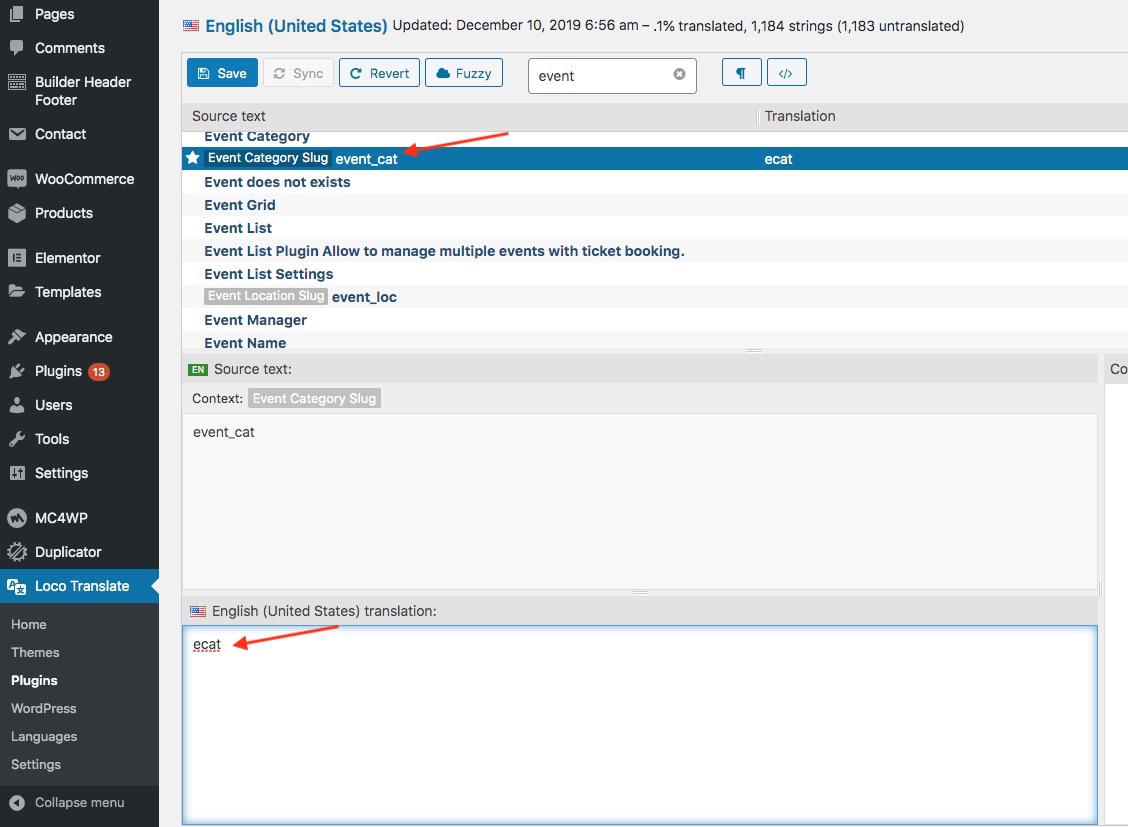
Change Slug at url taskbar
- You can use Loco Translate Plugin to translate Slug of Event, Event Category, Event Location ... in EventList Plugin
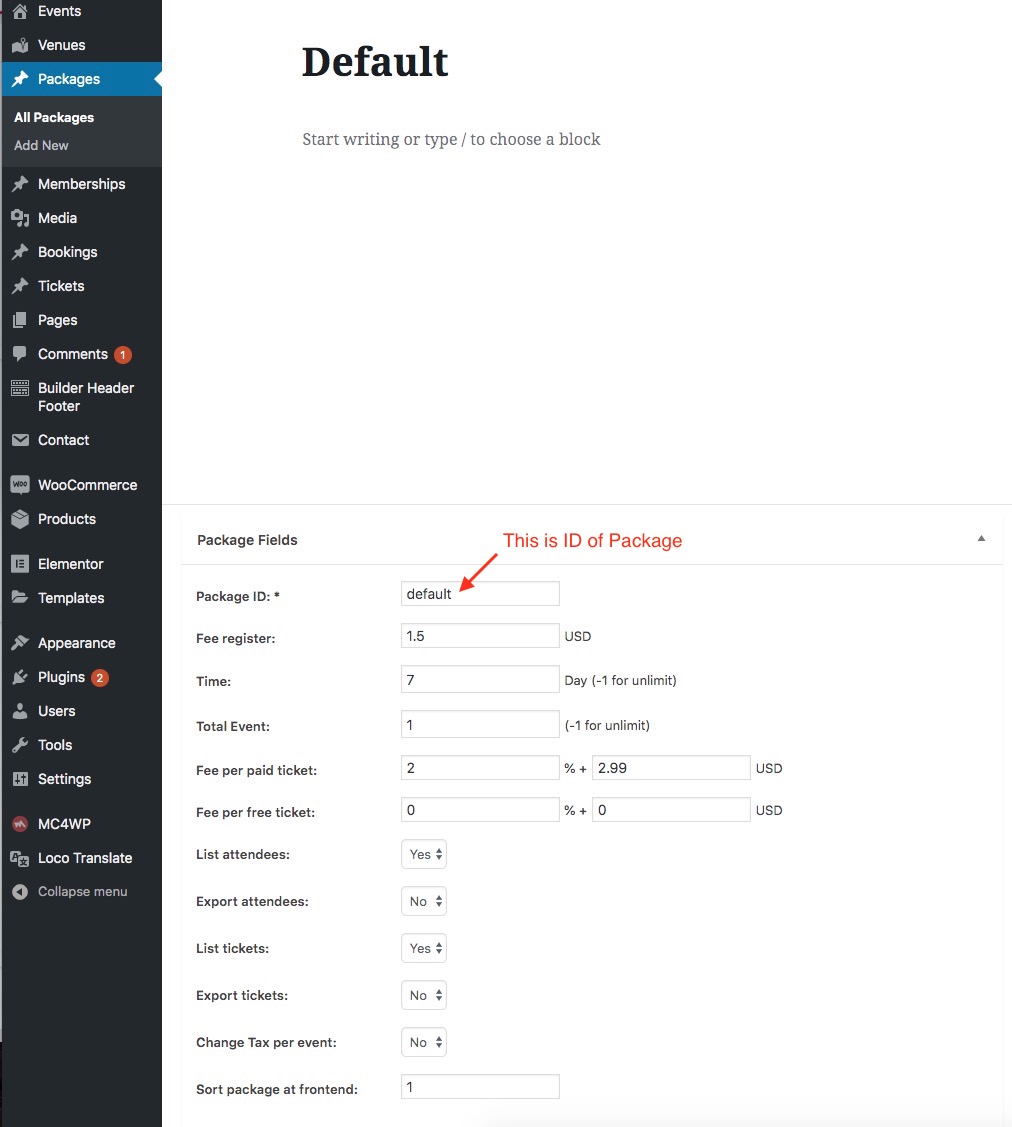
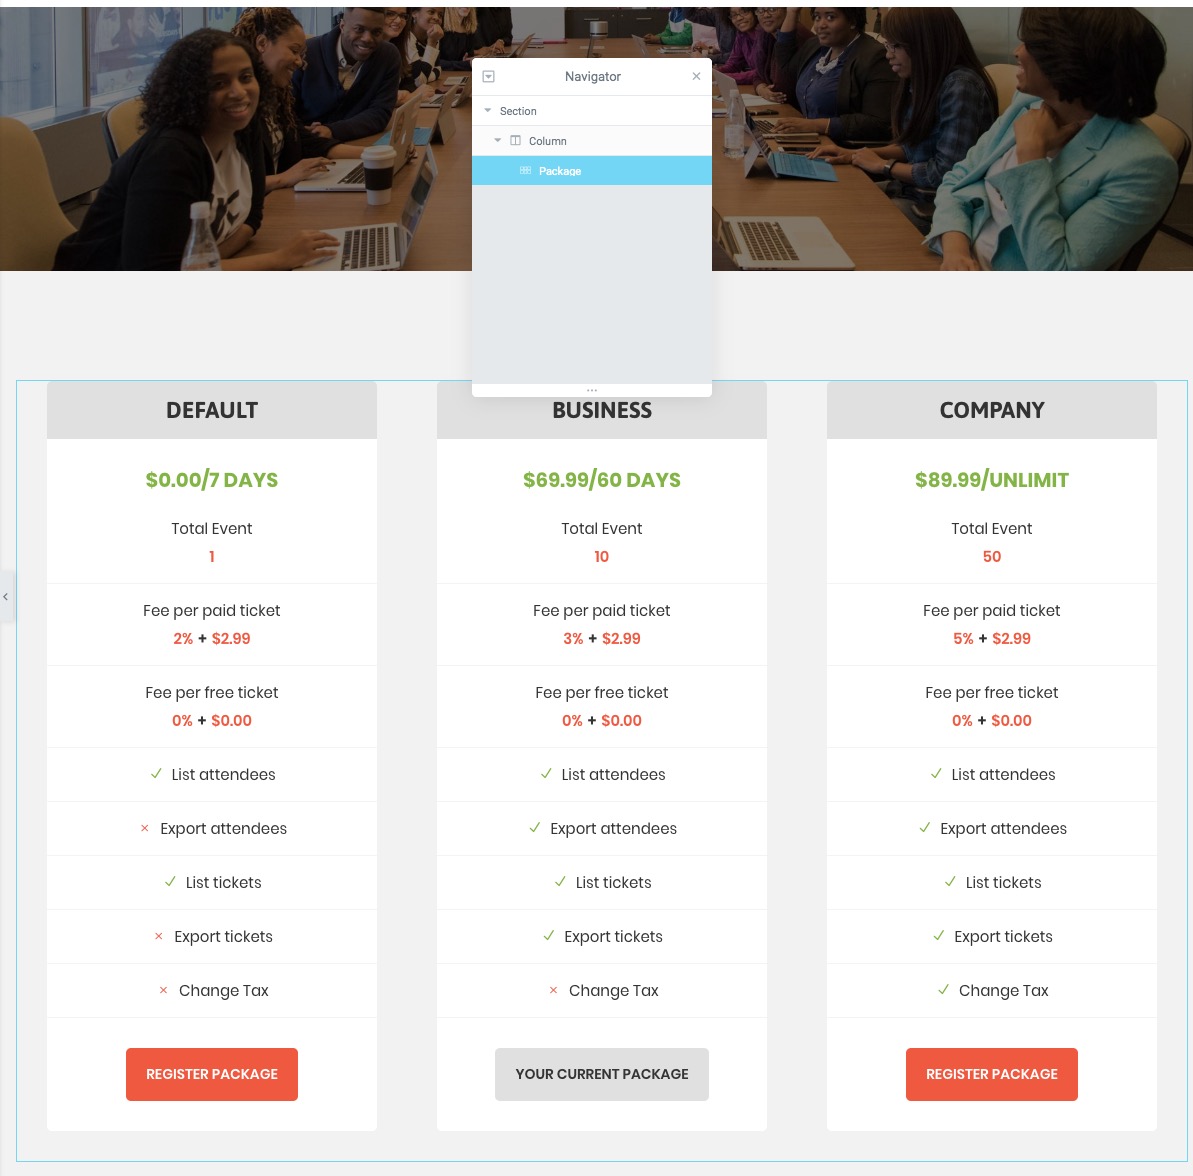
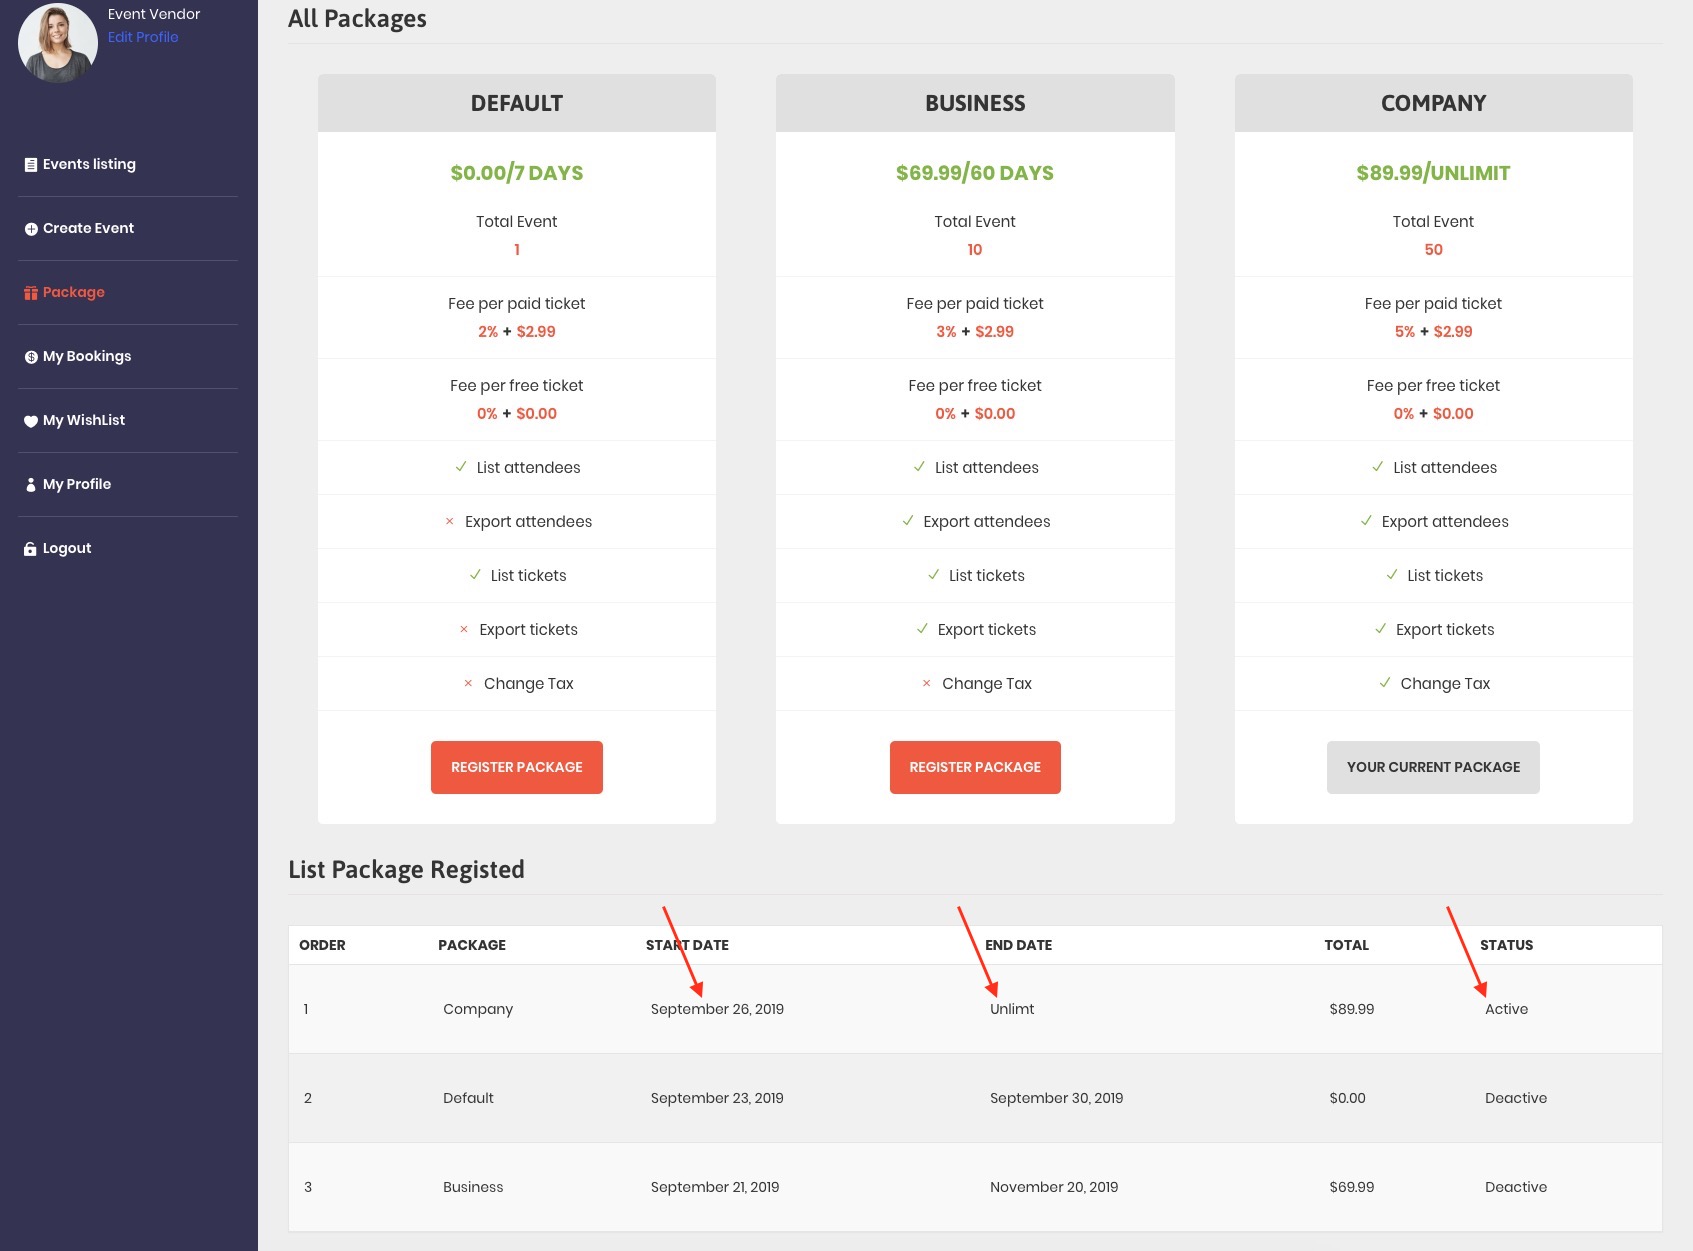
Manage Package & Membership
From Left Panel click Packages >> Add New
- Display packag at frontend: You can add 'Package' element to page
- Manage Membership: After vendor register package, the all info will Store in Memberships
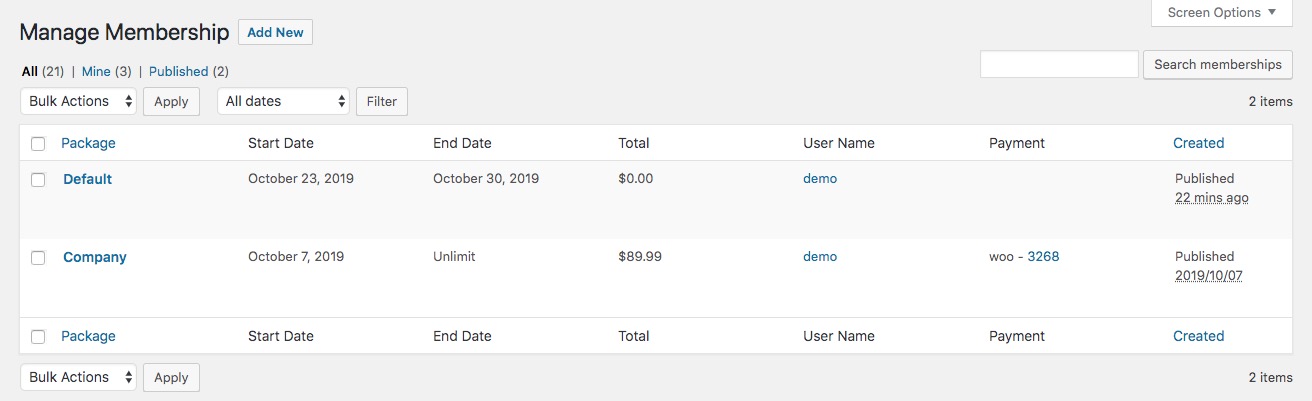
- The vendor can check their membership
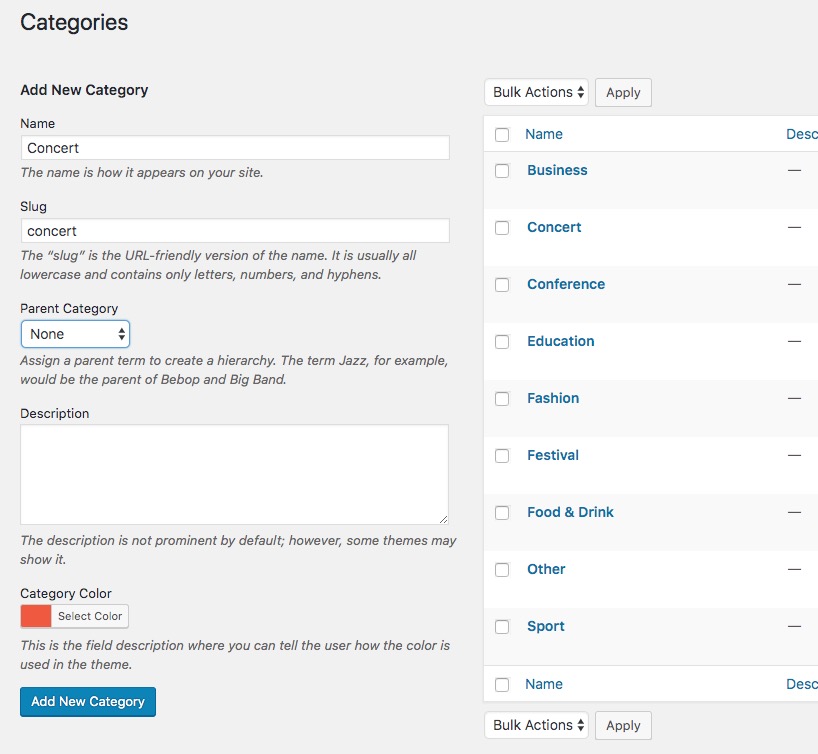
Manage Categories
Only Admin can make category by click Events >> Categories >> Add New
+ Add Name, Slug, Color, ...
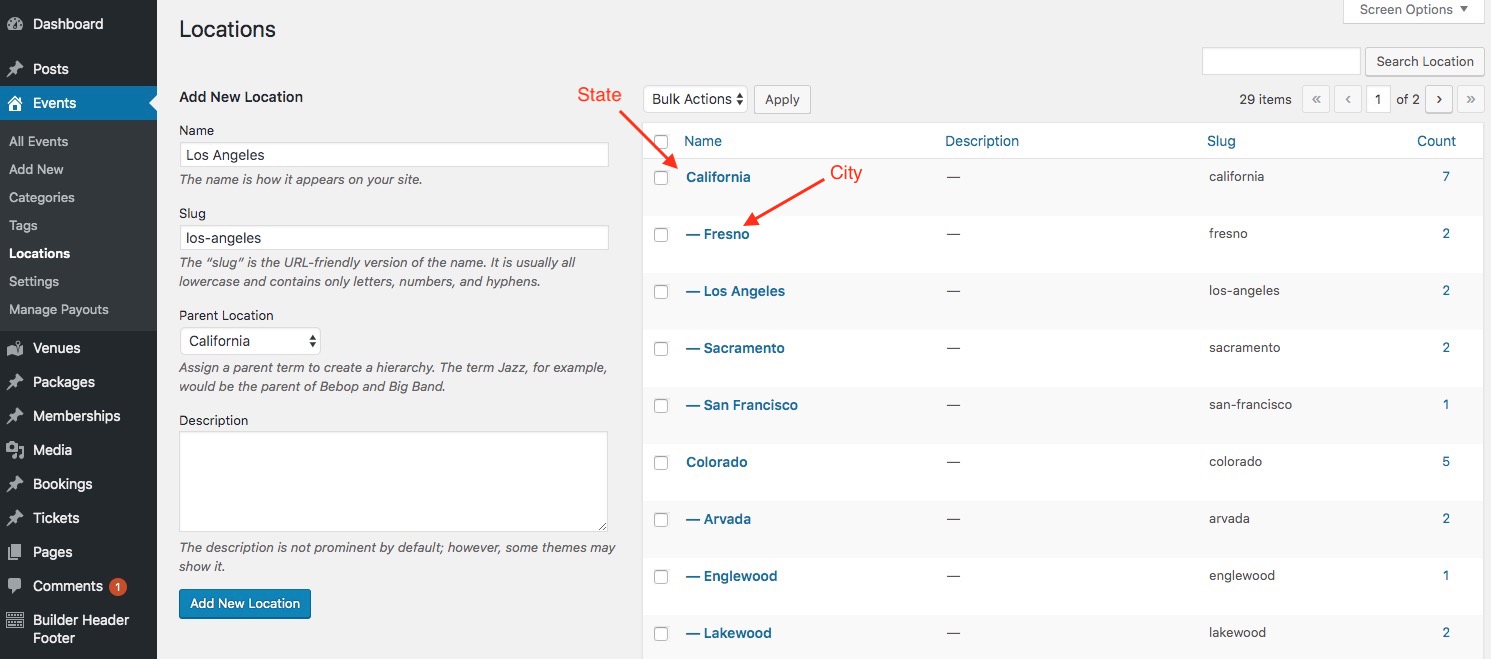
Manage State, City
Only Admin can make location by click Events >> Locations >> Add New
+ State is parent location
+ City is child location
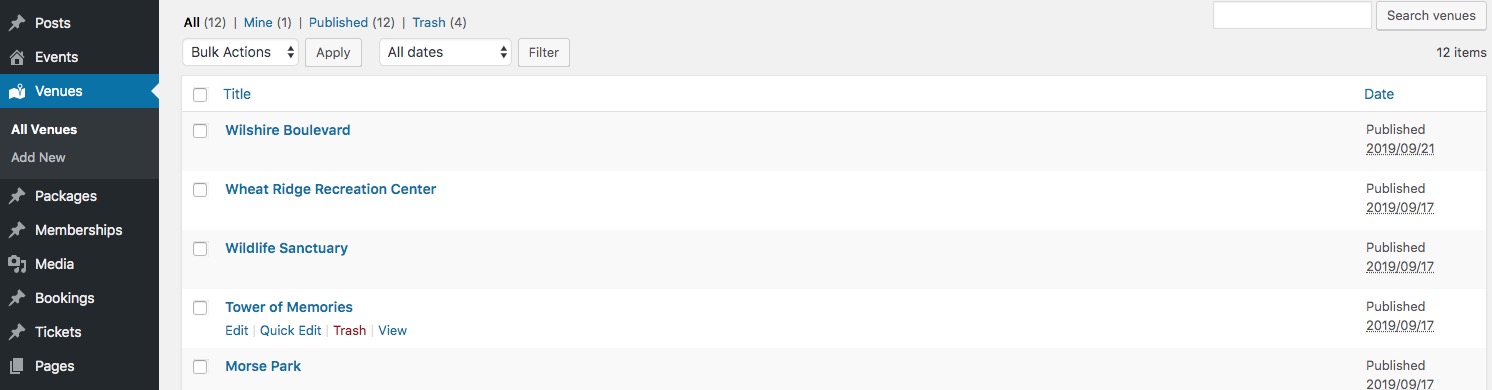
Manage Venue
- The vendor will add venue when make a event at frontend. All venues will display in backend like:
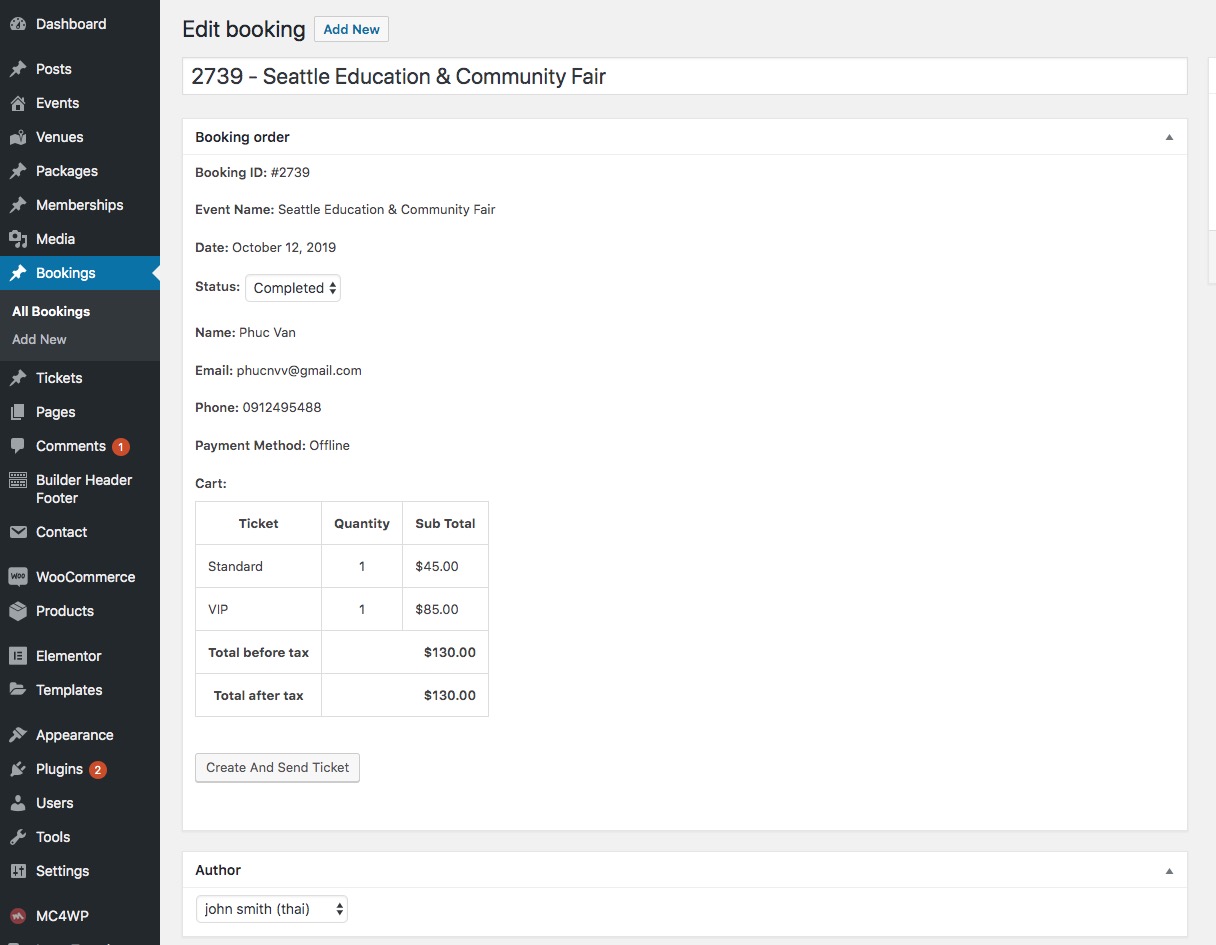
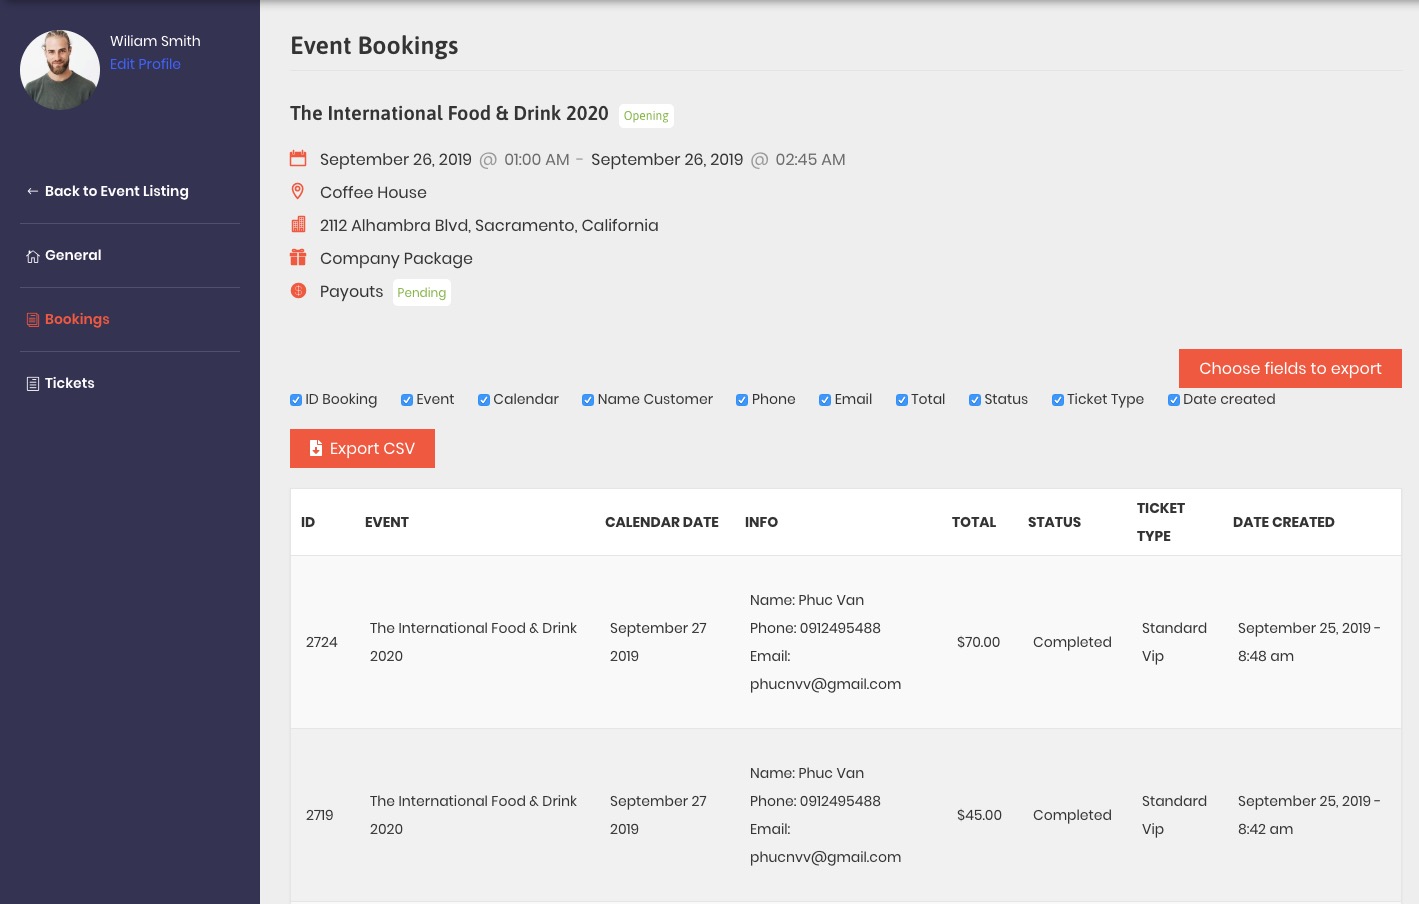
Manage Booking
1: Admin can manage All Bookings in backend:
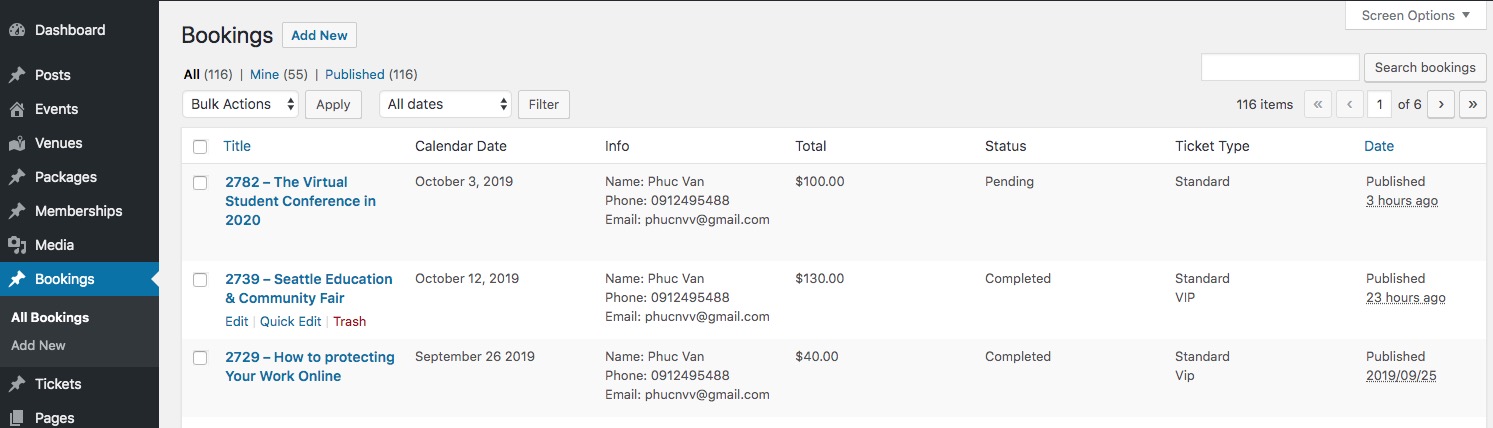
- Check detail a booking and send ticket to the client
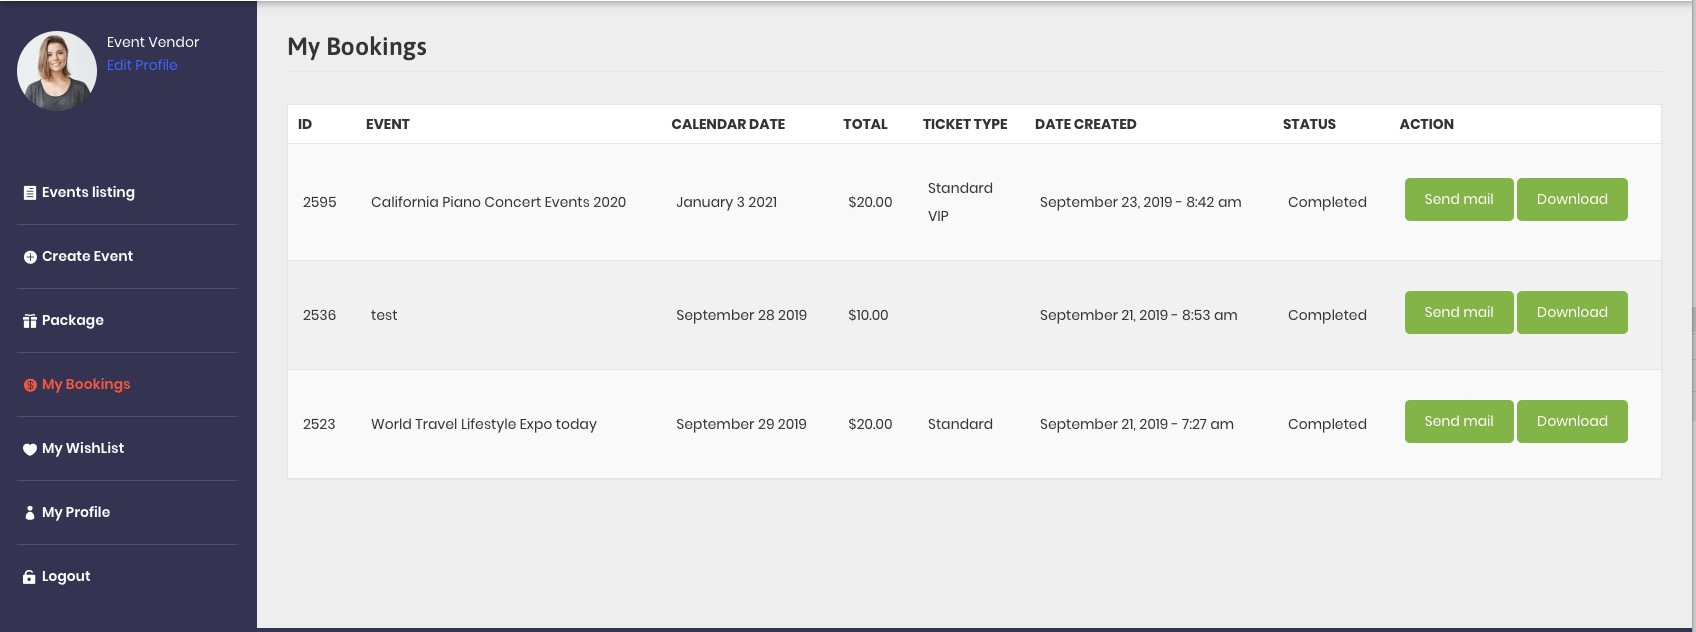
2: The customer can manage their booking: Download ticket directly or send ticket to mail.
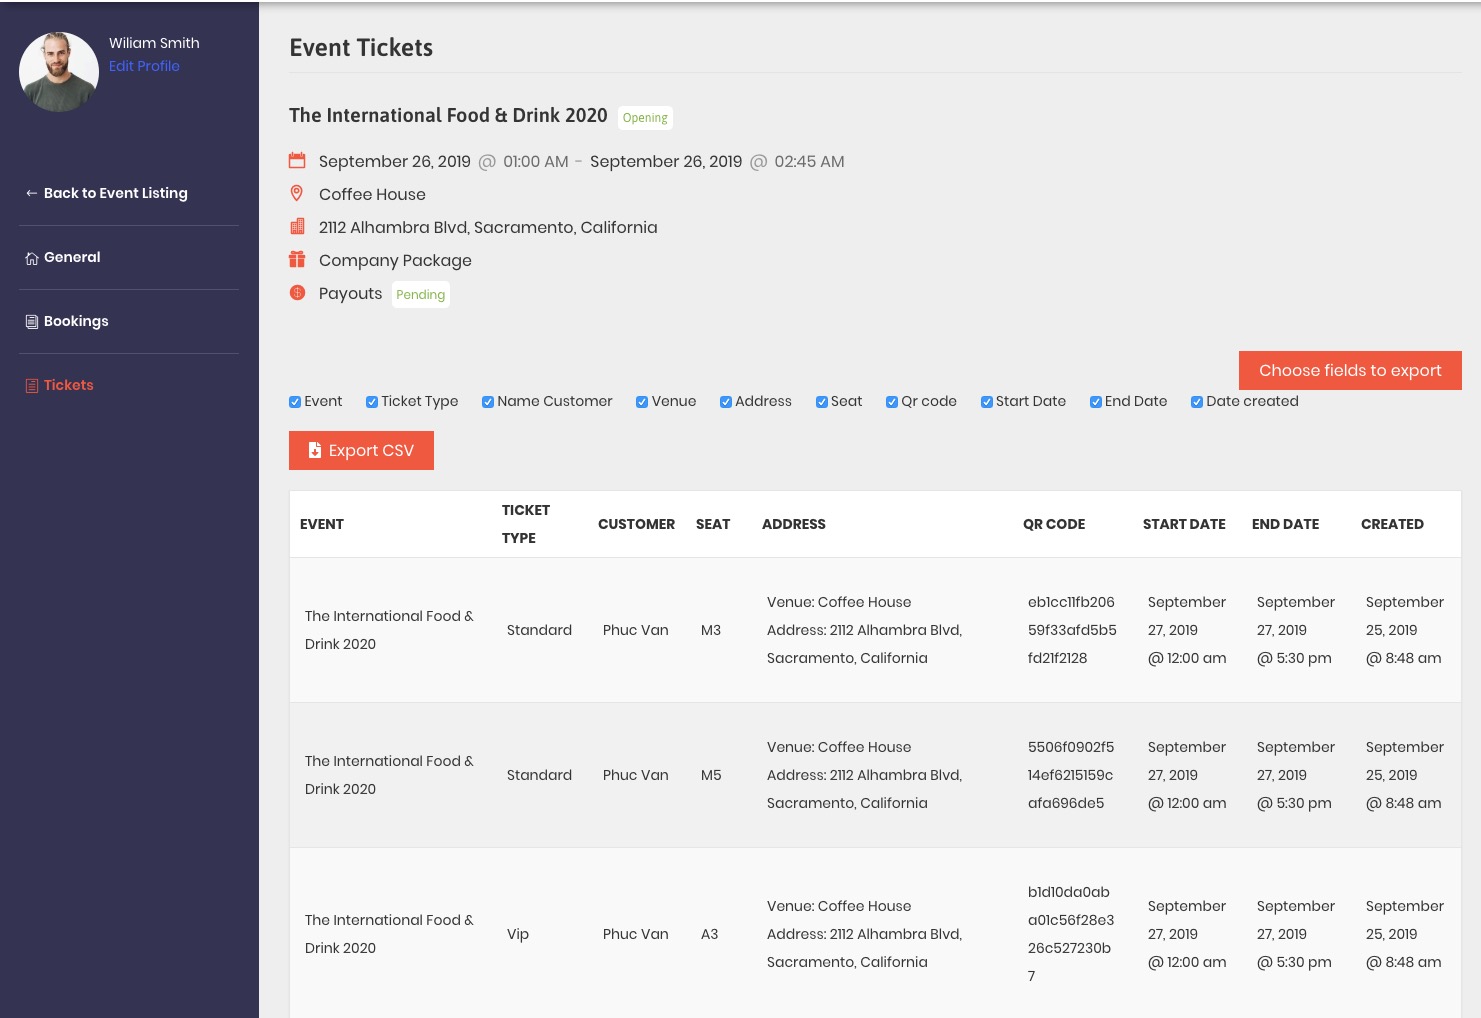
Manage Tickets
1: Admin can manage All Tickets in backend:

Scan QR Code Ticket
- Download APP in theme: Download theme package from themeforest then unzip, you will see APP/Android App Demo/app-release.apk to install for Android OS.
If you are developer of React Native, you can customize code in App/Code/ . Read instruction (App/instruction_build_app.txt) to build project.
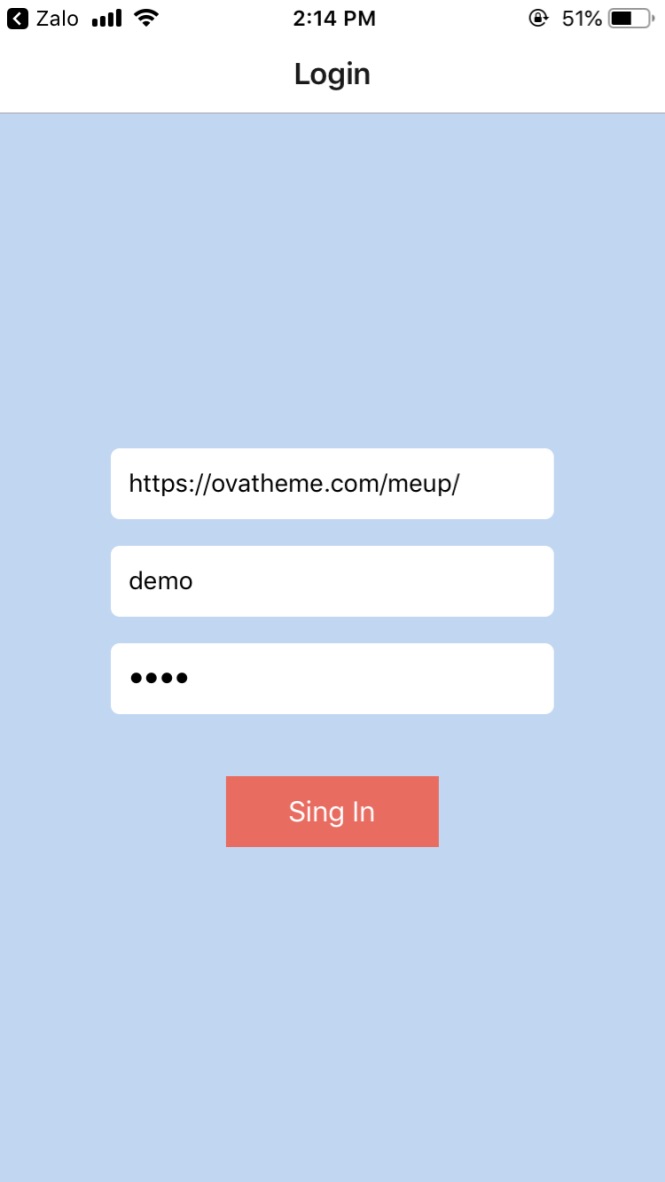
After install APP, you will see Login Screen:
WordPress Installtation URL: Insert your website url like https://ovatheme.com/meup/
User / Password: This is user/password account that registed in your site
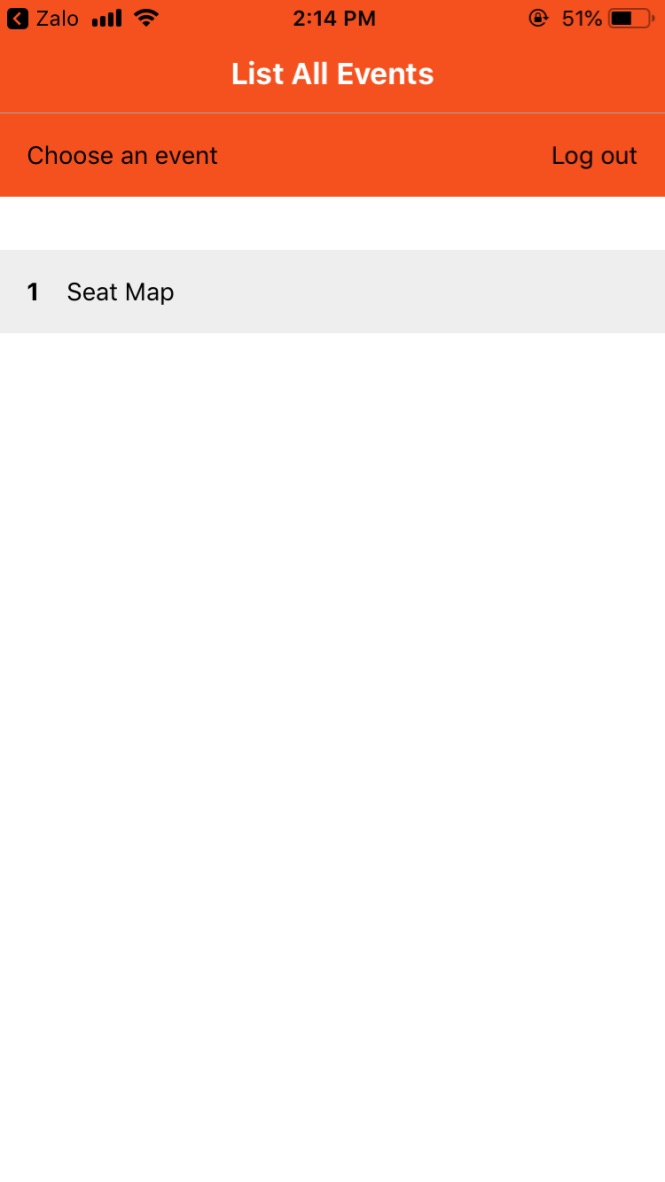
List All Events screen: Display all events that user can scan ticket. Note this user have inserted in Staff Member tab when make event
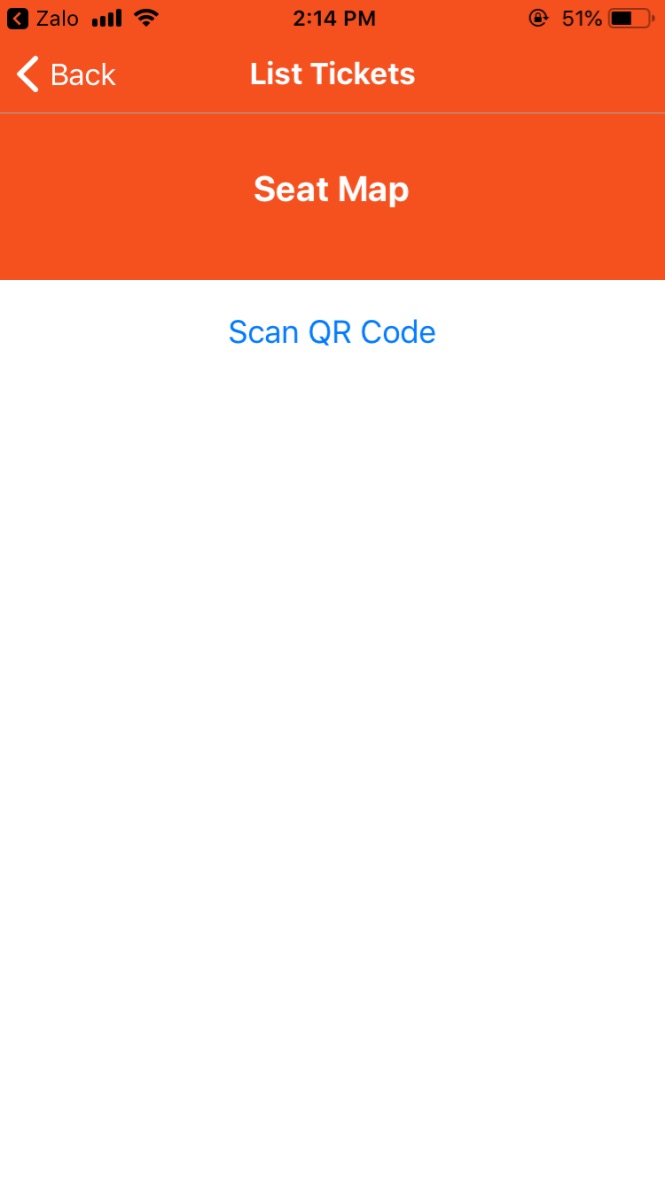
List Tickets screen: Click Scan QR Code to scan ticket
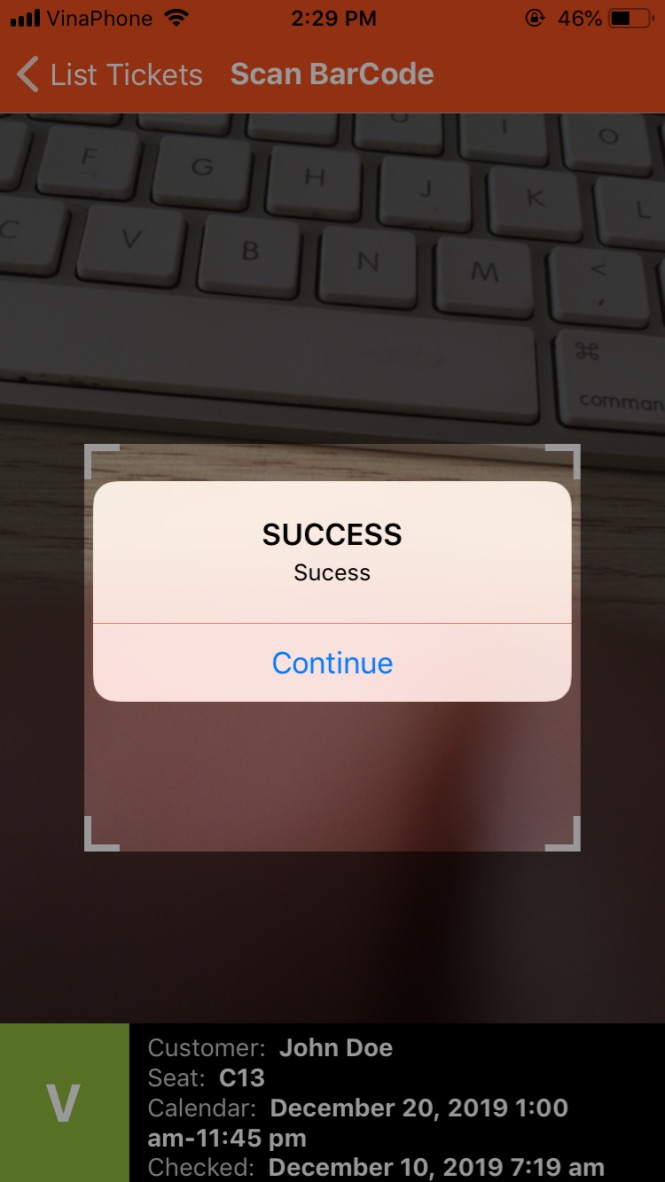
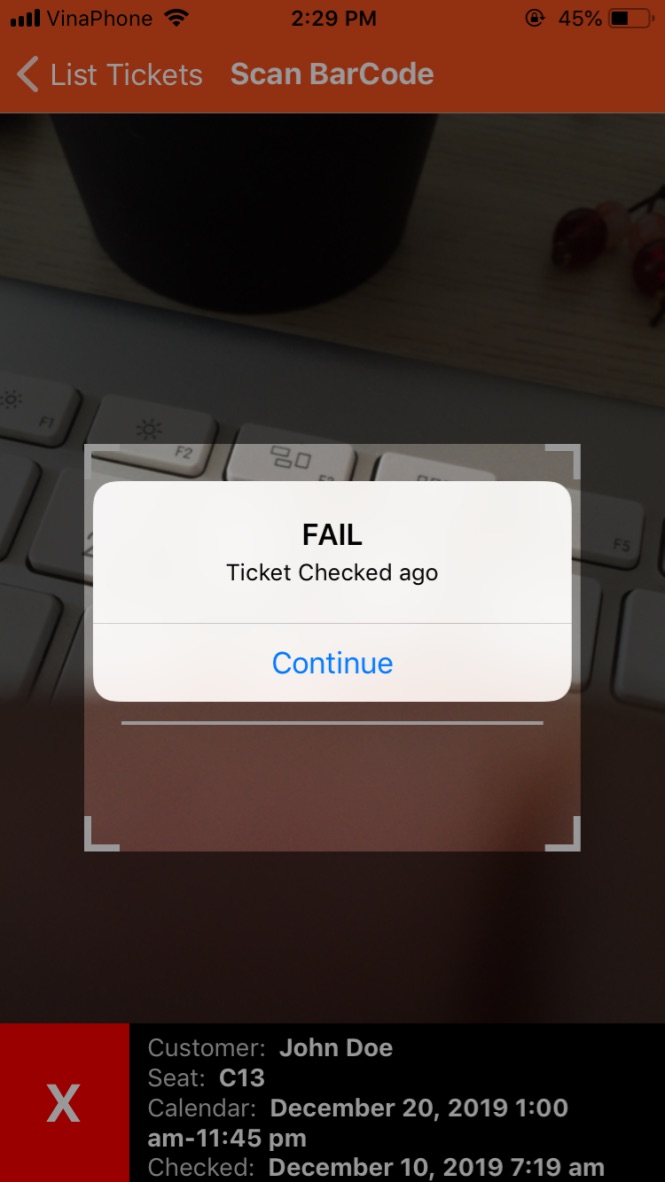
Scan QR Code screen: Display camera to scan QR Code. Per Ticket only scan once, for second scan will display error.
Example:
The First Scan:
The Second Scan:
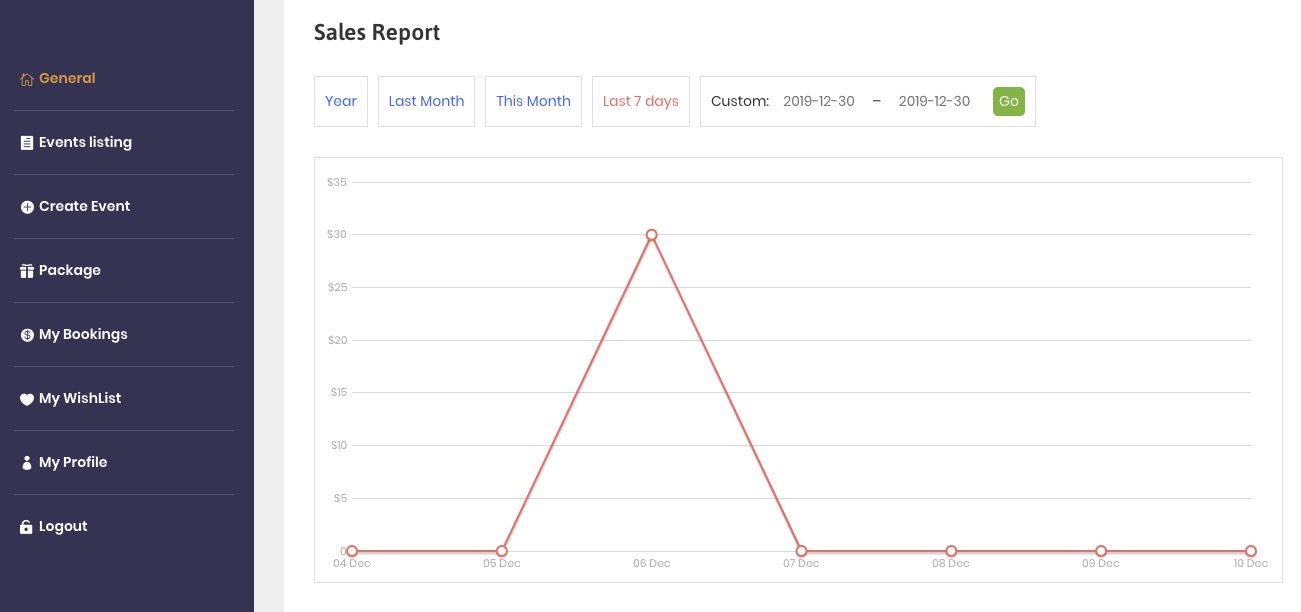
Manage Sales
You can Sales in any time

Vendor Scope
- The vendor can manage all information to event:
+ Create Event: Go to My account >> Create Event
+ Manage Sales
+ Manage Tickets
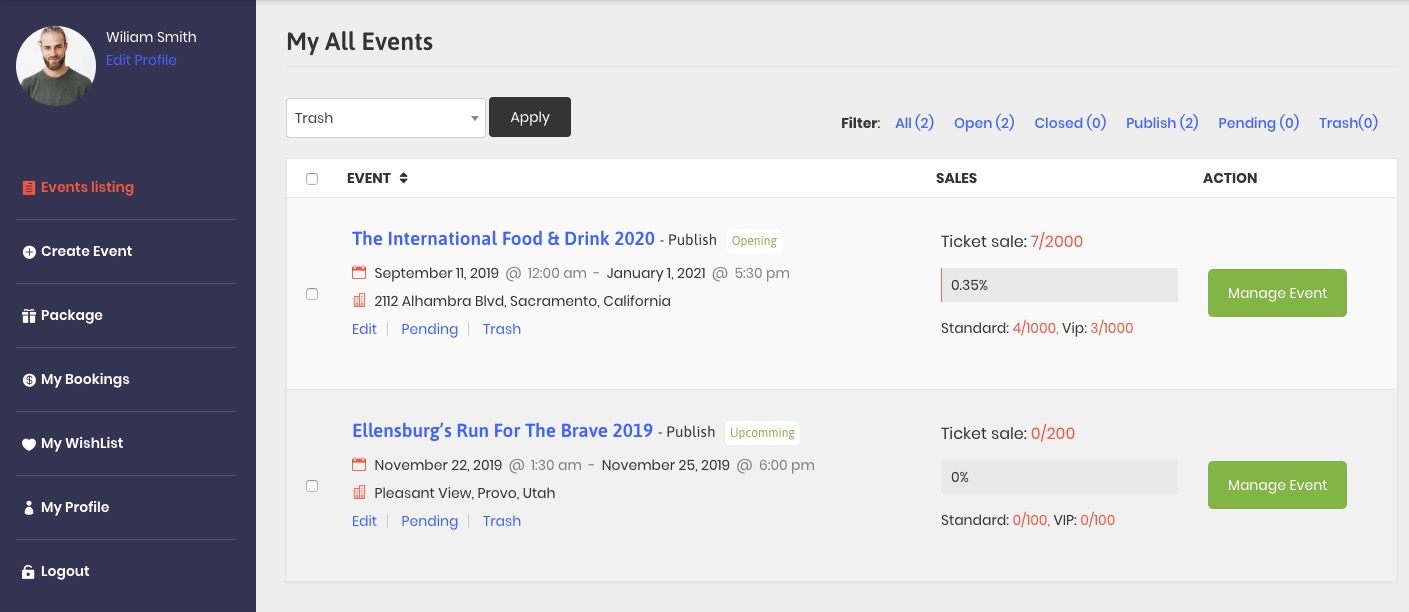
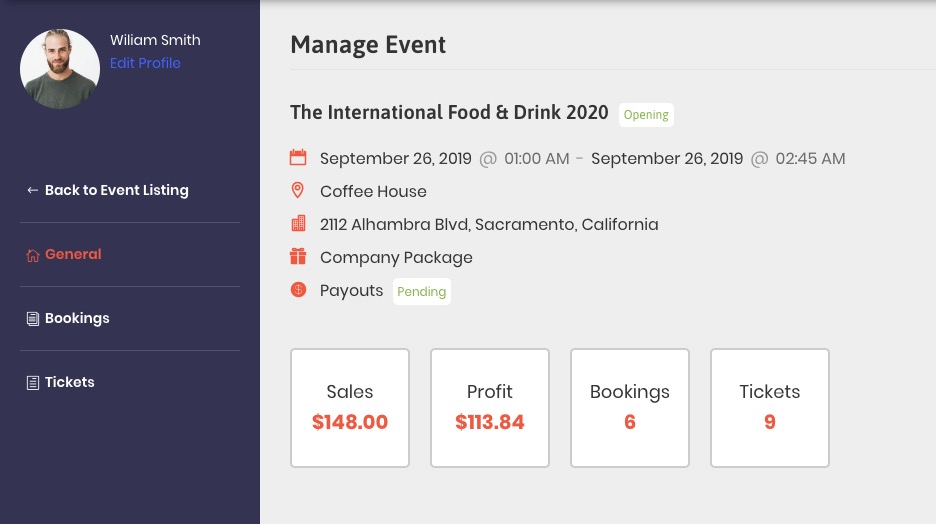
+ Manage Bookings
+ Manage Attendances (Tickets)
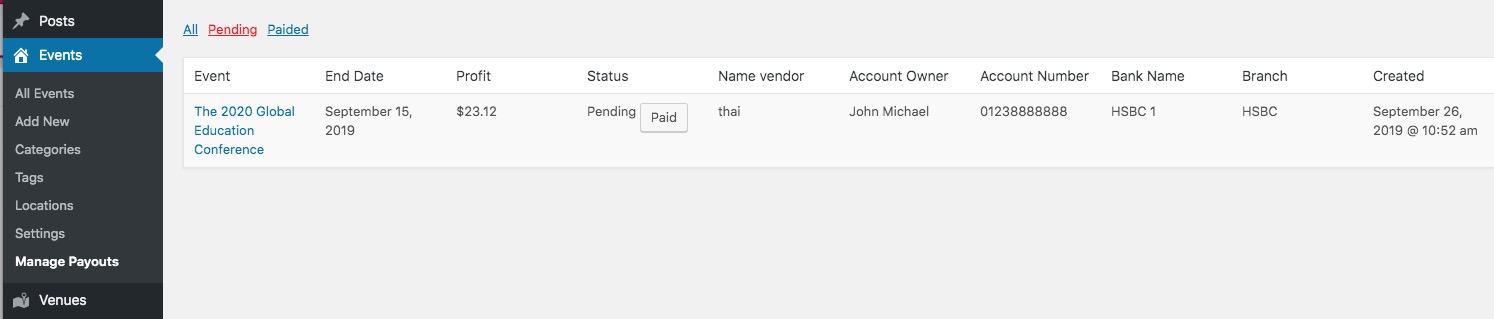
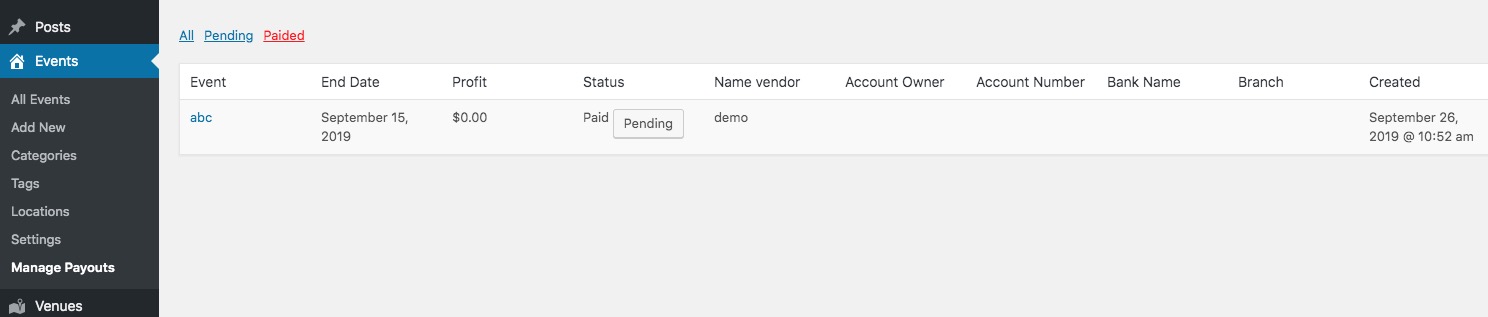
Manage Payout
Admin can manage payout in backend:
The Event afer x days closed, will display in payout. The Admin will send profit for vendor manually.
Payout: Pending
Payout: paided
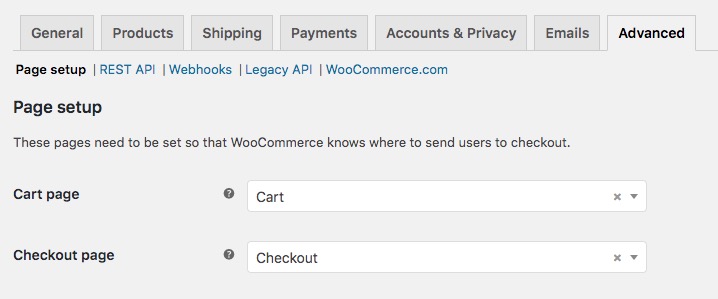
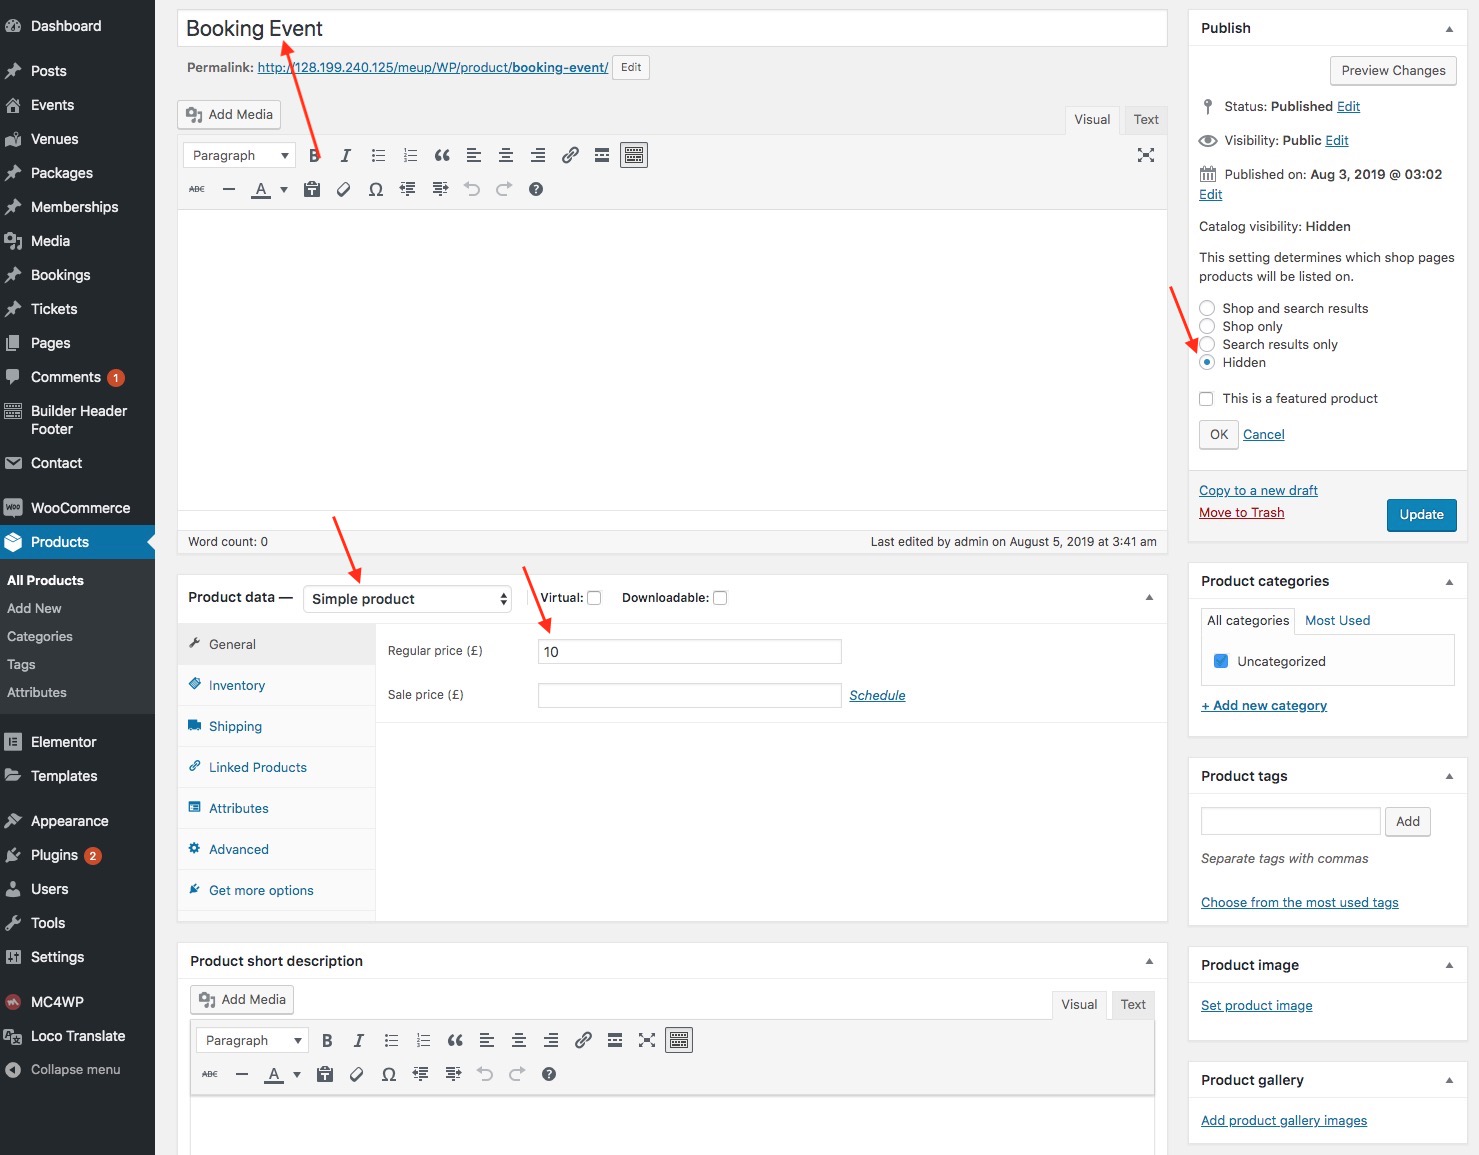
Woocommerce Setting
- You have to choose Cart, Checkout page in setting woocomerce
- Active Payment Gateway

- Make a simple product. ( This product will choosed in Event Settings >> Checkout >> Woocommerce >> Choose a hidden product in Woocommerce )
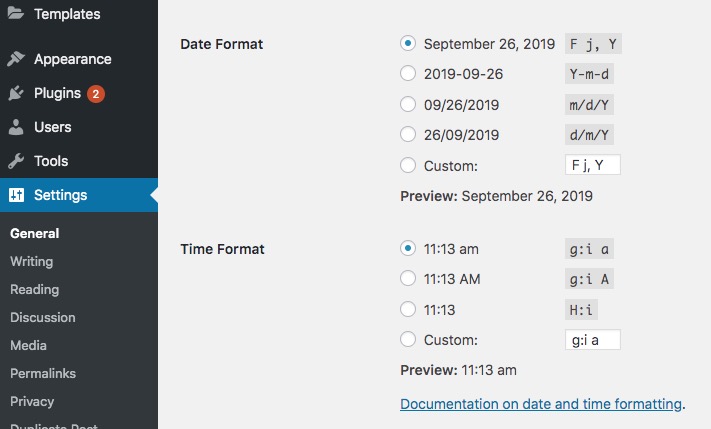
Date Format
- Change date format at frontend: Go to Settings >> General >> Date format
Mail chimp setting
Step 1: Go to MC4WP >> Mailchimp >> Insert Key
Step 2: Go to MC4WP >> Form
<div class="ova-subcrible">
<div class="input">
<input type="email" name="EMAIL" placeholder="Enter Your Email Address" required />
</div>
<div class="submit">
<input type="submit" value="SUBCRIBLE" />
<i class="arrow_right"></i>
</div>
</div>
<p style="display: none;">
<label>List choice</label>
<label>
<input name="_mc4wp_lists[]" type="checkbox" value="a328b7e698" checked="true"> <span>Ovatheme</span>
</label>
</p>
Note you have to change value="a328b7e698" by your key
Translate Theme, Plugin to your language
- Use "Loco Translate" plugin to translate theme, plugins to your language
- Use "WPML" plugin to make multiple language
FAQ
My Account redirect to ovatheme.com
- You have to change link of My Account in Header Elementor